
Words: John Danter
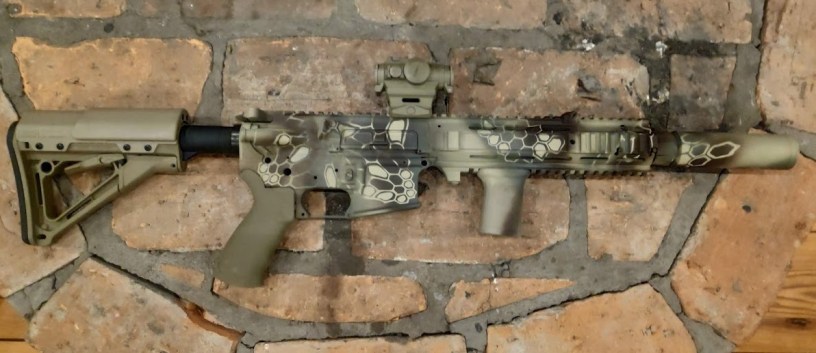
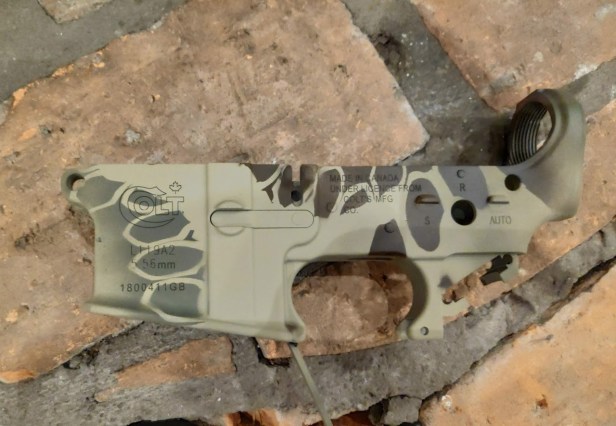
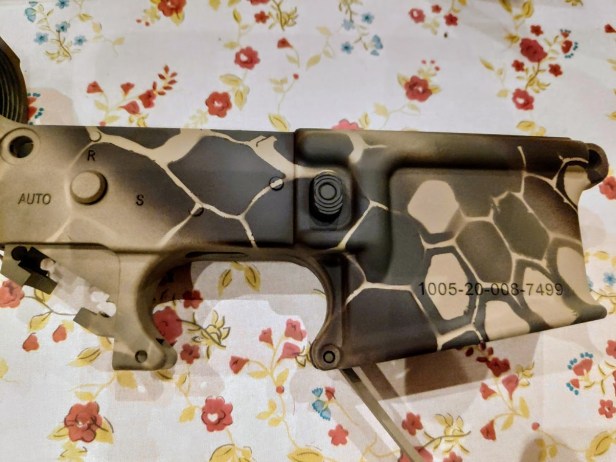
So at last, the long awaited HAO L119A2 lower receiver arrived and I wanted to do something special with it.
It’s been nearly a year since HAO released their Beta L119A2 IUR and during that time I know I’ve been an absolute PITA – constantly badgering anyone who will listen for news of progress. Apologies guys – but man, am I glad it’s here!
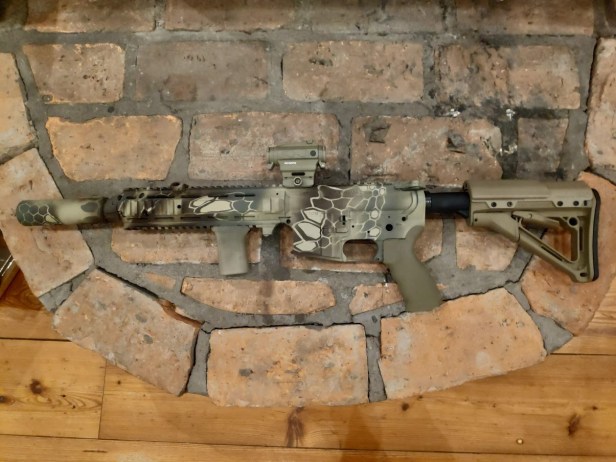
I’ve done dozens of paint jobs over the years – both my own kit and for mates. The L119A2 paint job needed to be the ‘pinnacle’ for me, to do justice to the UKSF 556 platform of choice; something I wouldn’t want to clean off and redo in a month or two when bored.
Thinking about a ‘legit’ pattern, I looked for inspiration in existing UKSF paint jobs – especially modern ones. Rich from The Reptile House reminded me that my paint jobs vary wildly: either looking like porridge or – at the other extreme – some kind of 6th form art student experiment. He sent the Kryptek HK417 reference pic from Jay’s excellent blog on the subject, suggesting that it would play to my strengths but still be legit.
Sold!
Rich and I have both tried out similar paint jobs, years ago, but using large cargo nets for the pattern – which is actually what inspired the makers of Kryptek; the big camo nets the military drapes on tanks etc., to camo them from the air.

Once my direction was decided I also got some really great advice from Svvytched, whose paint job was featured on The Reptile House Blog recently.
I didn’t want to overthink this as I am prone to doing. I wanted to keep it simple in terms of execution.
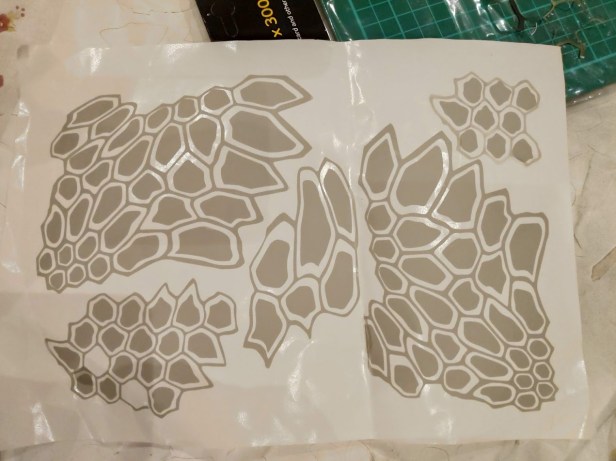
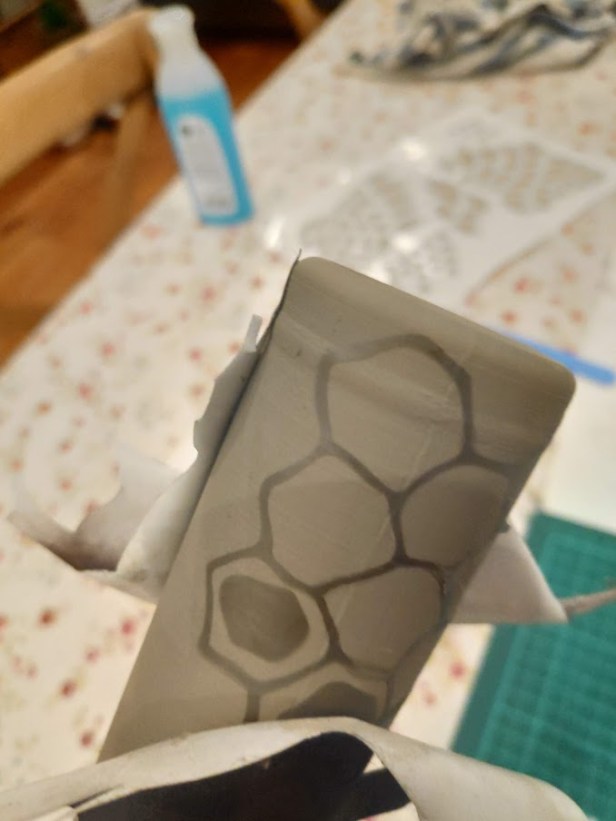
This is the brand of templates I used. I went for stickers:
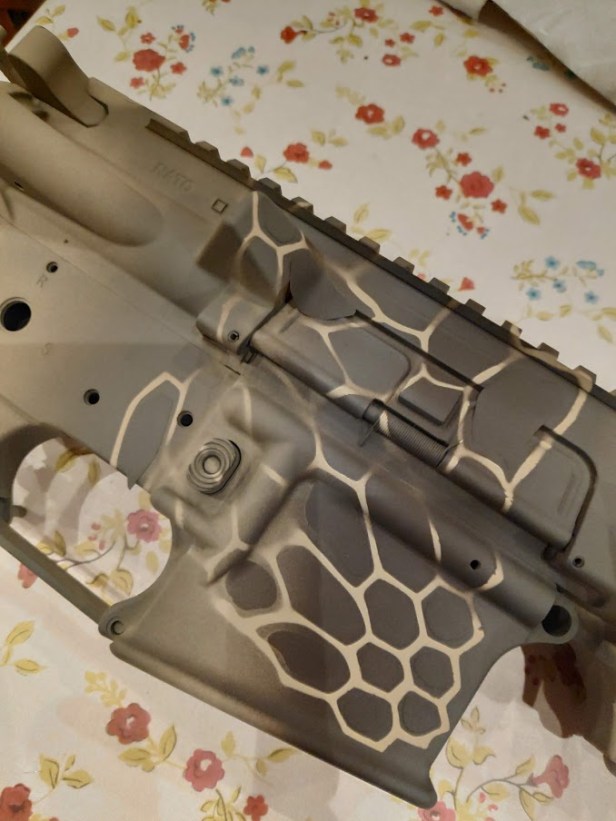
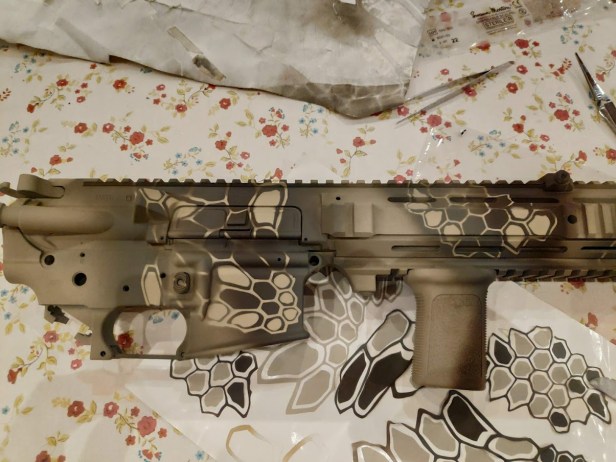
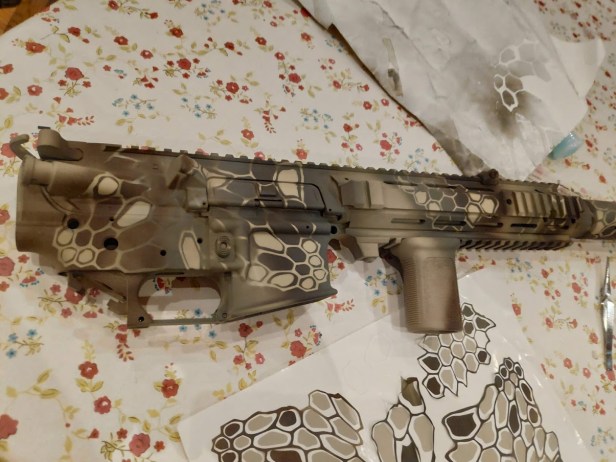
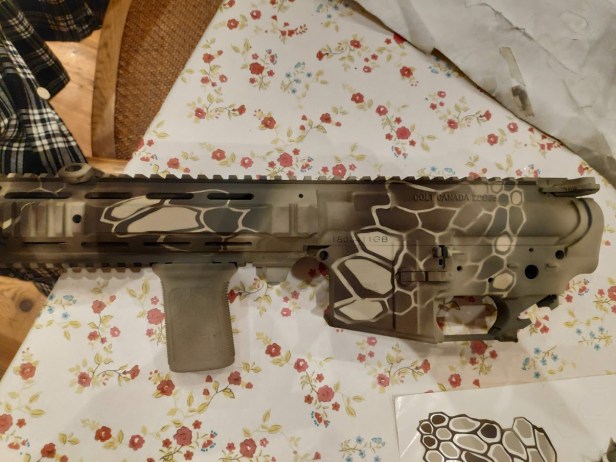
I felt it was important not to completely cover the whole rifle with Kryptek, but to leave sizeable gaps where the khaki base would show through.
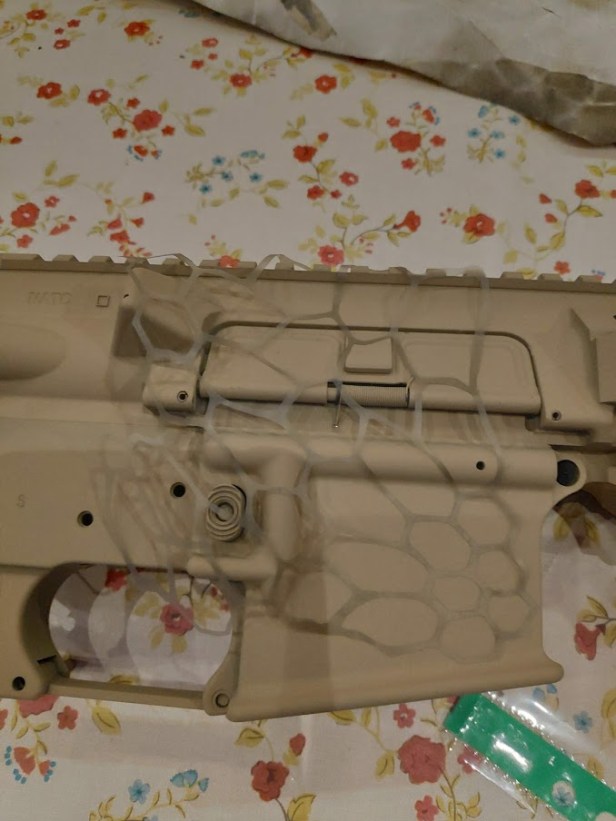
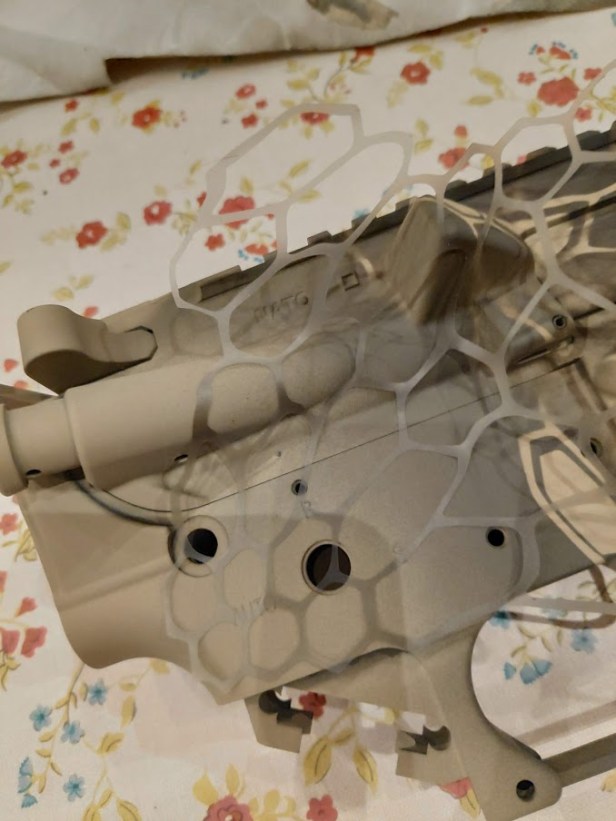
After formulating my ideas, I tested on a spare lower:

So, for anyone else wishing to have a crack at this, follow these steps for best results:
- Halfords Camo Khaki for the base – sprayed lightly
- Halfords Camo Brown and Green for the pattern – again, sprayed lightly
- Pick a hot dry day, or warm up the rifle with a heat gun; humidity is bad
- Leave gaps and space-out the stencils; less is more
- Add internal ‘scales’ along one or both edges of a large pattern Kryptek template for contrast
- Make sure you press down firmly with an adhesive template, to keep shapes sharp
- Never start to spray with the nozzle pointing directly at the rifle
- Always start spraying OFF the rifle, bringing the spray jet onto the rifle in an arc
- Don’t place the nozzle too close to the rifle; this can result in a splatter effect
- If you want to go bolder, spray another layer
- Use a hair dryer or heat gun on what you’ve just sprayed, to prevent paint bleeding
- If you are unhappy with an area, simply cover again with base coat and start fresh
- Don’t rush it
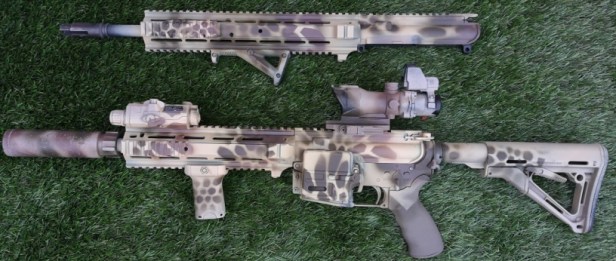
If this was a film, I’d expect a montage right now, so here it goes in words and pics…
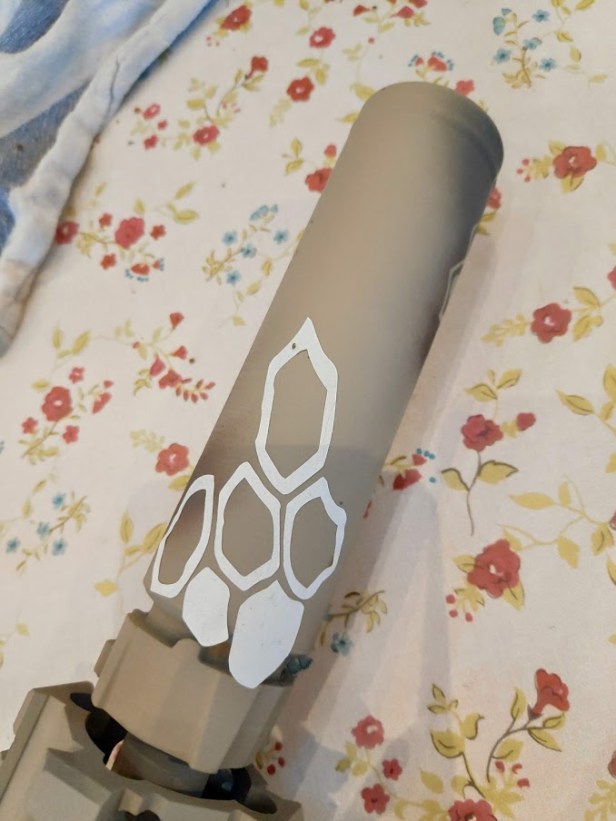
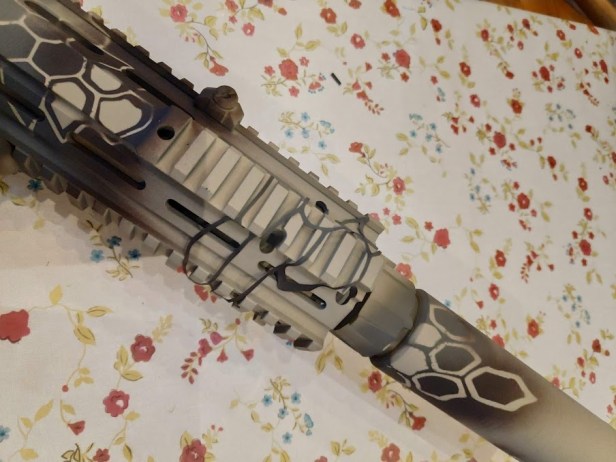
I started on the left side of the suppressor:
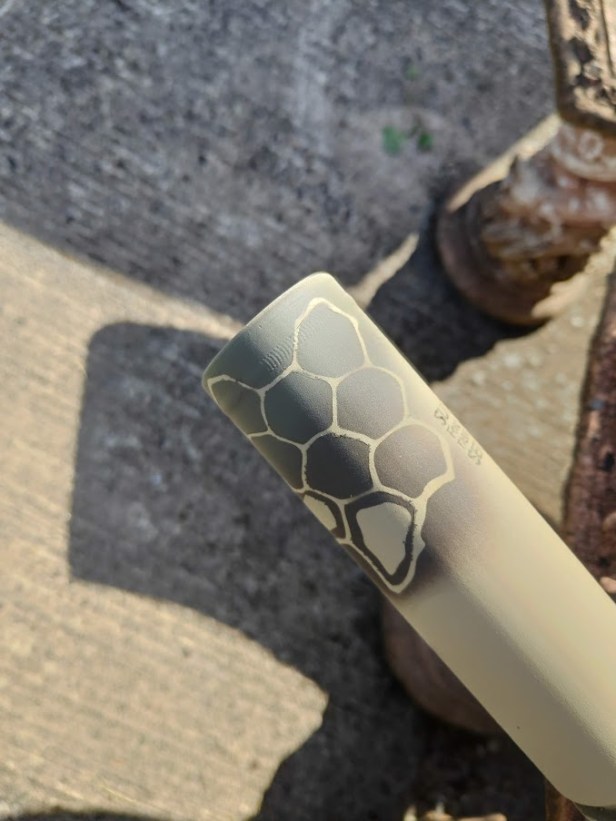

Left side front end:
Right side supressor:
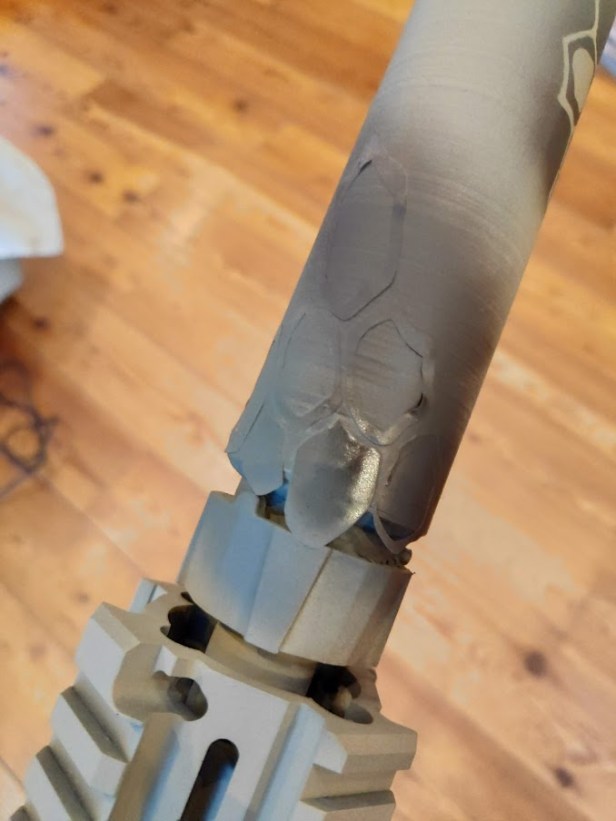
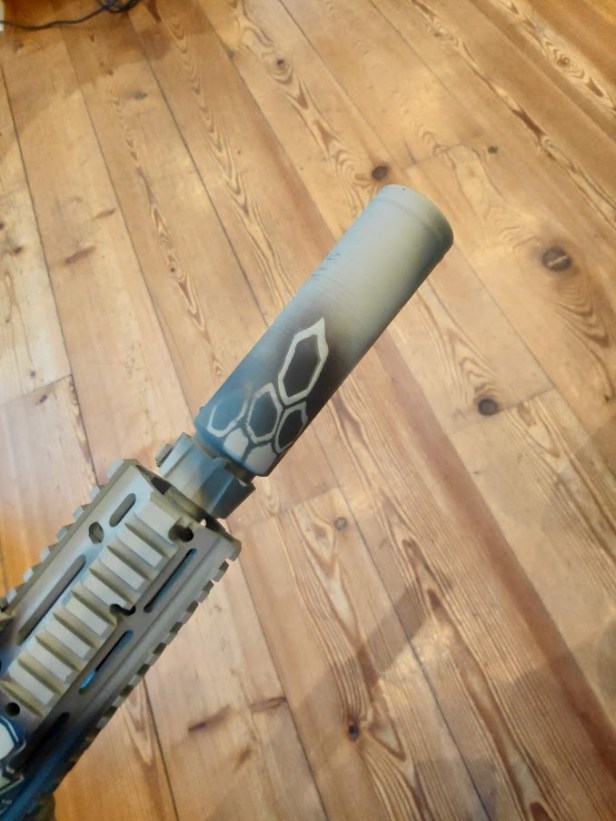
Right side front end:
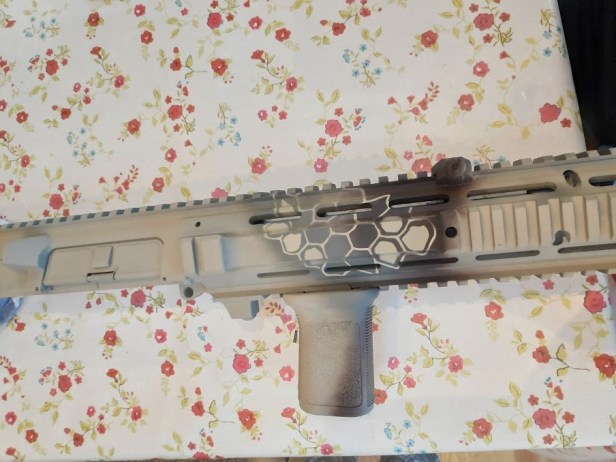
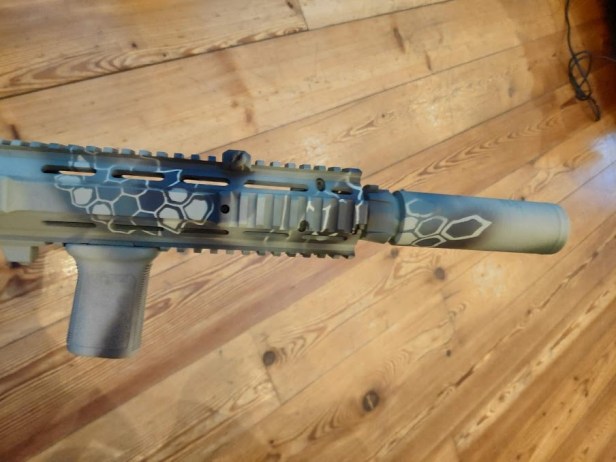
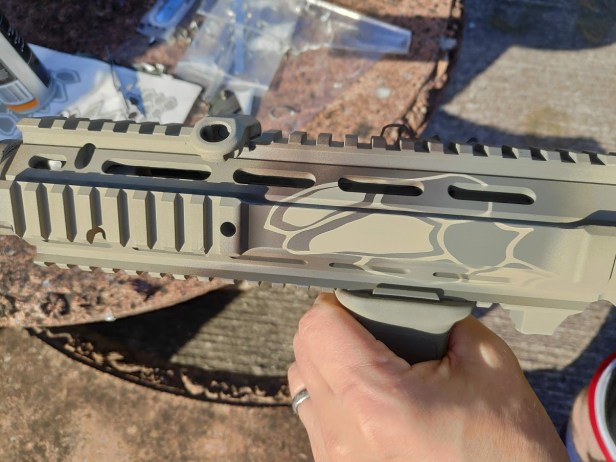
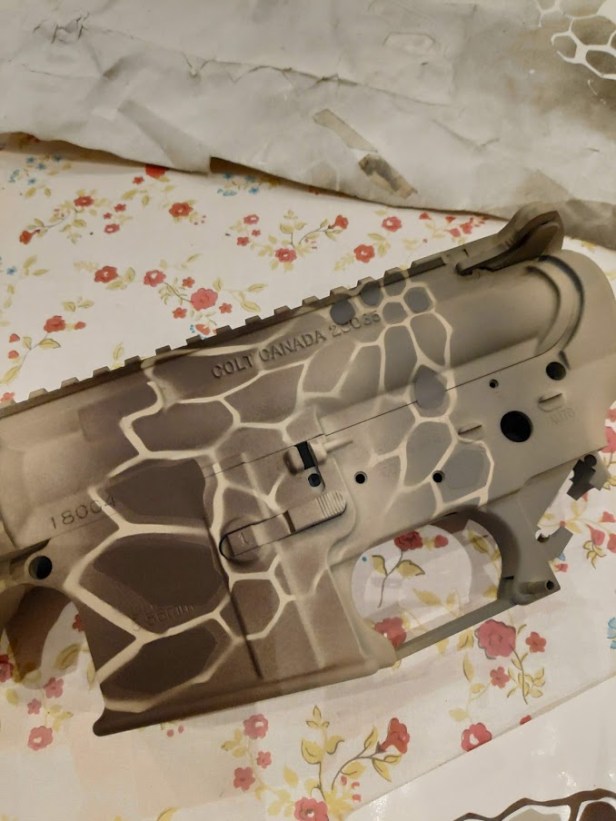
Receiver – again methodical:


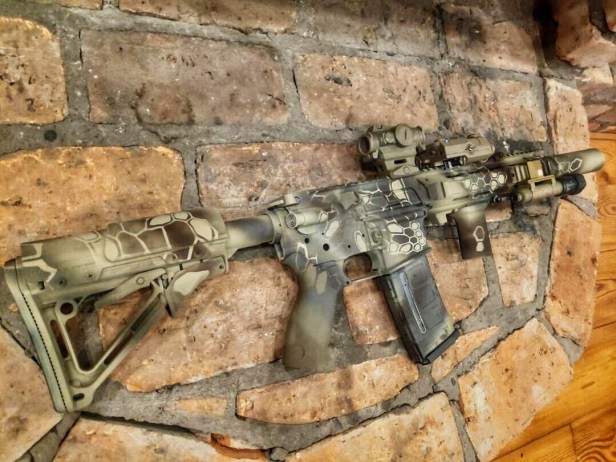
Remember to check out Part 2, where I show the completed paint job and full build. A taster:
Many thanks to Rich for his patience and assistance in moving along with this rifle. I was in constant contact with him as I progressed the paint job and he took the brunt of my OCD with helpful comments and some swear words 🙂
As penance, he’s made me include this – the piss taking swine! 😂

Further reading/links
The UKSF Kit List
The Comprehensive UKSF (SAS/SBS) L119A2 Parts and Accessories List
More articles, relating to the real steel L119A2:
- The original L119A2 primer, here
- GG&G AR15 vertical fore-grip in use here
- Magpul QDM and ASAP QD in use here
- 15.7″ L119A2 upper in use here
- Surefire FA556SA Suppressor here
- GG&G Aimpoint T1 mount in use here
- Magpul MS3 sling in use here
- Magpul ACS stock in use here – part 1
- Colt Canada parts – as used on the L119A2 – here
- Manta Very Low Profile Rail Covers as used on the L119A2 here
- UKSF Newcastle raid pics part 1
- UKSF Newcastle raid pics part 2
- UKSF Nairobi Kenya incident L119A2 parts breakdown here
- UKSF Belize ‘Jungle Set-up’ L119A2 parts breakdown here
- Confirmation bias (and the HSP Thorntail offset light mount) here
- UKSF Ecosystem: S&S Precision Sling Clip – Old Gen – here
- Inforce WML-type lights in use here
- Magpul ACS stock in use here – part 2
Follow The Reptile House Blog on Facebook and Instagram
 Obi Wan Nairobi patch from Platatac

Comments are closed.