
Words and pics: @svvytched
Introduction
It’s no secret that Kryptek has been seen on modern UKSF rifles. There are pictures – both public…

– and not so public.
Jay at Taranis Blog did an influential write-up on the subject – including a mock up of an L119A2, which displays a Kryptek pattern from a non-public pic:
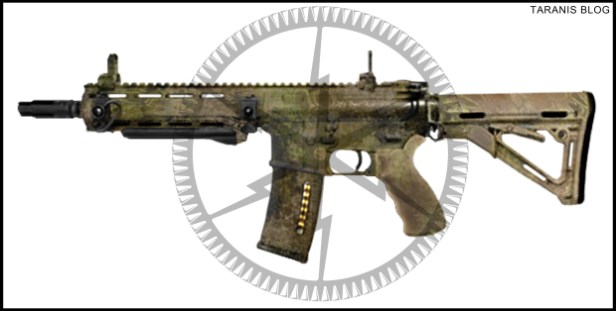
I was eager to implement my own interpretation of Jay’s iconic visualisation. Here’s how I did it.
Materials
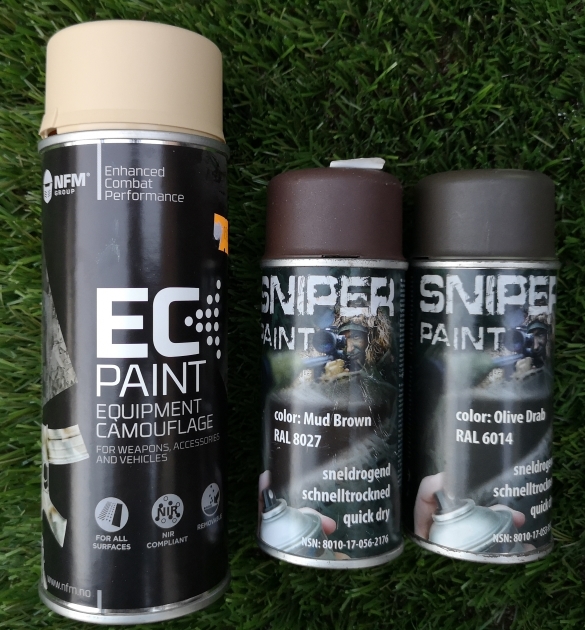
I used a mix of EC and Sniper paints:
- NFM EC Paint Sand
- Sniper Mud Brown (RAL8027)
- Sniper Olive Drab (RAL6014)
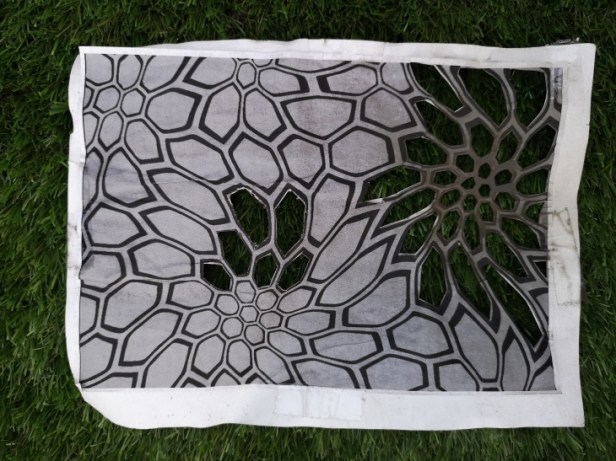
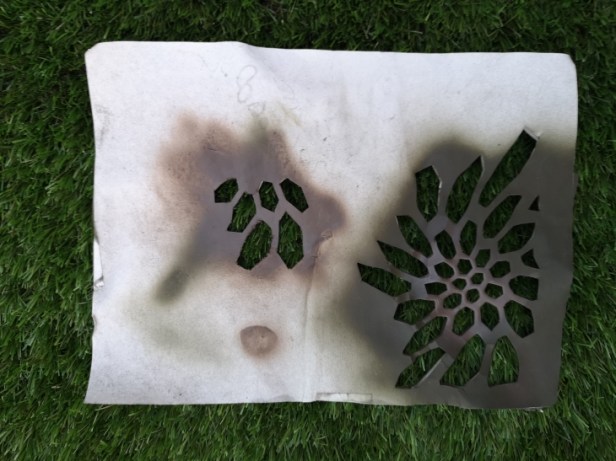
I used homemade Kryptek stencils:
To make them, I looked online for high resolution Kryptek stencil pics and Photoshopped one so that it was black and white; and so that the whole pattern fit neatly on A4 sheets of paper.
Once printed, I attached the A4 sheets to heavyweight Canson drawing paper to give them some stiffness and prevent the paint from destroying the simple A4 paper.
I then cut out different designs in each template using a box cutter/utility knife – the only difficult part of the whole process.
Step 1
I painted the whole L119A2 replica with the NFM Sand paint to give it a uniform base colour – and to replace my previous piece of art, since the receiver had been painted with an older design.


It was then left to dry for half an hour.
Step 2
I gently placed stencils on each area I wanted to camo-up, in turn, and just sprayed through the stencil.

Thanks to the Canson paper the stencil is pretty stiff, allowing single handed use. However, it’s still flexible enough to wrap around different parts of the replica.
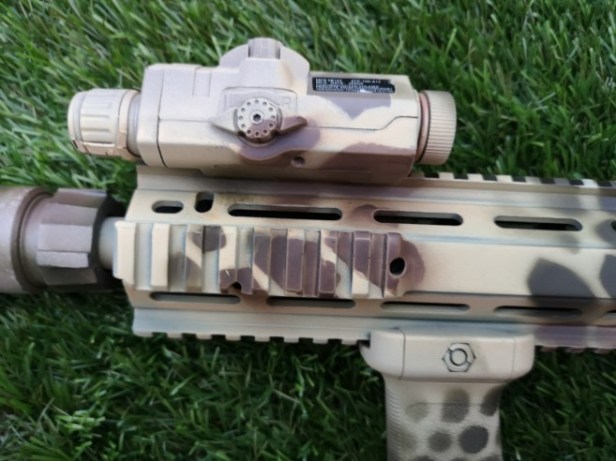
The camo nearly completed, I added a few sprays of OD and Mud Brown here and there, to add a little shadowing and depth to the pattern.
Step 3
I tried to mix both OD and Mud Brown in some spots.
I let the paint dry a bit and carefully – without rubbing the stencil against the freshly painted pattern – lined it up with the existing pattern and over sprayed.
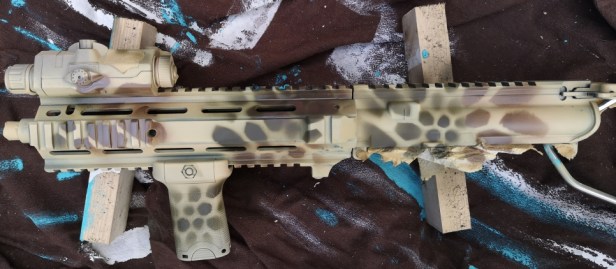
The good thing about this type of stencil is that you can place it closer or further away from the replica, to change pattern size and paint distribution. The further from the rifle, the larger the pattern; and of course the closer it is, the closer it gets to the 1:1 scale of your stencil.
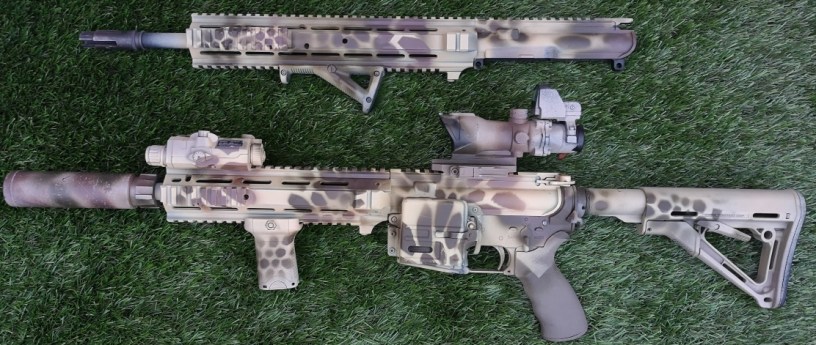
The Final Result
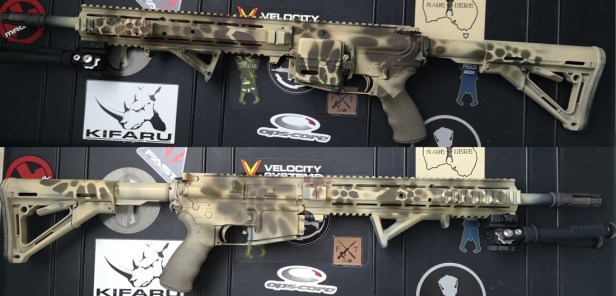
There are some imperfections in the pattern due to the stencil drifting, but I decided to keep it that way.
Perfection is not what I’m looking for.
Like most people I wanted something easy and effective – as long as it breaks-up the general outline of the rifle; so a big blob of OD or Mud Brown here or there is part of the charm.

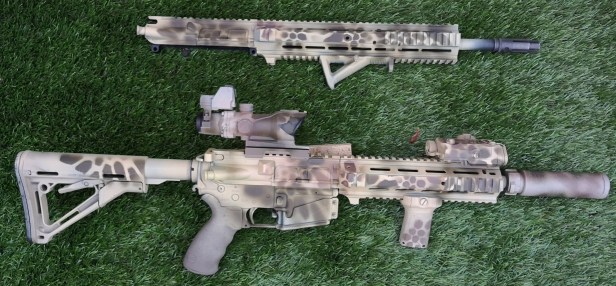
Having built the short upper more recently, I tried to line-up bits of the pattern with those on the lower receiver and yes! Obviously the big green blob at the back doesn’t play in my favour – but I’ll survive.
Follow @svvytched on IG
Further reading/links
The UKSF Kit List
The Comprehensive UKSF (SAS/SBS) L119A2 Parts and Accessories List
Follow The Reptile House Blog on Facebook and Instagram
More articles, relating to the real steel L119A2:
- The original L119A2 primer, here
- GG&G AR15 vertical fore-grip in use here
- Magpul QDM and ASAP QD in use here
- 15.7″ L119A2 upper in use here
- Surefire FA556SA Suppressor here
- GG&G Aimpoint T1 mount in use here
- Magpul MS3 sling in use here
- Magpul ACS stock in use here – part 1
- Colt Canada parts – as used on the L119A2 – here
- Manta Very Low Profile Rail Covers as used on the L119A2 here
- UKSF Newcastle raid pics part 1
- UKSF Newcastle raid pics part 2
- UKSF Nairobi Kenya incident L119A2 parts breakdown here
- UKSF Belize ‘Jungle Set-up’ L119A2 parts breakdown here
- Confirmation bias (and the HSP Thorntail offset light mount) here
- UKSF Ecosystem: S&S Precision Sling Clip – Old Gen – here
- Inforce WML-type lights in use here
- Magpul ACS stock in use here – part 2
Follow The Reptile House Blog on Facebook and Instagram
 Obi Wan Nairobi patch from Platatac

Comments are closed.