

Words and Pics: @TheOtherGuy1999
This guide will show you how to complete the L119A2 miliput mod successfully – breaking it down into easy steps, to help you along the way.
Big thanks to Mark (@mk1_tactical) – who talked me through how he delivered his own version – and E27A who originated the mod.
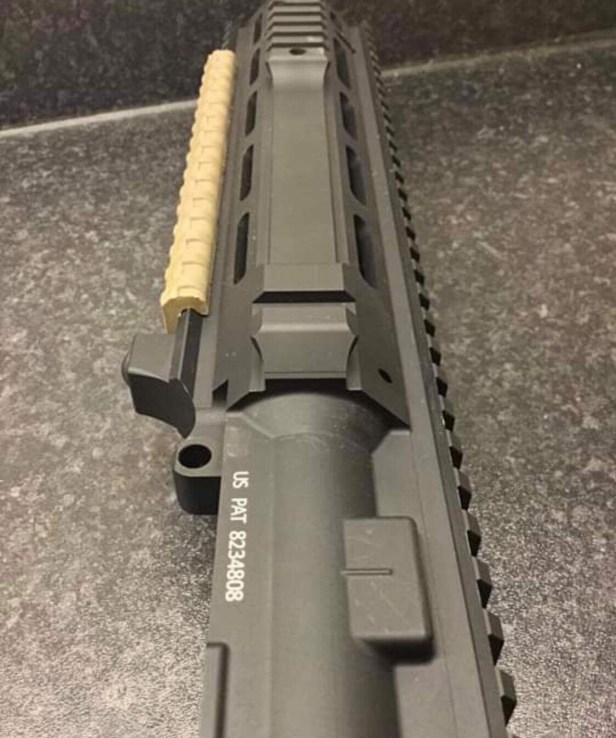
The guide will be geared towards GBBR users (e.g. GHK) who need to be able to separate both the upper and the rail.
However, the mod still works perfectly fine with the TM NGRS and other AEGs.
Things You’ll Need:
- Miliput
- Water
- General shaping tools
- File
- Paint and Lacquer
- Lots of time!
Stage 1: Preparation
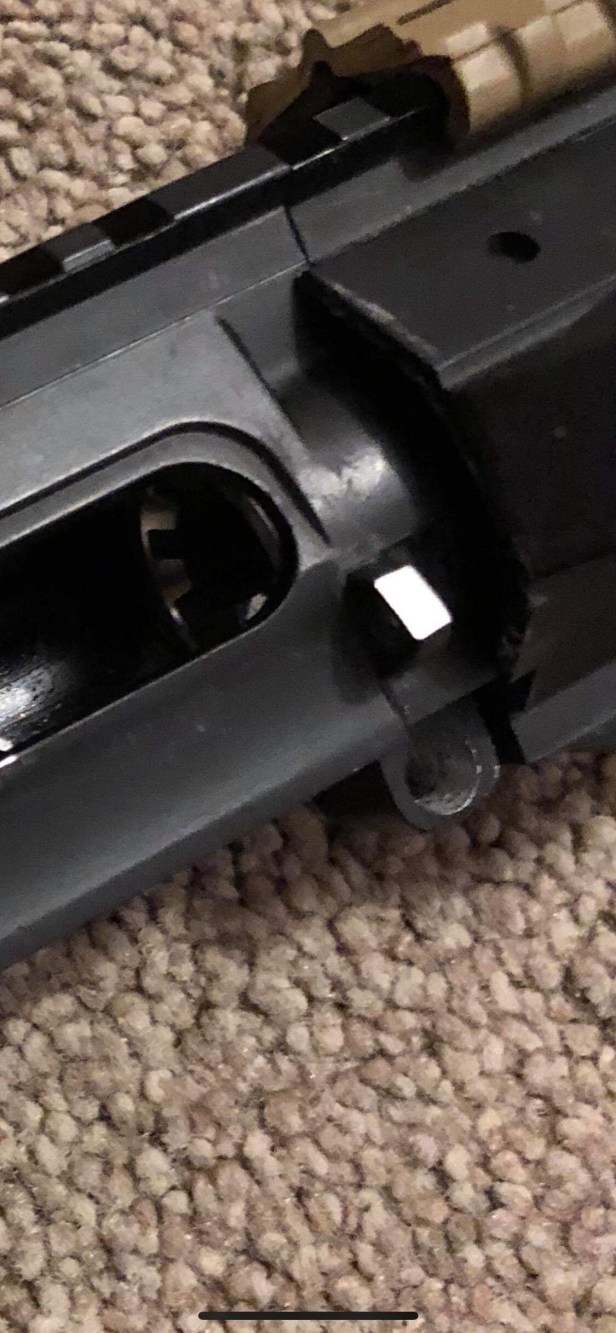
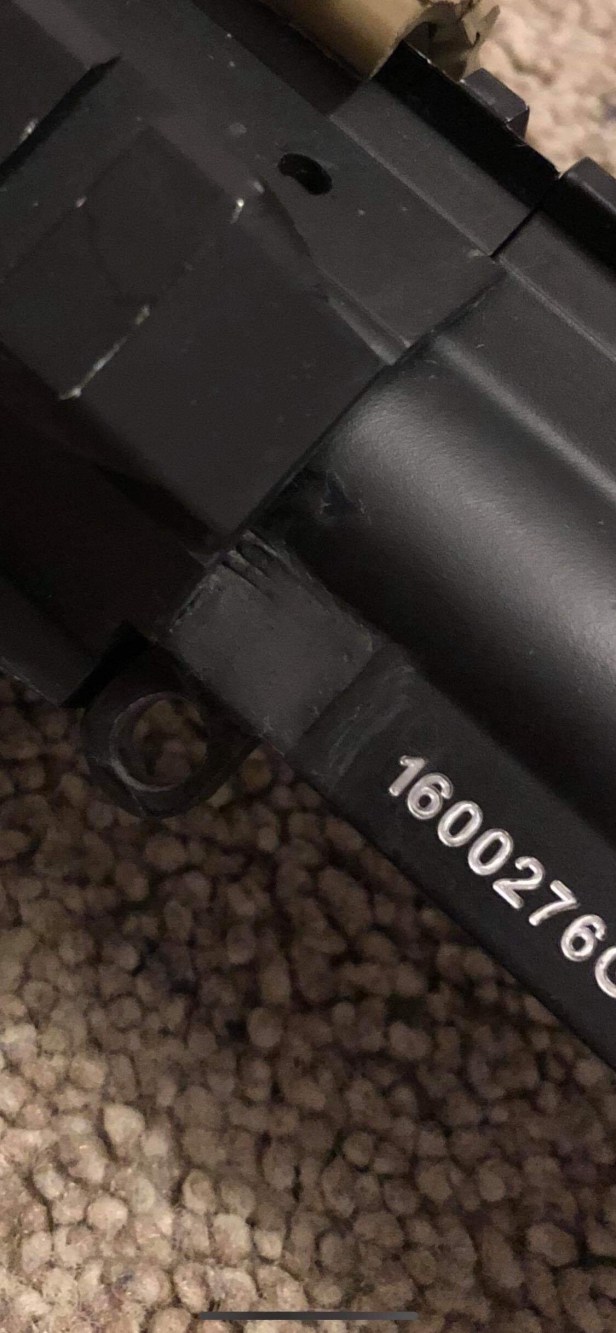
Before starting the miliput mod itself, you’ll need to take some time preparing the upper ready for the mods – firstly by removing all peripherals and other parts, including the dust cover.
I’d recommend taping off any engravings with some duct tape as well, so that no miliput gets into them during the course of the mod.
Using a small hand file, or another abrasive tool, you will need to remove material from the rear dust cover pin hole to take the curve out of it, and create a right angle. This is done by following the line the brass deflector already exhibits, down towards the centre.
This only needs to be done for a millimetre or two, so there is no longer a curve going from the brass deflector to the end of the rear dust cover pin hole.
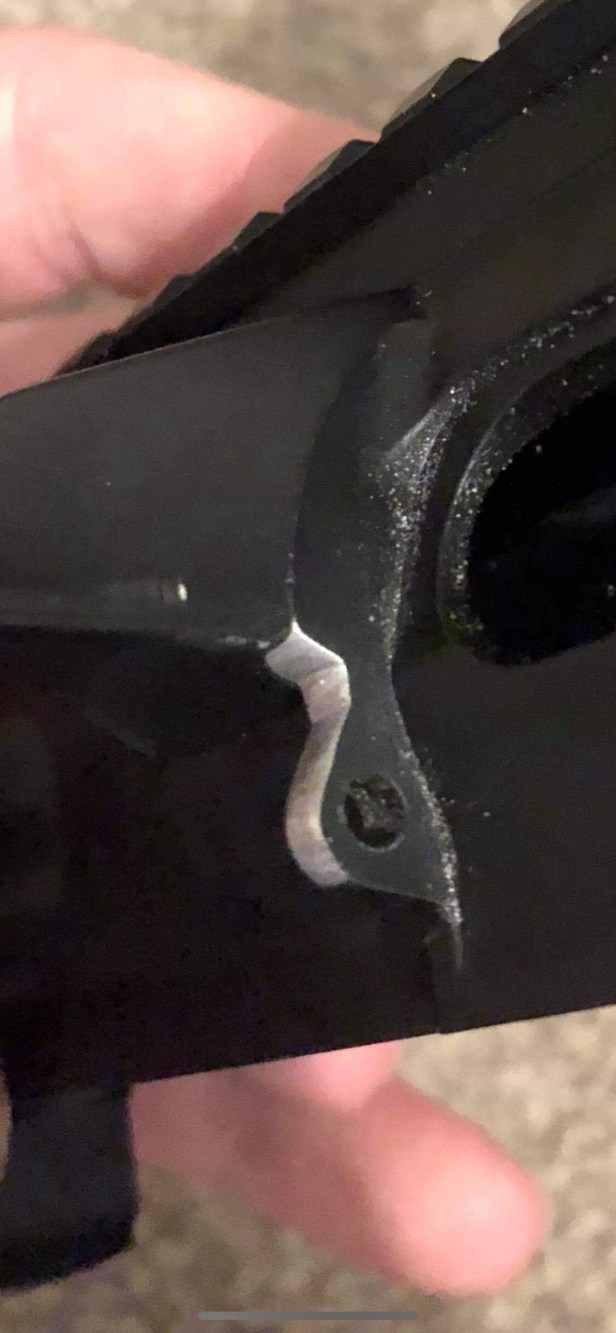
After this is done, you will also need to file away some material from the front dust cover pin hole, creating an angle on it that follows the angle of the dust cover.
Stage 2: Miliput
The Miliput process needs to be taken slowly. Miliput can take a long time to fully cure, so leave plenty of time between each section, as you don’t want to damage it.
When using the miliput, remember it is always better to have too much and remove excess, than have too little and try to add more. If you are part way through a section and discover you need to add material, it can take a long time to get the two separate pieces of miliput to properly bond, without ruining the progress you have already made.
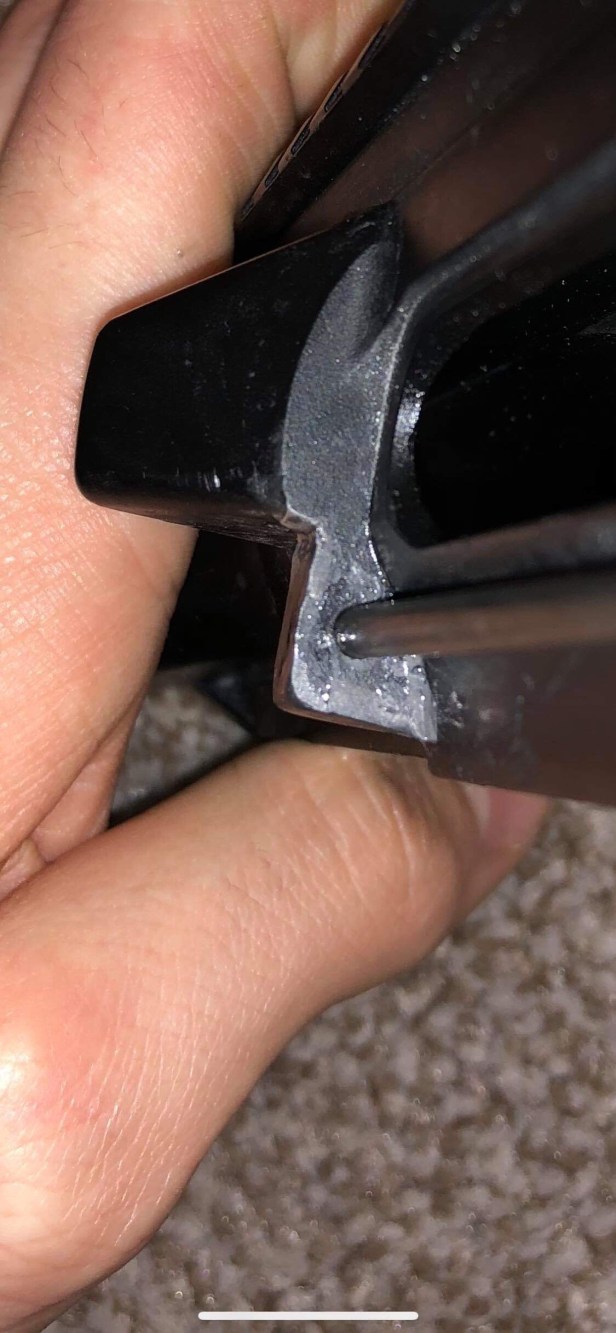
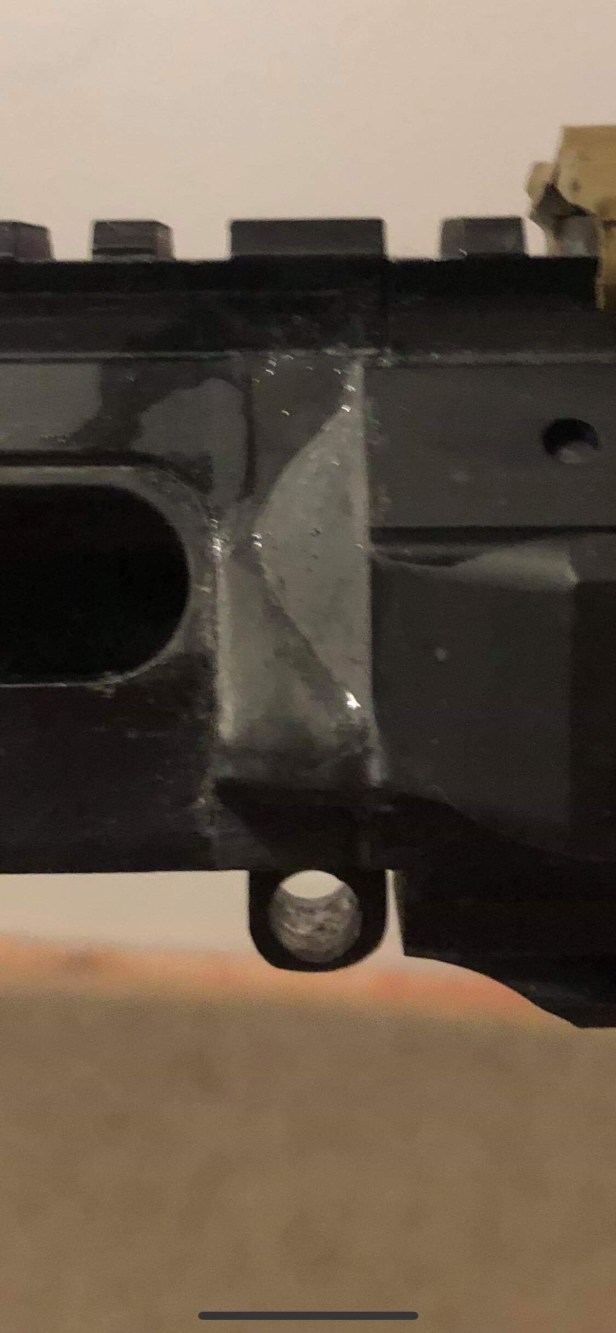
Step 1: Left hand side
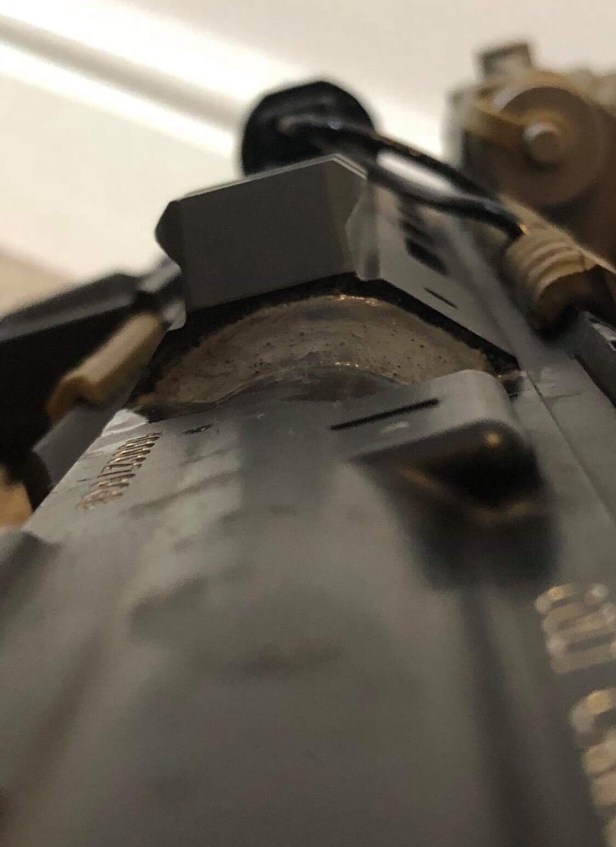
There are two stages to the first section. First a small square gap needs to be filled in, then the ‘bump’. Do not try and do these at the same time, as it can be a pain to get things aligned.
Firstly, to fill in the square on the left hand side, mix some of your miliput very well for 5 minutes, plug it in the gap and press down to make sure you fill all areas of it. You should have quite a bit of excess miliput at this point, and this is fine. Do not worry if you are a GBBR user and miliput starts to go under the rail either, this will be corrected shortly. At this initial stage you don’t need water either, you don’t want it getting trapped underneath and not creating a proper seal between the miliput and the receiver.
There are a couple of different angles where this needs to be flat. Directly on the side of the receiver it needs to be smoothed out as this is where it will be noticed the most underneath, so you create a sharp line running from the receiver to the rail itself.
To create the smooth surfaces and sharp lines you will need to use a lot of water, and smooth it out with the tip of your finger, and also cut away excess material when you see fit. It is better to smooth out the Miliput with water than sand it once it has dried, as it doesn’t sand particularly well.
For GBBR users, when doing this remember to keep on taking off the rail and clearing excess miliput off the nut, upper and rail. If you have a watery/Miliput liquid on the rail or upper, make sure to wash this off as it will dry hard!
Once this is done it is time to move onto the bump. This can be hard to get right as you need to smooth it out in a few directions. The easiest thing to remember is smooth it from the receiver to the top of the rail – just turn the upper around instead of working around it.
Start with a fairly large piece and don’t be afraid to push the miliput down and under the rail. Then start cutting material off slowly – I found a flat head screwdriver worked well here – as well as smoothing the material out into the upper.
Be careful not to take the Miliput too high, though. It should not actually sit on the rail but just under it. If you study pictures of the Colt Canada IUR you will see there is a ‘ledge’ with the ‘bump’ below it.
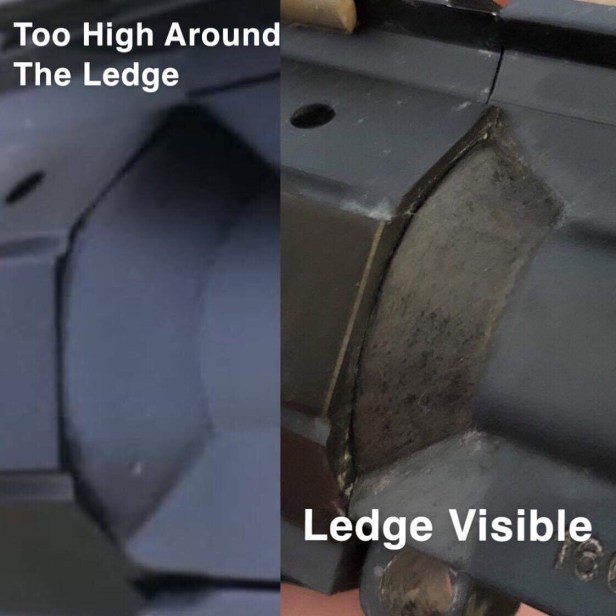
I found Rich from The Reptile House’s pics of the HAO L119A2 useful as a guide:

The bump should also start just over halfway on the square. Again, use lots of water to mould the miliput into the shape you want.


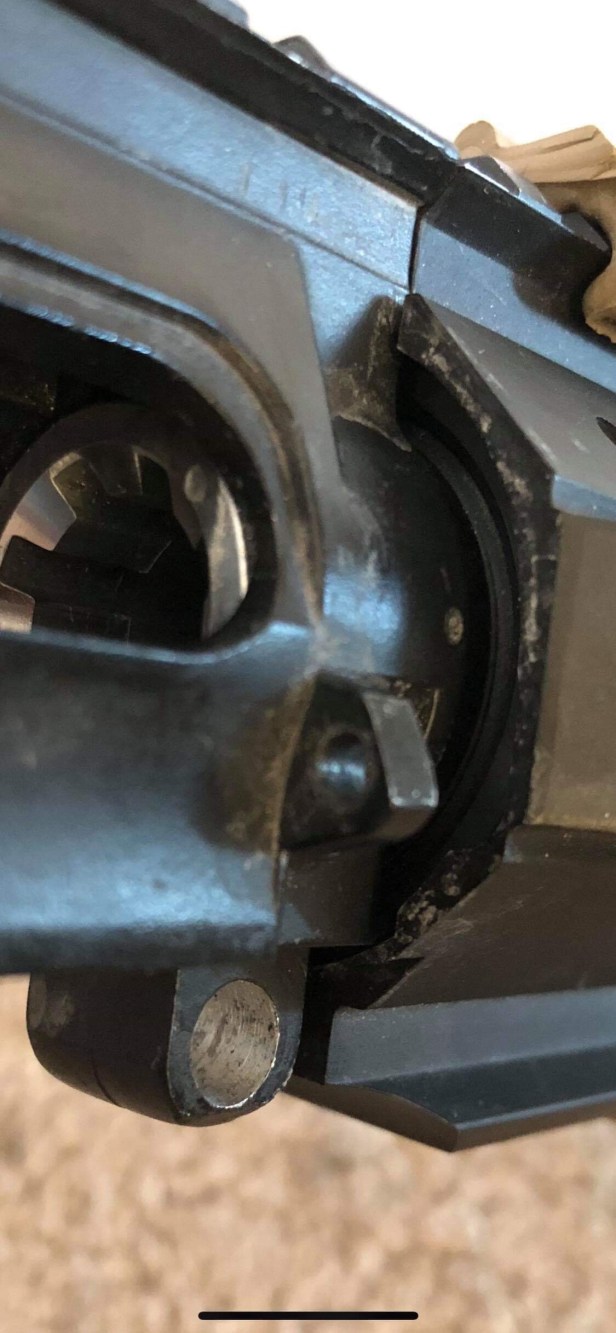
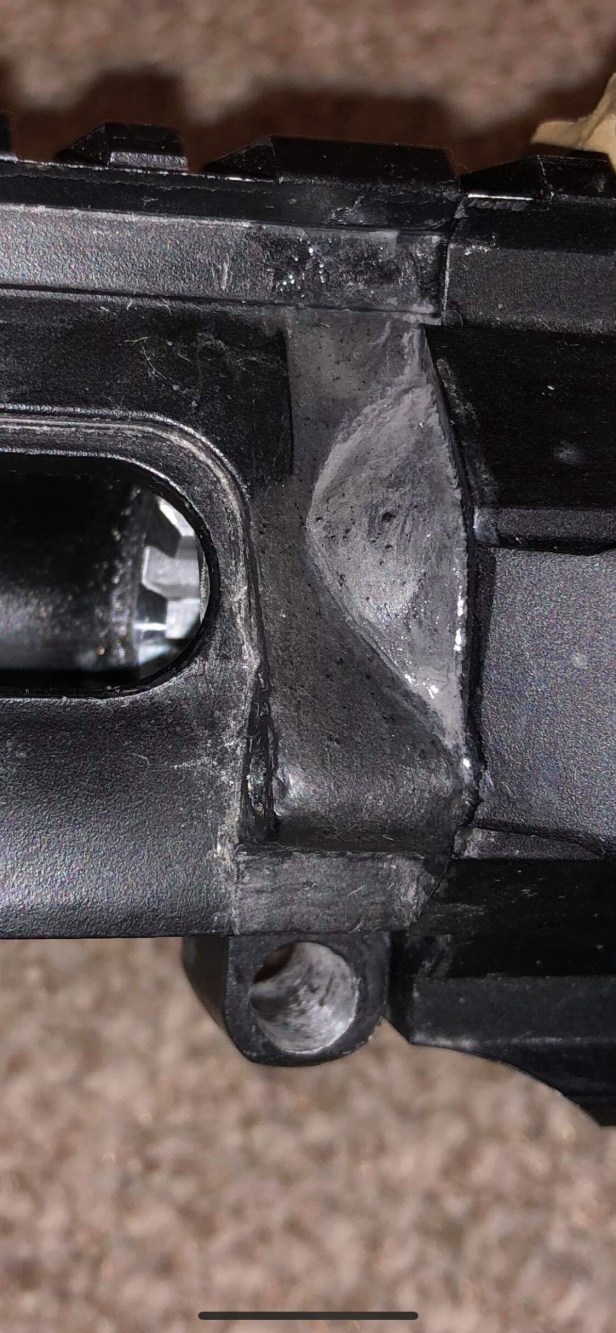
Step 2: Right hand side (Rear)
This part should now feel easy, once you’ve done the left side. This part simply needs a small rectangular blob of Miliput around the back of the dust cover pin hole.
Make sure you look at pictures of the real A2 and the size of this piece; it’s narrower than that featured in HAO’s Beta Release IUR.
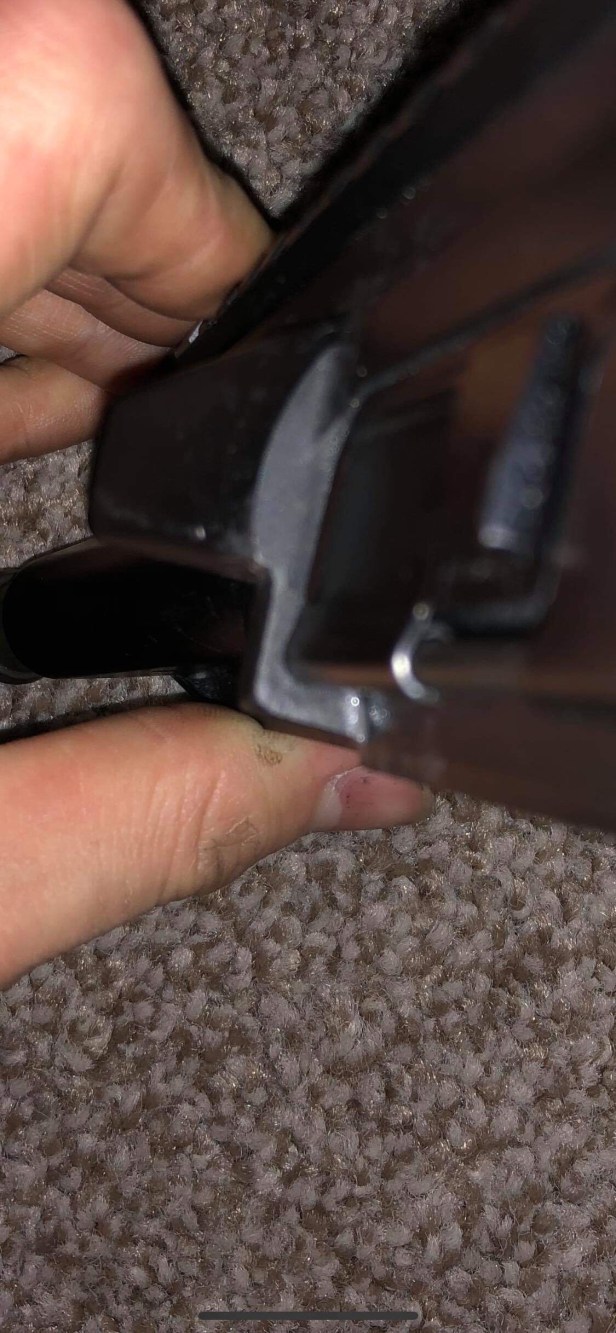

Use the flat head in the same way, to smooth out the miliput into the upper so you get a solid bond. Work your way around the block, and also make sure there is no miliput in the area where the dust cover will go, as it can block it.
Use a flat object like a ruler to flatten the sides and get sharp corners on the Miliput, to recreate that on the real A2.
Do not forget to keep on inserting and removing the dust cover pin, so there is enough room for it to sit once the block has hardened – though don’t leave it in as it will get stuck.
As before, use lots of water when perfecting the shape; especially when using tools as they can get stuck to the Miliput.
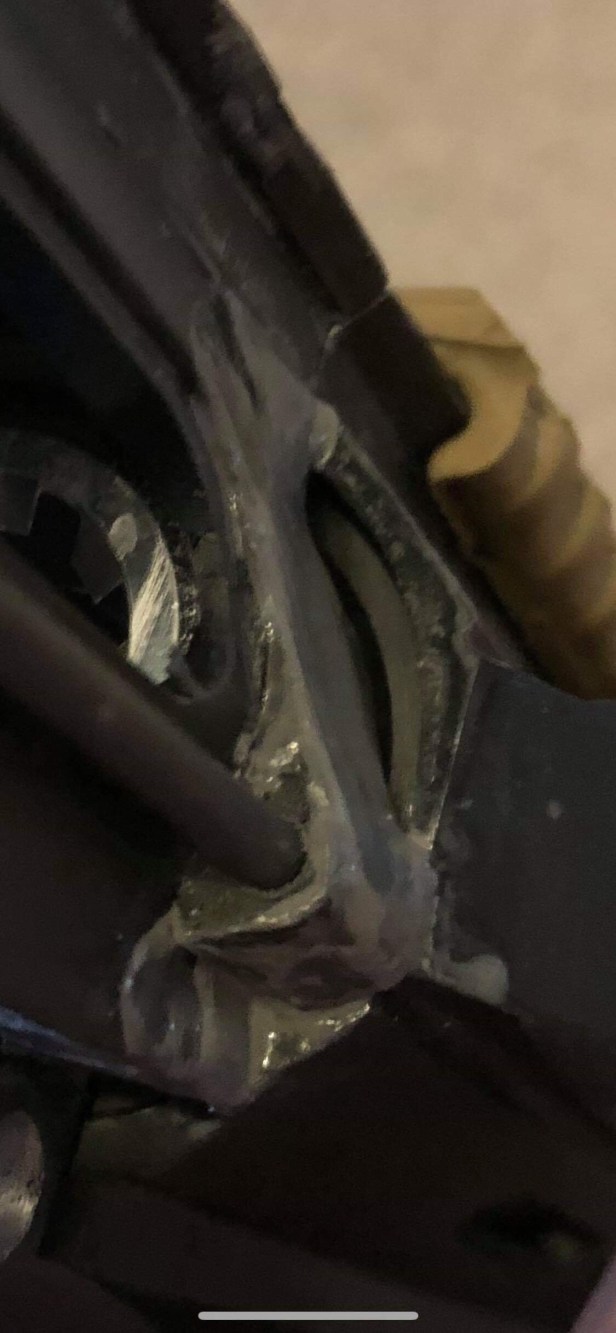


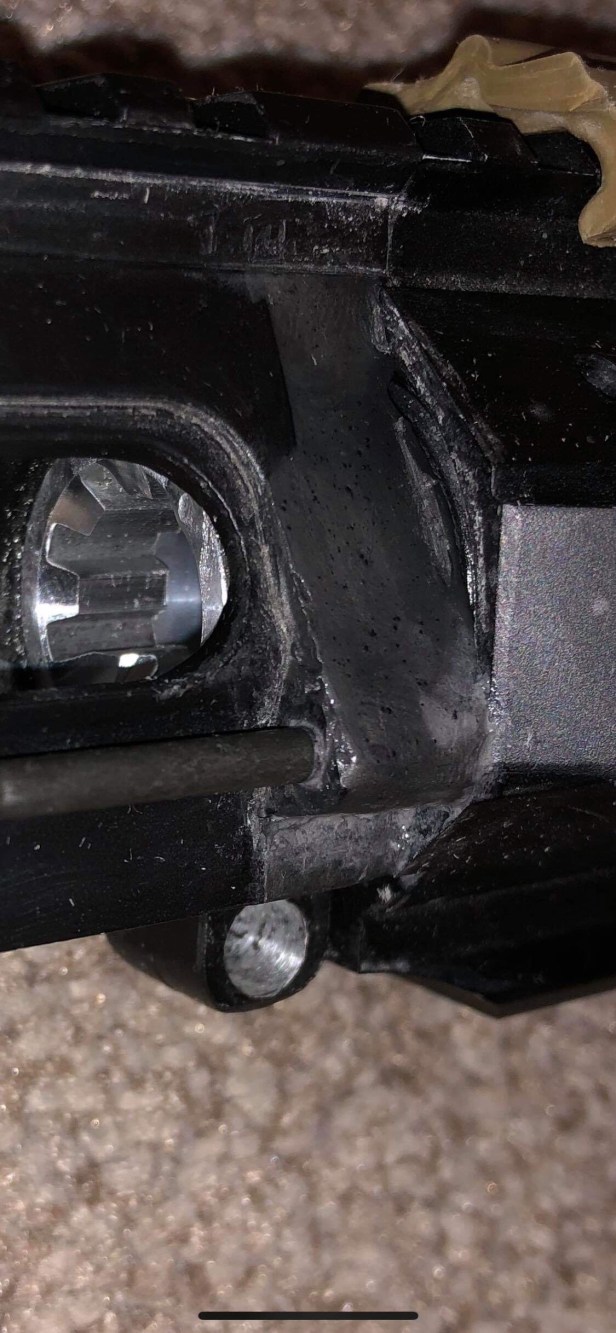
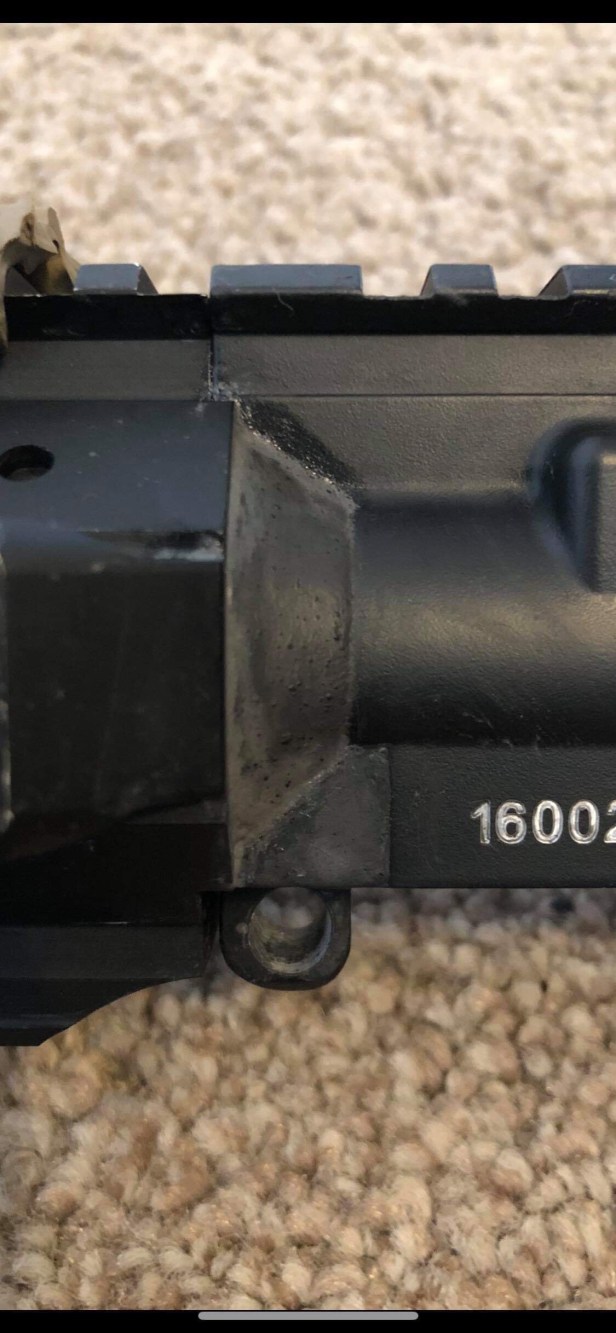
Step 3: Right hand side (Front)
There are three different steps to this part. Filling in the small square; creating the slope; and then the bump.
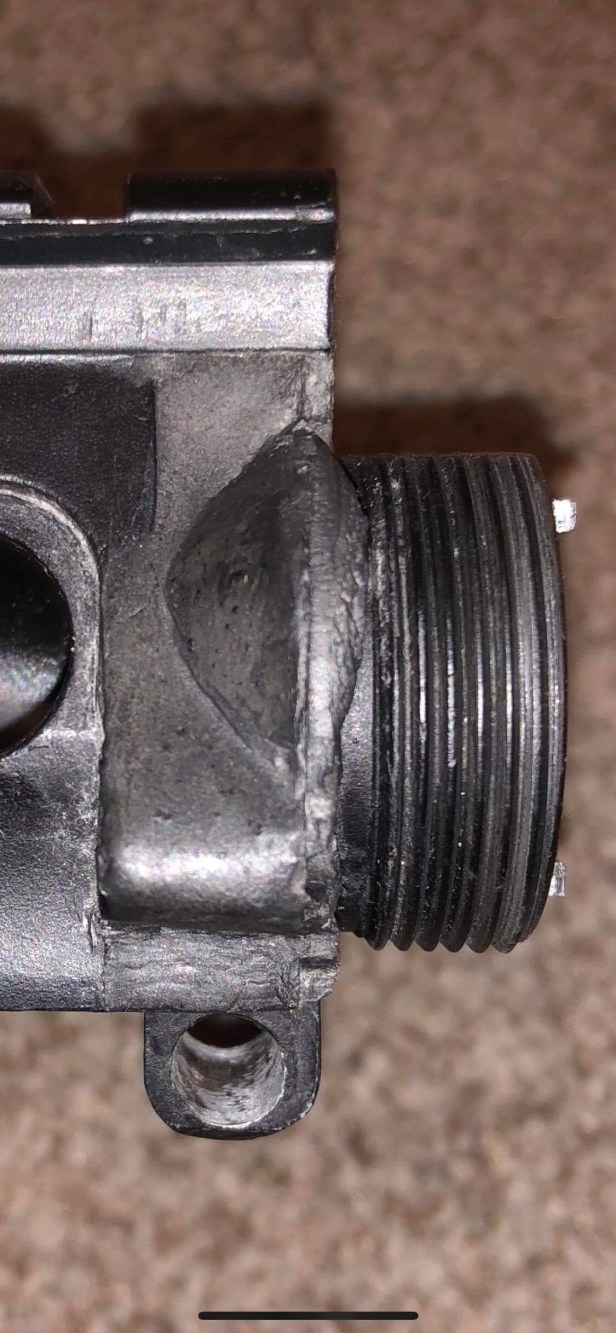
Starting off with the square, this is the same as the left hand side. It means you don’t have to worry about pushing material down and accidentally moving this part of the Miliput. When I did my upper, I did this at the same time as the slope which made it twice as hard to get smooth and sharp.
Once this is done, the slope needs attention. Again, start large with the piece of Miliput. Allow some to be pushed under the rail and then start using lots of water and tools to get the desired shape and finish. Start with the pin inserted and work the miliput around the area, to create the same shape seen on the real A2. Use a ruler or straight edge to get the Miliput flat, yet smooth and aligned with the line already around the dust cover.
Once the shape looks like this, you can let it dry and remove any excess from under the rail and on the nut.
For the bump, this side is harder than the last because you are working on an angle, and not a flat surface. The same details apply though, the bump should only fit into the gap visible, and not sit on the ledge of the rail.
Blend the bump into the slope and work it under the rail, again lots of water to get the surface smooth.
Stage 3: Painting
Now the Miliput is complete, all your upper needs is a lick of paint. Before painting check all the miliput to see if there are any imperfections, and areas that might need a small amount of sanding, as these will show through the paint.
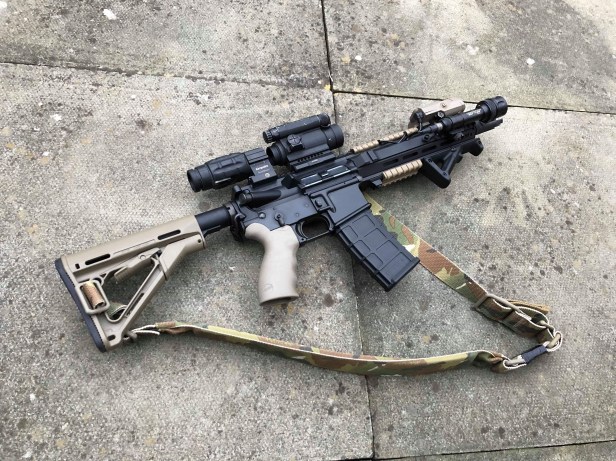
I found Halfords Camo Black and Matte Lacquer work well and give a similar finish to the Angry Gun L119A2 rail.
Thanks for reading. If you have any questions, please message me on Instagram @TheOtherGuy1999 or find me on facebook in the L119 Owners Club; or UKSF Airsoft Impressions groups.
Further reading/links
The UKSF Kit List
The Comprehensive UKSF (SAS/SBS) L119A2 Parts and Accessories List
Follow The Reptile House Blog on Facebook and Instagram
More articles relating to the L119A2:
- The original L119A2 primer, here
- GG&G AR15 vertical fore-grip in use here
- Magpul QDM and ASAP QD in use here
- 15.7″ L119A2 upper in use here
- Surefire FA556SA Suppressor here
- GG&G Aimpoint T1 mount in use here
- Magpul MS3 sling in use here
- Magpul ACS stock in use here
- Colt Canada parts – as used on the L119A2 – here
- Manta Very Low Profile Rail Covers as used on the L119A2 here
- UKSF Newcastle raid pics part 1
- UKSF Newcastle raid pics part 2
- UKSF Nairobi Kenya incident L119A2 parts breakdown here
- UKSF Belize ‘Jungle Set-up’ L119A2 parts breakdown here
- Confirmation bias (and the HSP Thorntail offset light mount) here
- UKSF Ecosystem: S&S Precision Sling Clip – Old Gen – here
- Inforce WML-type lights in use here
 Obi Wan Nairobi patch from Platatac
