

Words and Pics: Dave from E27 (@echo27_xray)
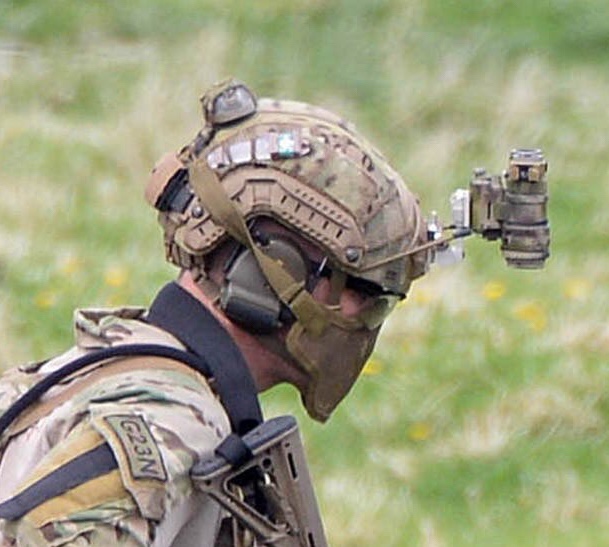
Behind gun and rig, a solid helmet setup is probably the key to a decent kit impression. It’s one of the things that draws the eye first.
It’s also one of the elements I’ve historically found the most faff to put together: I am in the huge noggin brigade and most replica manufacturers sadly aim their products more at the hobbit end of the spectrum.
An incorrectly fitted helmet looks ridiculous, and when your head is the size of a small moon it’s even more obvious when your lid is too small.

With that in mind, I’ve been using a genuine ops core L/XL carbon helmet for quite some time.
Before that I was using a Dragon Red replica Maritime, which although a touch on the small side wasn’t a bad shout; but I made the move to the real carbon for a few reasons, size not withstanding:
- I prefer to include as much real deal functional stuff in my kit as possible, so when adding a real suspension, pad system, vas mount for night vision and rails, the accumulated cost came to far more than my carbon ended up costing me (about £350).
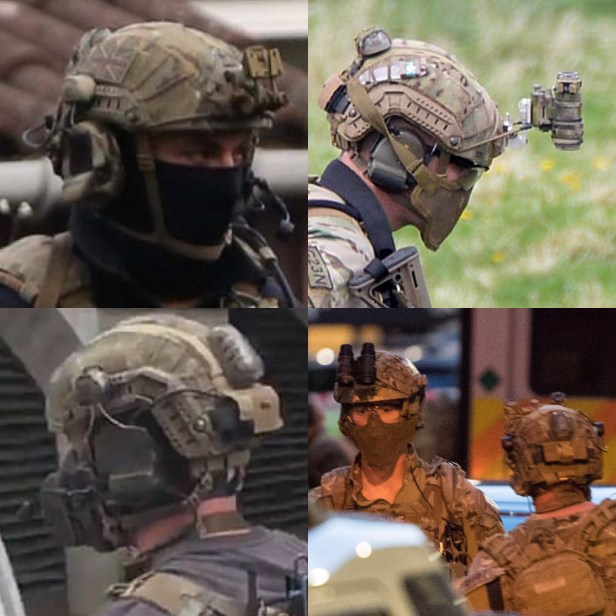
- The main issued helmet is the Ops Core Maritime. This has several differences to the Carbon in cut and profile. However, these are minor & not a dealbreaker for me. There’s been the odd other variant of Ops Core ballistic used and the Carbon itself is actually used for training, parachuting and non-Direct Action tasks. So, the lack of a visual Maritime profile isn’t a serious issue – or outside the realm of possibility. Helpfully though, UKSF have been using helmet covers to reduce IR signature for a while now, which means I can cover the ventilation holes in the Carbon and ‘hide’ the non ballistic nature of the lid.
- The Carbon is a fraction of the weight of the real Maritimes. While I do chuckle at some of the efforts made by my fellow airsofters to reduce minute amounts of weight of some of their kit, I have enough musculoskeletal issues as it is without adding the weight of a Ballistic to the existing night vision & associated kit on my head.
- It’s not nicked off the MOD. While there are some genuine Multicam Maritime Ballistics knocking around the UK impression scene, there are very few that haven’t made their way onto it from MOD stores. Given the milsim scene in the UK is now very much on the radar of the authorities – thanks to the actions of a select few – Maritimes are definitely on the list of high value, high risk items I’m sure they’d think nothing of confiscating (and perhaps worse).
So reasons for choosing the Carbon done, I’ll move onto the parts & accessories. breakdown.
Helmet Cover
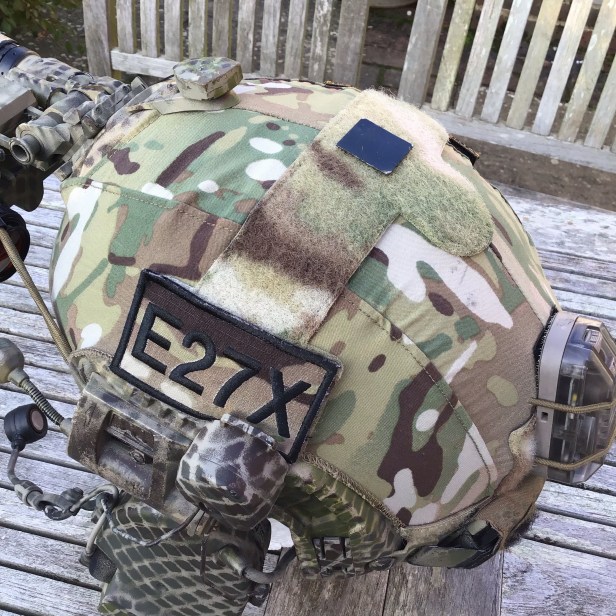
The helmet cover I’ve gone for is a UK legit First Spear Full Stretch Maritime cover in Multicam. As well as the First Spear Full Stretch and Hybrid covers, UKSF have been pictured with a variety; the Orion Design Group (ODG) cover being a classic, but also variants by Crye, Ops Core, Platatac, C2R, and more.
Indeed, SBS were papped by TheGeardoCrow using Chinese Aliexpress Kryptek covers – the filthy amphibious hipsters!
I went for the Full Stretch because it’s solid material and covers the holes of the Carbon, and also because it’s nice and simple: UK helmets don’t seem to be setup with the levels of bells & whistles, electronics, patches, V-lites and kitchen sinks USSOF and most airsofters seem to favour. The First Spear keeps things neat and clean. For a UKSF impression kit, less is more.
NOTE: if you’re going for a Carbon or replica helmet, it’s generally best to go for a helmet cover a size down from the size of your lid to compensate for the thinner helmet shell.
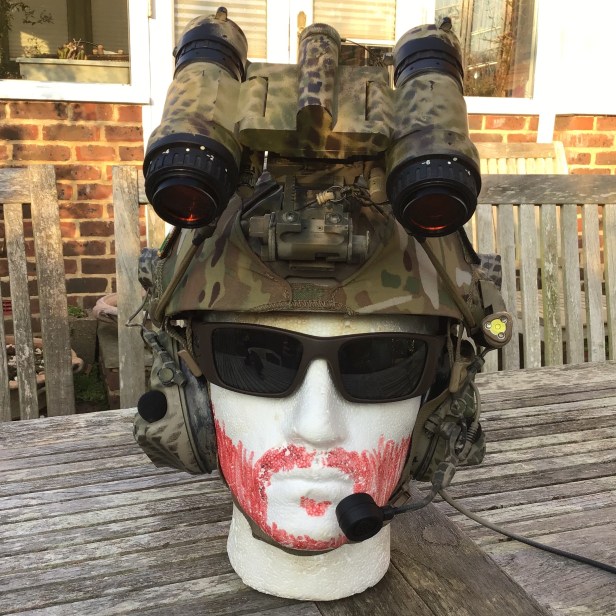
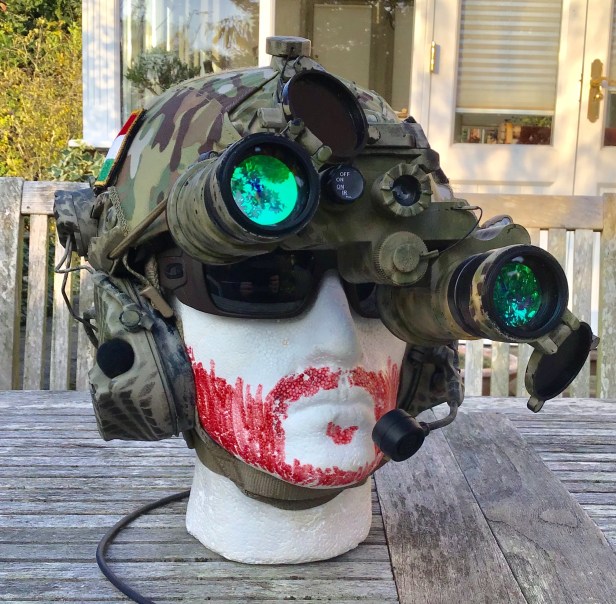
Night Vision
The main reason I wear my helmet when not doing the ITAS CT events or CQB stuff is to run nods and comms. So the NV is a major part of my setup. I used to use a couple of old surplus nods such as an ENVIS, and then ITL NSEAS – back when I was still flipping and trading kit.
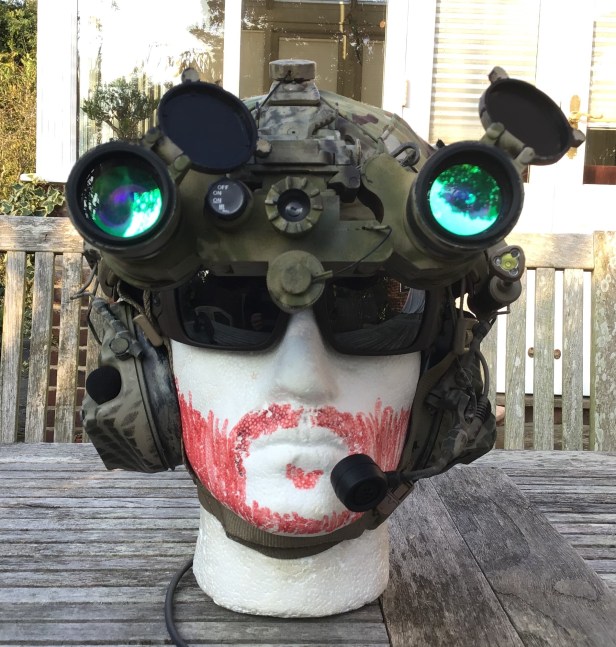
I managed to acquire my current setup; a pair of NV depot BNVD-G dual tube gen3s, which are best described as a civilian PVS31-alike using PVS14 compatible parts. Sorry to disappoint those people who either thought I was rich enough to afford 31s or had a stolen set; these are civilian, completely legal, and about half the price of 31s. A lot of guys run the Flir dual tube Gen 2+ goggles now, which I haven’t had much of a play with, but I got these for a similar price and they’re far superior in terms of quality.
The advantage of the BNVD set is that they’ll fold up while still ‘down’, minimising the risk of clonking them on ceilings and being much easier to get back into position when required. Having both down allows for better depth perception, while if you’re using an optic or want to check something with the naked eye you can simply flip one up.
I run these on a Wilcox L4G24 night vision arm, with a Wilcox NVG lanyard. They’re fitted with LIF filters, lens protectors and low profile amber filters, the latter of which I find less abrasive than the natural green tubes. I’ve never been a fan of white phosphorous tubes thankfully, which is good for my wallet.


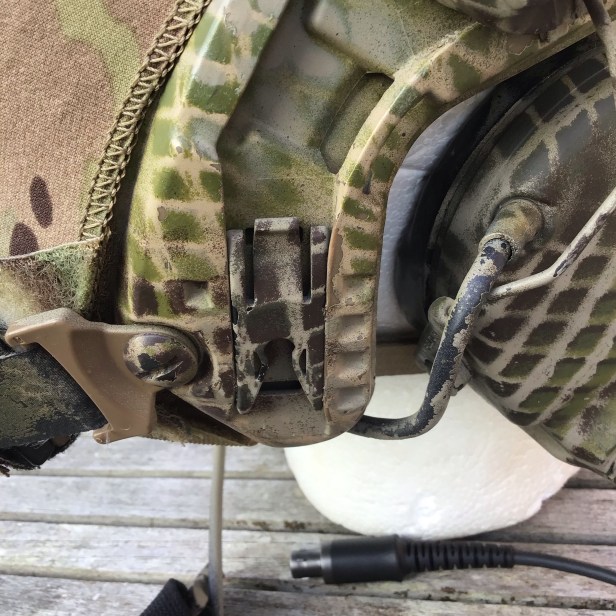
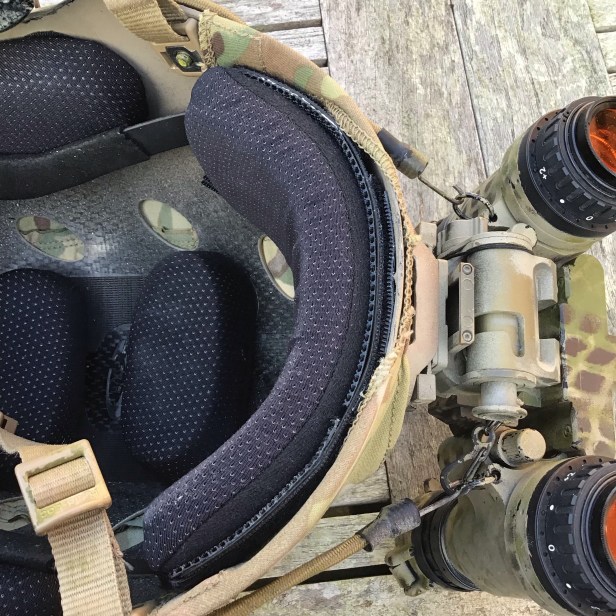
Earpro
For Earpro I use a set of Invisio Comtac XPI fitted with Arc rail adapters and Noisefighter gel pads. The Arc rail adapters are ubiquitous on cool guy lids but they’re on there for a reason – they’re the most comfortable way of running Comtacs on a helmet IMO, and if I’m not using a lid I’m generally somewhere I can get away with using my in-ear headset.
The Noisefighters are a personal preference item, but they’re cheap and useful – two things that make them perfectly acceptable for impression use IMO. They’re supremely comfortable gel cup earpieces with cutouts for eye protection; your glasses sit in the cutouts, preventing the earpro from crushing the arms of your glasses into your skull. I’d highly recommend them.
Helmet Light
The helmet light is a Princeton Tec Charge. I use Princeton Tec stuff for Airsoft, for work and just for day to day stuff like camping. They’re one of the best brands going in terms of illumination.
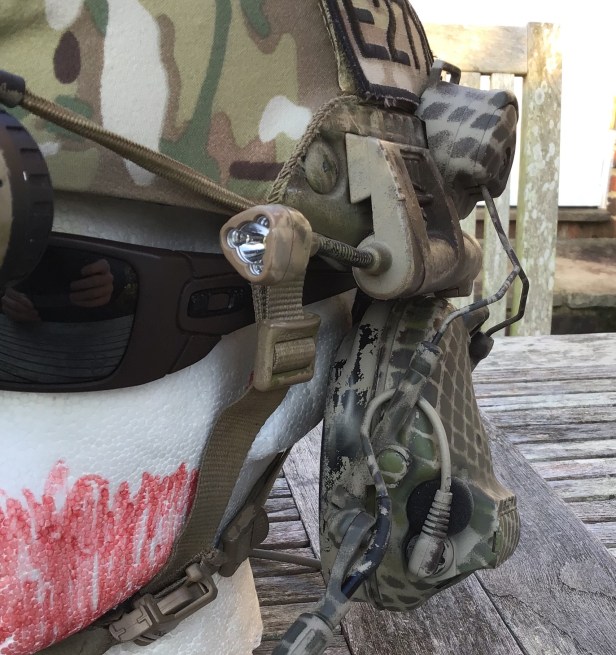
The Charge is the common, smaller MPLS’ bulky cousin. It features a larger battery capacity and more rugged design, but keeps the red & white LEDs. As can be seen from the above pic, it’s a tight squeeze on the rail with the peltor Arc mounts but it’s a brilliantly useful bit of kit.
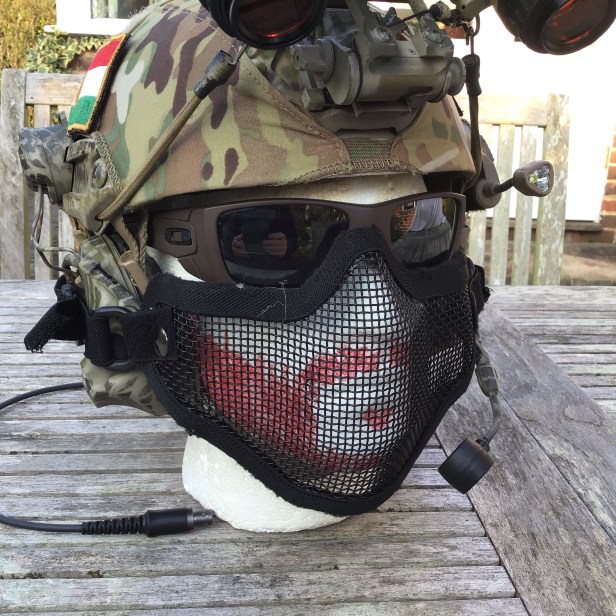
Mask
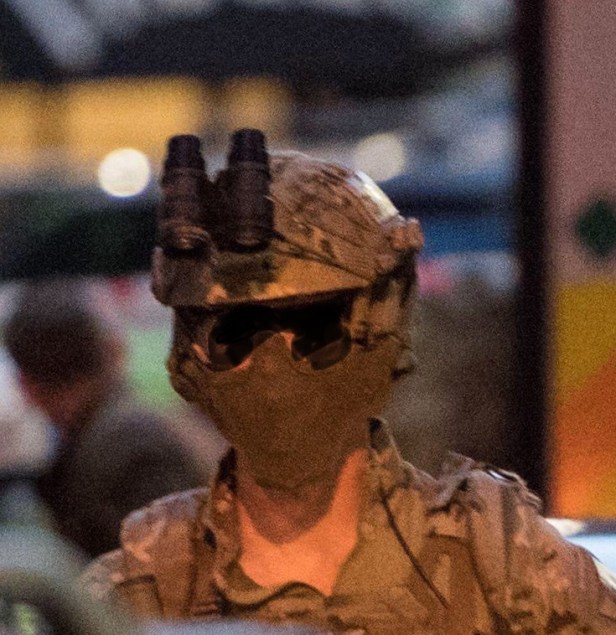
In a decision that launched a thousand arguments on Instagram, UKSF adopted the widely available humble airsoft mesh mask a couple of years ago for persec reasons; and for protecting against sim rounds in training (or maybe they just found it funny being called airsofters by tubby Walts on social media).
Generally the SOP seems to be to just stretch the strap over the top of the lid. I wasn’t a huge fan of that, so with a set of Ops Core goggle retention clips and a pair of scissors I modified my mesh mask so it locks into the rails instead. This means I can hang one side off if I want some fresh air or eat/drink, without all the extra screwing around trying to get a snag happy mask off the helmet.

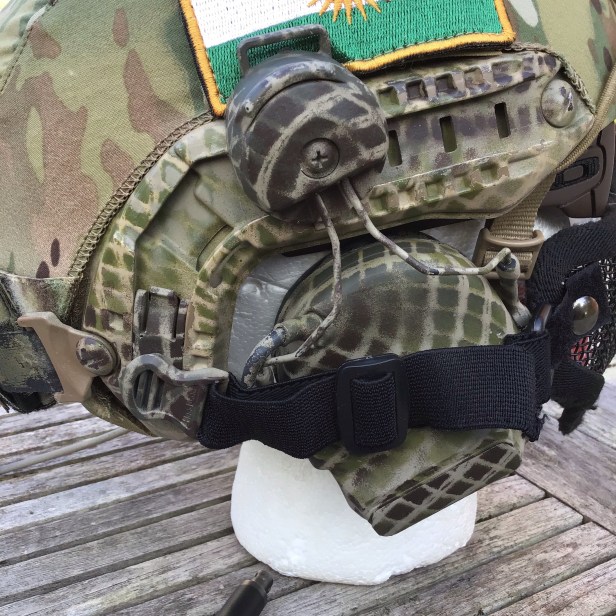
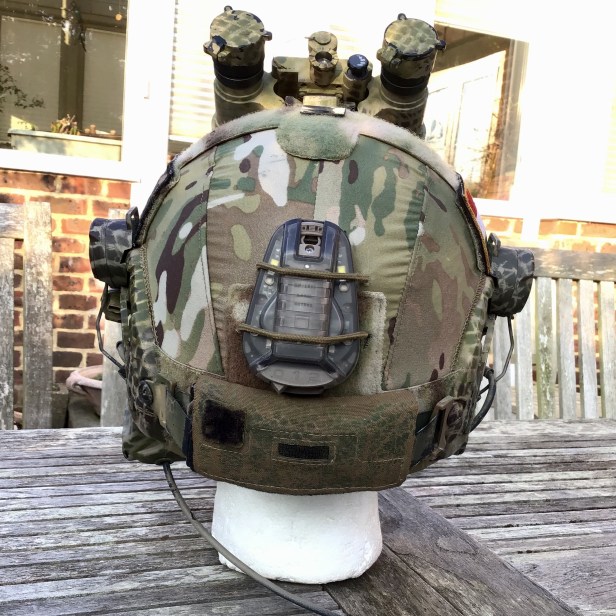
Strobe & Counterweight
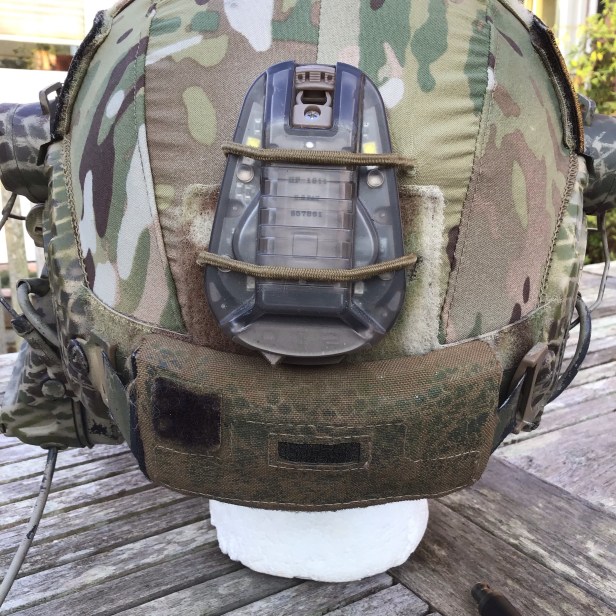
The Ops Core counterweight and Helstar 6 strobes are ubiquitous parts of the UKSF helmet. Pretty much every real lid I’ve seen has had them, and I’d recommend you get both if building your own. The real deal counterweight can be had for quite cheap on occasion. Though there are replicas, they’re not the right colour and will stand out as fake – but it’s up to you. Go for the coyote one if you do get a replica – the Multicam ones are barely used and the fakes look extra crap in my opinion.
The Helstar 6 strobe is one of the only bits of kit I own which is actually repro, for the main reason that I never ever switch it on so I don’t see the point of having a £200 lump of plastic sitting on my head doing nothing. ‘But why not turn it on?’ I hear you ask. Well, because back when I had time to actually play weekenders regularly, I quickly realised that those on blue force with decked out operator lids would invariably switch all their marker lights and strobes on as soon as the sun went down, turning themselves into tactical Christmas trees. This is fine if you’re the only force on target in Syria with NV capabilities, about to ram a fur missile up the ass of the head of ISIS; but not so great when you’re playing a combat sport against the Opfor who often have better night vision than you do, because they didn’t spend all their NOD budget on Crye gear. So I use the FMA copy with the batteries out.
The strobe retention cost me approx 50p to throw together. It’s a chopped up expired gym membership card with elastic taped to it and fed through holes poked in the stretch cover. Works really well, allows you to change battery (if I wanted to) and cheap.
Paint Job
My paintjobs have featured on this blog before in the past, and those who know me know when I get the rattle cans out, everything in block colours is getting sprayed.
I’ve recently been told that I was a ‘boundless cretin’ for ‘ruining more nice kit than anyone else on Instagram’, which made me chuckle as it’s probably not far off.
Whether painting random bits, chopping up plate carriers or other modifications to my gear, I enjoy customising my stuff and putting my personal mark on things. From a practical perspective, the NVG and Comtacs – and even the counterweight to an extent – are large blocks of colour which draw the eye; a basic quick fishnet camo job such as the one I’ve done on this helmet breaks up the outline and blends everything together.
It’s not even unusual. A quick peruse of recent UKSF reference pics show painted NODs & Comtacs too, so it’s not worth getting knickers in a twist over.
Interior
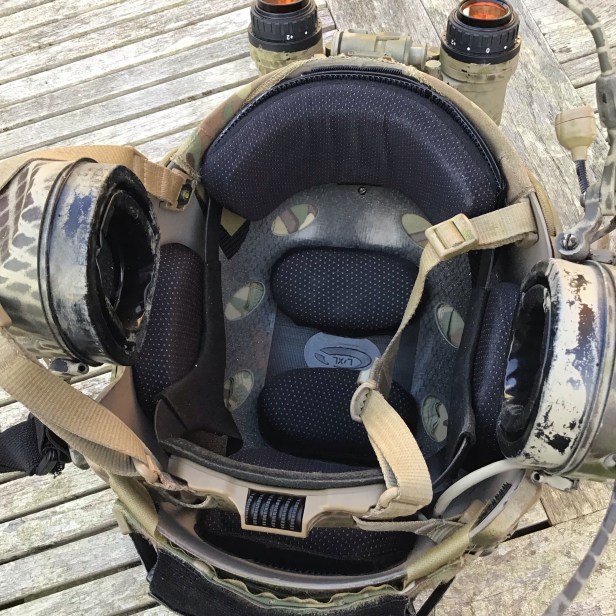
In the interests of making the carbon more ‘UK spec’, I did switch out the stock suspension system in favour of a Lux Liner & Worm Dial, which is the standard suspension in the issued Maritime.
However, I have recently traded the polystyrene shell and pads of the Lux Liner for a set of 4D comfort pads. These are the king of helmet pads and much more comfortable and stable (and offer better ventilation) than the tight closeness of the Lux.

As some may know, the Worm Dial harness is actually bolted onto the inside of the Lux Liner. When I removed the liner in favour of the pads, I simply attached a layer of adhesive Velcro between the harness and the shell, and more Velcro inside that for the front helmet pad. Easy.
If you look at the picture below, you’ll get a rough idea of how far the front of your helmet should be from your forehead (which going back to helmet fitment, means the profile your helmet shouldn’t blend into your forehead like a skullcap).
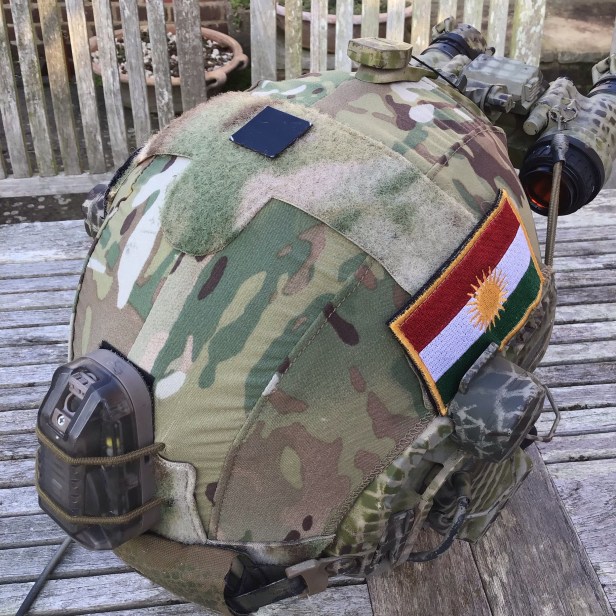
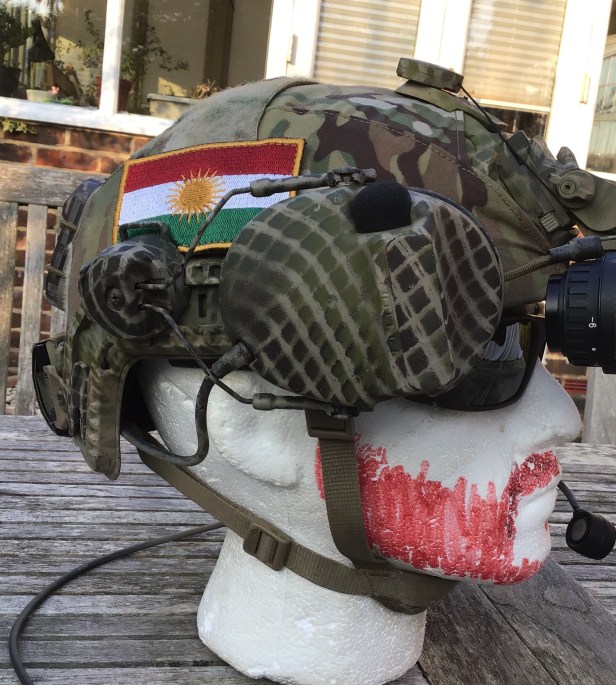
Patches
For patches, I kept it simple. A good way to ruin your coolguy impression is to cover yourself in excessive morale patches, whether it be about Vikings, infidels, sheepdogs or some other bollocks.
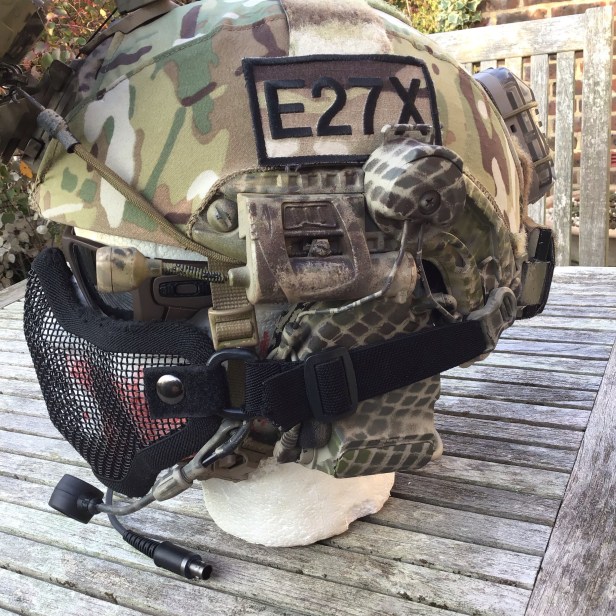
My helmet velcro is restricted to Callsign patch, flag patch (usually a UJ on mine but currently a Kurdish one for obvious reasons), and a single IR square on the top. Again, less is more.
And there you have it. My UKSF inspired, personalised Ops Core helmet setup with NVG.
