
Words: Rich Norman
I first saw the Crye Skeletal Cummerbund Tubes mod done by Downrange Gear. It must have been around 2013/14 (link here) and it featured the 3-Band version:
 The mod represented an awesome proposition: the combination of two paradigm-shifting technologies, proprietary to two titans of the tactical scene, in one product.
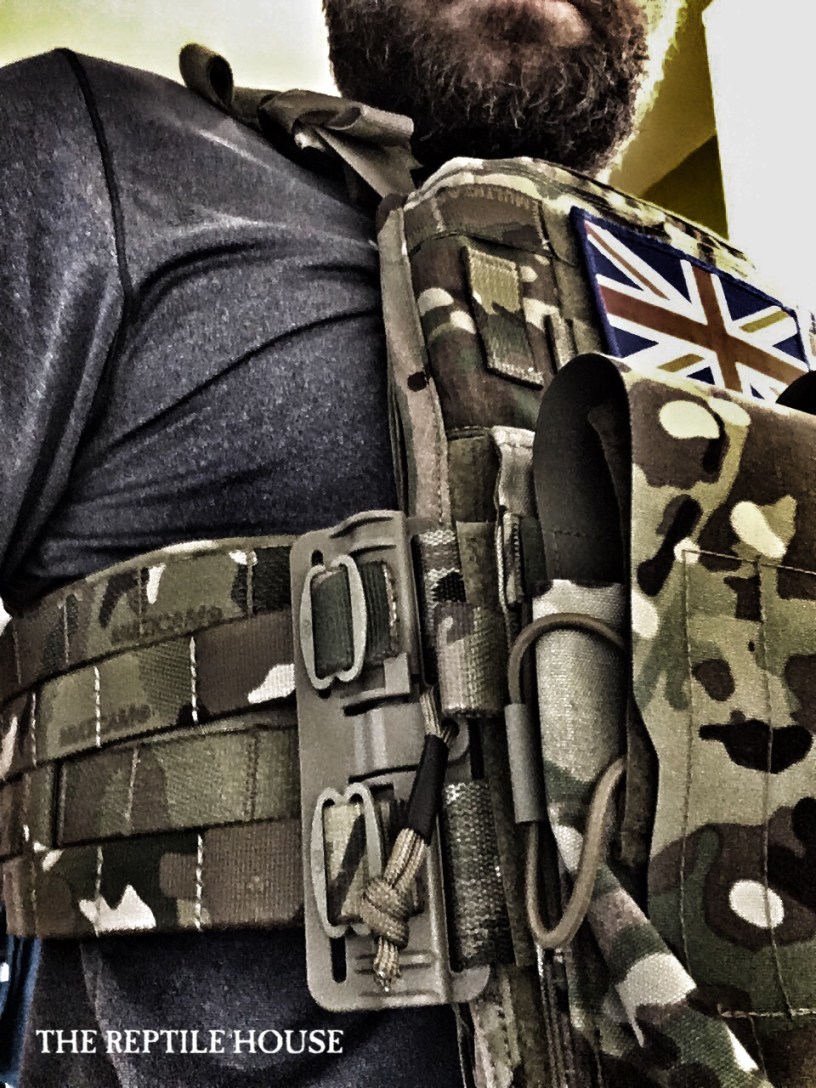
Most people are familiar, at least in principle, with Crye’s Skeletal Cummerbund. It’s light, provides excellent ventilation and the webbing bands are reinforced with what I’d guess is some kind of carbon fibre composite. This makes it an excellent weight bearing structure, particularly when paired with Crye’s AVS Harness.
However, getting in and out of conventional plate carriers – lifting a Velcro placard at the front – is a bit of a ballache if you’re doffing and donning frequently. Crye’s Skeletal Cummerbund is no different in this regard.
Indeed, it’s enough of a ballache that First Spear developed Tubes to counter the issue. My first practical encounter with Tubes wasn’t until earlier this year, in the form of the STT PC (review here). That really turned me onto the idea of Tubes and you can see why, here:
About this time, pretty much the only person in the community who was balls deep enough to get the Tubes mod done was Dave at Mapleleaf Tactical:

Now, this article isn’t about getting a pro Tubes conversion done like Dave did. It’s about a DIY version that I’ve done myself, as a temporary solution which is more of a proof of concept. Please, bear that in mind as I run through the steps. There are loads of different ways to do the mod, but my way is the one which best fits my peculiar constraints (for instance, the cummerbund is a size too small for me).
Because I prefer the 2-Band Skeletal Cummerbund – as opposed to the more popular 3-Band version – I went with that. The 2-Band also has the advantage of marrying up nicely with the appropriate slots in the Tubes – which I robbed from an XL First Spear Retrofit Cummerbund set. The latter was way too big and in any case I was never going to use it.
Snip, snip.

Here’s what I started out with:
- Tubes
- Crye 2-Band Skeletal Cummerbund
- 1″ Oval Slides
- Scissors
- Miniature blow torch (because we all love fire)

First, I cut the Velcro off the cummerbund and disposed of it entirely:


Next, I removed the excess lengths of carbon fibre strip inside the cummerbund, because the Tubes end has to be pliant:


I then heat sealed the webbing ends to prevent them fraying and also making them easier to work with:

On goes the Tubes, and an oval slide for each cummerbund band end.


Using the oval slides to hold the Tubes captive may seem like a bad idea (and indeed it may be) but I was constrained here by having a cummerbund that was technically too small for me.
Having levelled that disclaimer, it’s worth noting also that this is the very same method Crye recommends for securing the cummerbund to the rear of the AVS:

So it should work with the Tubes end, too.
Next, I secured the male Tubes underneath the placard. This is dead easy, because the ones which come in the First Spear Retrofit Cummerbund set are perfect.
A lot of length adjustment is possible as the Tubes’ Velcro structures overlap quite a bit, but I wanted to keep the Tubes themselves quite close to the placard; thus only sacrificing one PALS column.

And done:

Test fit:

So far (just around the house) the oval slides are holding fast and everything is comfortable and – crucially – easy to doff and don.
I’ll test this out and see if I stick with it. If I do, I’ll be calling on my good friend Andy at TacBelts UK to do a pro mod.
