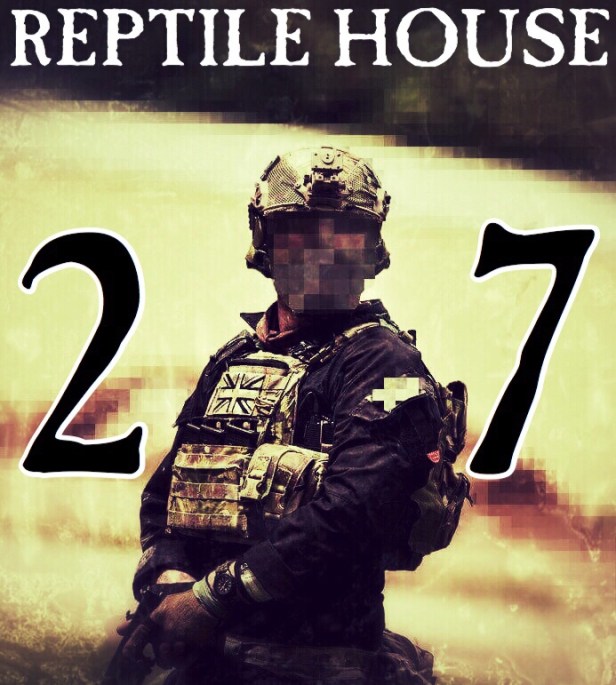
Words and pics: E27R
Introduction
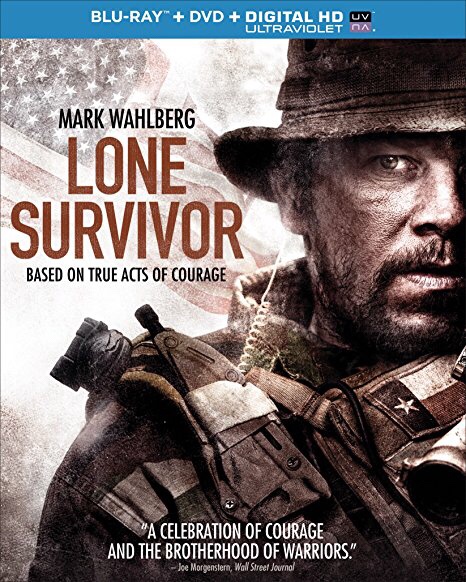
Whilst Hollywood does a fantastic job of portraying cool guy strike ops, door kicking and general badassery, the same cannot be said for ‘green’ or recce operations (with the notable exception of Lone Survivor).
Why, I hear you ask?
Well, because recce fucking sucks.
You walk around carrying a house on your back in the freezing cold for days on end, and then lie in a frigid hole in the ground for a few more days, subsisting off cold rat packs and wanking yourself half to death to stave off hypothermia.
That being said, the machine breaks down without proper flow and analysis of information. Good reconnaissance is invaluable and the buzz you get from observing an enemy position, exfiltrating unseen to relay that information to the COC and then acting on that intelligence to close with and engage the enemy is unparalleled.
Now that I’ve got your attention, it’s important to note that this article is not intended to be an exhaustive list, nor is it meant to dismiss any other kit set-ups or methodologies. What’s written here represents a personal framework based on my experiences – so take it or leave it.
In this framework, there are some minor differences from your archetypal ‘milsim loadout’ and everything that is carried is functional. When you are living out of a Bergen, weight savings become vitally important. If, like me, you are blessed with #SalonQualityHair, you might think carrying your shampoo, conditioner and that travel sized bottle of Brazillian Keratin Extract to keep those silky locks at their silkiest, is well worth the exertion; but consider that every kilo of unnecessary crap is a litre of water or a day’s worth of food you could be carrying instead.
Weapon Systems
Before we get in to the nitty gritty of clothing and kit packing, let’s sort out your weapon systems.
Whilst we’ve all become accustomed to seeing short barrelled CQB carbines, when out in the ulu (a remote or rural place), you can often afford to carry a longer barrel.
Enter the 15.7″ barrelled L119A2. Short enough to be wieldy, but long enough to offer the additional range needed for sustained engagements.

Unlike all the most recent UKSF reference pictures which all depict CT operations, green work necessitates the use of force multipliers. The L110A2 (FN Minimi) is a brilliant piece of kit and there are a number of different manufacturers producing replicas. The LMG is compact, relatively lightweight and affords your team some serious firepower in a tight spot. If that isn’t enough for you, the Echo1 M240 makes a great L7A2 GPMG with a bit of work and is a serious firefight winner.
Sharpshooter rifles and DMRs are excellent team level assets if deployed correctly. The HK417 and SR25 are robust and versatile weapon systems, capable of delivering accurate fire over longer engagements whilst retaining the ability to suppress enemy positions with a rapid rate of fire.
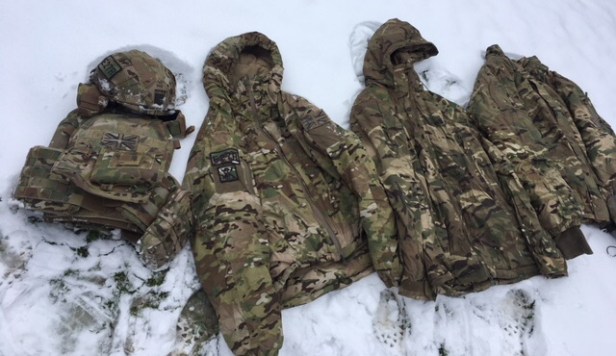
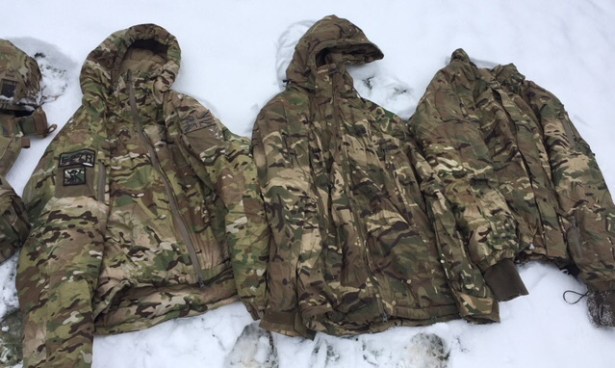
Clothing
Now that the weapons are out of the way, it’s time to focus on clothing.
I tend to avoid base layers. It’s easy to remove top layers but difficult to remove bottom layers. If I’m just wearing a UBAC and plate carrier and I’m too cold, I can add a jacket. If I’m wearing a base layer as well, and then I’m too hot, I have to shed everything just to get rid of the base layer.
If you must wear a base layer, Under Armour compression shirts are a solid choice. The snug fit acts like a second skin and stops Bergen burn.
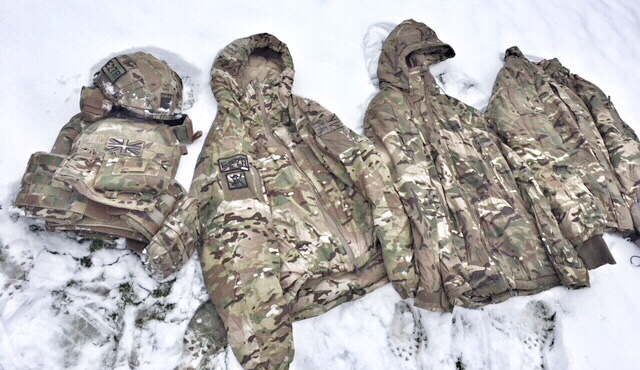
I favour Crye G3 trousers and the Arc’teryx Talos shirt in multicam; although I often wear issue windproof trousers instead of the Cryes, because they are so much more lightweight. In a trouser pocket I will carry a bush hat and a scrim net for cam and concealment.
I also carry a windproof SAS smock in MTP. SAS smocks are ultra light weight, windproof and generally considered ally as fuck. The offering by Level Peaks is also a great option, albeit slightly heavier, and likewise the standard issue CS95 and PCS windproof smocks are good – just avoid the PCS MVP smock (it has a black lining). That lining is goretex and the jacket is just begging to give you a heat injury.
When it comes to underwear, you can’t go wrong with Under Armour compression shorts to stop chafing when you’re pisswrapped and cold. As far as socks go, I highly recommend Bridgedale Trekkers and would advise against “1000 mile socks”. I’ve tried more socks than I care to remember, but Bridgedale Trekkers represent a gold standard to me. Ultimately though, socks are a very individual taste – I would suggest buying a pair and trying them out for a day or two rather than investing heavily in a full roster. You’ll want at least a couple of pairs of socks spare in your Bergen but more on that later.
For cold weather gear I cannot recommend Carinthia enough. Arcteryx is also fantastic quality. On the budget end of the spectrum, the issue reversible Softie jacket is pretty damn great, so much so that friends keep ‘borrowing’ mine.
Footwear
Boots are a sore point for me and I’ve assured Rich (Reptile House) that I will go easy on this point. Now as much as footwear is a very individual thing and everyone has different tastes, there are a couple of things which are objectively and universally true:
- You need the boots to fit both the width, arch and also the length of your foot
- The tread of the boot must provide sufficient purchase on slippery terrain
Just about everything else is subjective. Some people argue that artificial support provided by boots makes fractures more likely, others argue the opposite. Some people like leather boots, some people like synthetic boots. It’s really down to the individual and the most important thing is to make sure the boot fits and suits your foot and leg well rather than just buying the latest cool guy fashion trend.
However, since I am writing this article, I’m going to relay some of my experiences. I currently own and have extensively worn 10 pairs of boots in all manner of conditions, but there was only one pair of boots that has consistently performed well in sub tropical jungle all the way down to -25C.
The Altberg Tabbing Boot.
The Tabbing Boot is lightweight and supple. It feels like you are wearing trainers and they are easy to run in. They offer reasonable grip on ice, they are low cut enough to offer free movement but high cut enough to offer a little bit of reassuring support. But the most important characteristic of these boots, and one that has literally saved my feet when other people around me have suffered from frostbite, is that they dry quickly. It is an inevitability that the inside of your boots will get wet, either through snow melt, rain, river crossings, sweat or even just long grass saturating your trouser legs and the water draining in.
The problem with Goretex membranes in footwear is that they prevent that water from going anywhere. This is further compounded by boot manufacturers – looking at you Haix – putting soft fabric liners on the inside of the boot for comfort. These soak up and store water and guarantee a nice dose of Trench Foot.
When boots without Goretex membranes get wet, powder your feet, put dry socks on, then put waterproof socks on over the top of your normal socks – Sealskinz are great. Then put the boots back on. It will be a really snug fit and the heat from your feet will dry out the boots in a couple of hours. This can be a lifesaver in the cold, but even in temperate climates it means you can keep your feet a bit drier and you don’t have to put on gopping wet boots when you wake up – which is always a bonus in my book.
As far as waterproof clothing goes, just buy the issue tissue. Even the more recent lightweight Goretex isn’t that bad but the heavyweight sets are much nicer and appear to be modelled on the Carinthia Goretex sets that were issued to bootnecks and SF.
Kit List
The general rule of thumb here is that each layer of kit provides a different level of functionality. Think of your kit as different standards of domicile:
- Your belt kit is a soggy cardboard box complete with mongrel dog on a string. It keeps you alive for a short time
- Your daysack is a weathered old caravan – no one wants to live there, but you can make it work
- Your Bergen is a bonafide mansion complete with an indoor swimming pool, a bar and an all you can eat hooker buffet
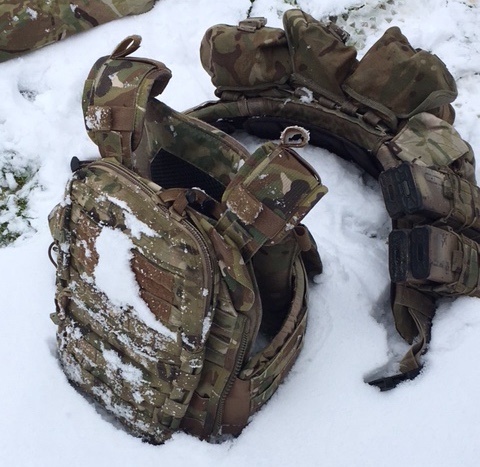
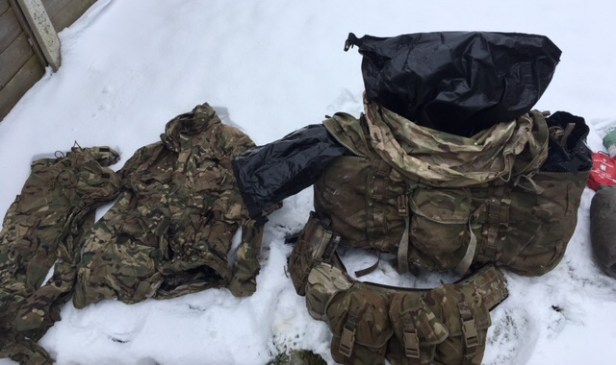
Belt Kit
Personally, I use a Crye Low Pro belt. It is rigid and supportive, maintaining its shape even when fully laden with 17kg of link and sadness. I have run my low pro belt for about 4 years now, with and without yoke, under a variety of different loads and conditions and it has never missed a beat. It is so faded that the Multicam pattern is barely discernible, but I love it all the same. In fact, the only problem I had with it was that it was so rigid that it could restrict the range of movement when moving uphill. The same is true of all belt kits and the solution with the Crye is to unclip the waist buckle, and let the yoke do its job until you reach the summit – then clip back up.
If MOLLE belts aren’t your cup of tea, stitched on webbing is a fantastic option. The pouches being fixed in place provides unparalleled stability at the cost of adaptability. In the UK, Dixies Corner and Jay Jays of Brecon (amongst others) do exceptional work tailoring belt kit and bergens.
Belt kit seemed to go out of fashion during the Task Force Black era; with pictures of RAV-clad superheroes kicking in doors in Iraq. Chest mounted holsters and mags on the torso made belt kit seem somehow antiquated. But those guys had a very specific role to perform. They were covering small amounts of ground from a vehicle to a target building and then executing a strike op. They didn’t have to survive for prolonged periods of time on what they were carrying.
Whilst during Operation Herrick there was a shift away from wearing mags on your body armour (for fear of secondary fragmentation from IEDs), this is hardly a threat at your average milsim weekender.
For Airsoft folk, the impetus behind belt kit is two fold:
- If your front is clean, then you can go prone more comfortably
- Your Glutes are your powerhouse; distributing load to your hips takes strain off your neck and shoulders and reduces fatigue
Belt Setup – What to Carry?
So I’ve convinced you that belt kit isn’t just for moustachioed bootnecks yomping around the Falklands. Now, what do you carry on it?
Quite simply your belt and smock (or shirt) is for surviving. It should be viewed as an extension of your body and it’s always the first thing you put on your body, even before your weapon sling.
Between your belt and your clothing, you need to carry everything you need to survive for at least 12 hours. That’s: ammunition, a survival tin, cam cream, 1 litre of water, 2 meals + spoon, personal med kit, weapon cleaning kit plus a small clasp knife.
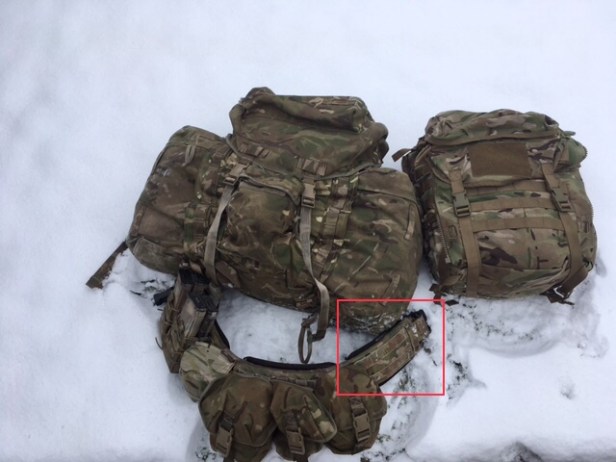
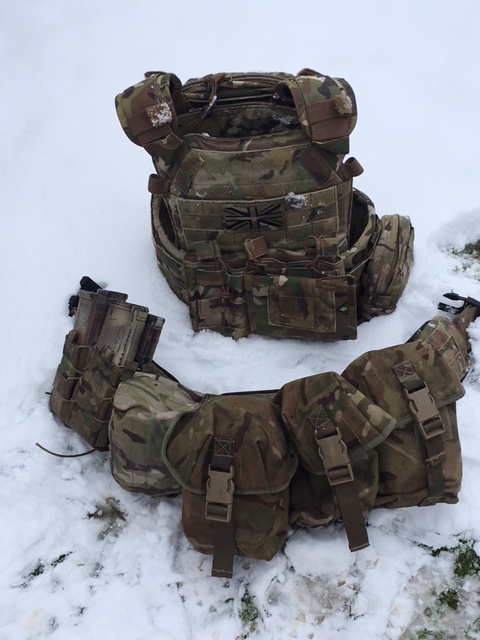
Plate Carrier
Next up is your plate carrier or ‘body drama’. Contrary to popular belief, if someone is potentially going to be shooting at you, then you want plates.
Whilst in the milsim world, chest rigs are associated with reconnaissance and greenside ops, they are poorly suited to this role. Load up your chest rig and lie down on top of your mags for three hours. You’ll know why it’s less than optimal. I believe that one of the reasons chest rigs became so intrinsically linked with our subconscious image of greenside ops, is something to do with all the old reference pics floating around of good guys cutting about Tora Bora hunting bad guys. Those good guys were working at altitude and climbing. They needed a full and natural range of movement, to efficiently move through that terrain.
Chest rigs have their purpose, just like all kit (apart from that expensive Blue Force Gear Cyalume/Pez dispenser). They are great for vehicle-borne troops for example, or those working in mountainous terrain. They are also a staple of jungle work.
However, SOPs and modern technological and material advancements mean that wearing body drama is not only required, it is also preferable in most circumstances. The Crye Airlite, JPC, AVS, BFG Plateminus and the C2Rmor carriers are all fantastic examples of ultra-lightweight modern plate carriers. They are scalable to suit the threat with removable side plates. They are athletically cut to allow a more natural range of movement than their bulky predecessors. Finally, technological advances have resulted in material solutions to weight problems. Modern carriers with all the Hypalon bells and whistles weigh a fraction of their forebears, available on the market at the start of the Global War on Terror.
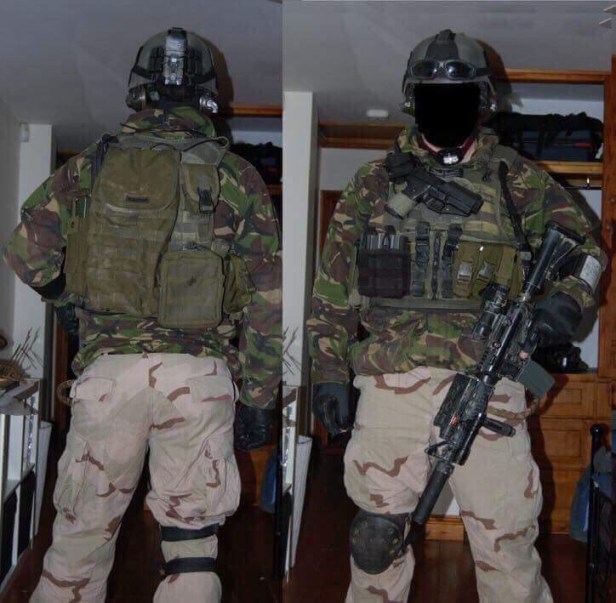
The astute amongst you will have noticed that all of the plate carriers listed above are also commonly used for direct action (DA) kits. The difference between a DA setup and a greenside plate carrier setup is all about pouch placement. Personally, I keep the front of my carriers very clean so I can get down low in relative comfort, but the back panel – during strike ops – is occupied by an Emdom hydro and two flashbangs. When it comes to greenside, bulky back panels aren’t really possible if you’re using an internal frame Bergen like the UK issue PLCE. You also don’t have a need for flashbangs, so you can chin them off and run a fairly slick back panel. Less is more. If you take an item of kit with you three times and don’t use it, get rid of it.
With the advent of zip on back panels, it is possible to run a slick backed carrier for when you are carrying your Bergen, and then add a zip panel with your hydro etc when you cache the Bergen.
Helmet
Having covered plate carriers, it would be remiss of me to ignore helmets. Contemporary options from Revision, Gentex, Ops Core, Crye and Team Wendy all offer significant improvements over the bone domes of yesteryear.
Personally, I run an Ops Core High Cut Ballistic. It’s lightweight and the OCC Dial means that the helmet stays right where it is supposed to, even when prone wearing a daysack (no more slipping over your eyes mid contact).
If you are looking for UKSF legit helmets, the Ops Core HC and MT are by far the most commonly used options out there and affordable repros are manufactured by FMA and a dozen other companies. The only time you don’t want to be wearing a helmet, is arguably when heading out on a close target recce. At which point you would be better served by a bush hat and scrim net to help keep you concealed.
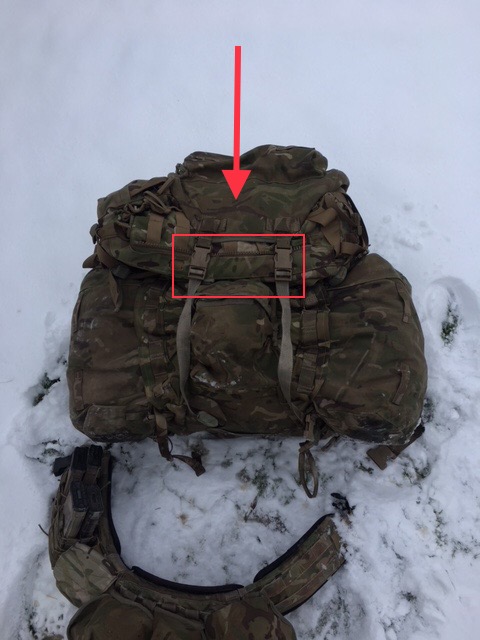
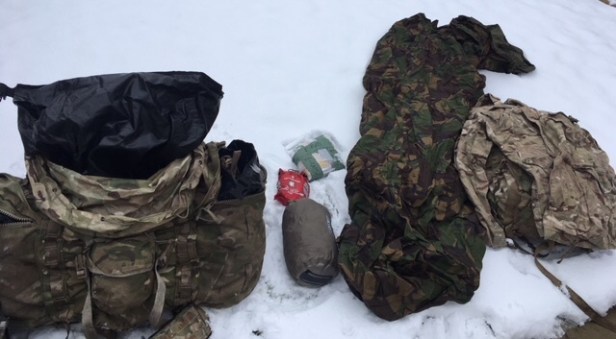
Bergen
I use the UK issue PLCE short back infantry Bergen. It is short and fat, perfect for running over the top of belt kit. The shoulders are adjustable to accommodate body drama and the whole pack is just about bomb proof. But the best thing about the PLCE Bergen is the size. It holds 120l of comfort and happiness. The trick is not to take it as a challenge and fill all 120l, but rather to use that huge space to make life easy for yourself. It’s quick and easy to pack a big Bergen with a large top opening. Then you can use the lid buckles to cinch it down nice and small.
The denser the Bergen, the more comfortable it is to carry on your back – not to mention that carrying a daysack sized ball of Bergen on your back just looks much more ally than a hulking great MTP mess.
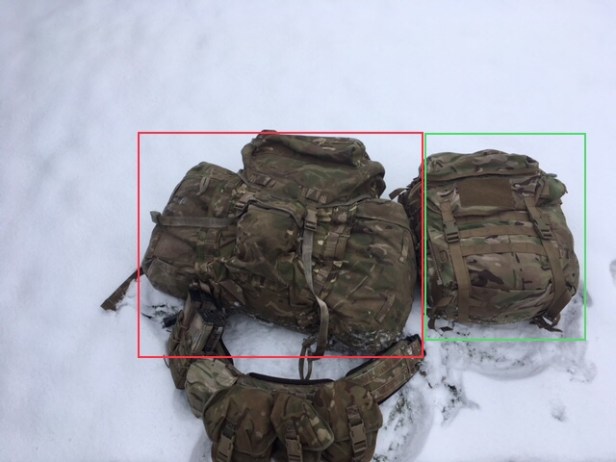
There is another UK issue Bergen that deserves a special mention. The air support pack. This monstrosity has a capacity of 150l. I’ve put two GPMGs and an IW in one before now to prove a point. They are simply awesome, but pretty unnecessary for a weekend in the woods.
If you have the money, by all means spring for a Mystery Ranch pack. They are by far the most comfortable and well made packs I’ve come across, but they come with a serious price tag that matches their build quality.
How to Pack Your Bergen
This packing guide is written for the PLCE infantry Bergen but the principles can be adapted to other systems.
The number one priority when packing a Bergen is waterproofing and the number one name in waterproofing is Ortlieb. Ortleib dry bags come in a variety of flavours, from 1.5l up to 100l and are perfect for protecting your kit from the elements. Get yourself a Bergen liner sized dry bag and side pouch bags and put them in their respective cavities, ensuring the edges of the dry bags are touching the edges of the bergen cavity.
Sleeping System
For this portion I will cover the whole sleeping system: the ground mat, sleeping bag and bivvie bag.
Sleeping Bag
Your sleeping bag (or ‘gonker’) selection will be dictated by weather conditions. Bags generally carry a comfort rating and a survival rating, E.g. Comfort: 5C; Survival: -5C.
The objective here is to choose a bag which has the lowest survival temperature to the lowest weight. In other words, the lightest, warmest bag you can get. The issue jungle bag is great for the summer months, but Snugpak make a variety of options that are the way to go for gonkers suited to the rest of the year.
Take your sleeping bag out of its stuff sack. Seriously – stuff sacks take an absolute age to use, so just chin it off and never look at it again.
Bivvi Bag
Put the sleeping bag inside your bivvi bag. The issue bivvi is great but if you are really flush, a hooped bivvie makes an excellent, low profile one man shelter and removes the need to carry a basha. Grab a fist full of your gonker (now inside the bivvie bag) from the feet end, then twist it quickly to push the air out of it. Stuff it in to the main body of the Bergen keeping the neck opening at the top so that air can escape as you squish it down.
Ground Mat
For a ground layer, the German Army issue folding sleeping mat is a great purchase. At around £10 they offer a light and collapsible ground layer to make life a bit more comfortable without carrying a huge roll mat. I find it easiest to stow the folding mat on top of the rest of my kit, inside the main compartment of the Bergen.
Dry Kit
On top of your sleeping system, pack a 3l Ortlieb dry bag containing your dry kit – shirt and trousers then another 3l dry bag containing your smock when not in use. The dry kit is to be worn only when conducting admin. The idea is that your ‘wet kit’, worn during activity, stays wet, but your dry kit is always dry. This ensures you always have a warm dry layer to wear and mitigates the risk of non freezing cold injuries (NFCI).
Admin Pocket
The front pocket of the Bergen, often used for the issue 1L water bottle, makes an awesome little admin pocket. Store a 1.5l Ortlieb dry bag filled with foot powder in there, along with a dry bag of socks and a further dry bag of Goretex socks (like SealSkinz). When your boots inevitably get wet, putting on SealSkinz and then putting your feet back in the boots will dry the boots out using your body heat, without leaving the skin of your feet to get saturated – as explained earlier.
CAUTION: do not run around in Goretex socks. They are not highly breathable, no matter what the manufacturer might claim. Your feet will literally fall apart, like meat in a slow cooker.
Inside the Lid
The inside of your Bergen lid is the perfect place to keep the rest of your personal admin kit. A small Tupperware box will hold all of your dhoby (wash) kit and ancills if you buy travel size. Roll on deodorant is preferable to aerosols and there are plenty of natural odourless products available. I appreciate that post Christmas you probably have a stockpile of unwanted Lynx Africa, but living in a shell scrape is miserable enough without it stinking like a cheap brothel.
Outside lid pocket
The outside of your Bergen lid should be lined with a bin bag. This is where you will stash any and all rubbish. By carrying your detritus away with you, not only are you being a decent human being, but you also remove ground sign and make it harder for the enemy to track you.
Left Side Pouch
Left side pouch contains at least one litre of water and 12hrs worth of food. It should also contain a 3L Ortleib dry bag, housing a decent warm jacket.
I use the Carinthia MIG for most UK weather. I slept in it one night last November in North Yorkshire and was pretty comfortable.
Your wet weather kit (again in an individual Ortleib drybag) also goes in this pocket. At the very least, you need a Goretex jacket if not a jacket and trouser set.
Incidentally, the Green Machine has a weird aversion to Goretex – despite issuing it. Be sensible: if you are getting rained on and you are going to be outside in the wet for hours, it might be wise to put on waterproofs. Equally, if you’re getting rained on but you are running around like a madman, then it might be wise not to put on Goretex – because you will overheat and die.
As much as I’d like to see someone trying to jumpstart an Airsofter’s heart with an 11.1v lipo after a day of sprinting about in Goretex, it’s probably best for site owners everywhere if we all just demonstrate a bit of common sense.
Right Side Pouch
Right side pouch contains your poncho/bivvi/basha with bungees already fixed to each corner. The UK issue basha is perfectly sufficient for the task and relatively cheap to boot! In addition to the basha, you will want a peg bag and some spare paracord, further rations and water. I also keep my Jetboil in the right side pouch. Reason being is that if I have time to cook or brew up then I will be with my Bergen. I’m unlikely to need a hot wet whilst mid-scrap, so there’s no need for it to be in my belt kit.
Day Sack
Day sacks are a source of contention and debate. If you are on a shoestring budget and don’t mind looking like a DPM Buzz Lightyear, the issue PLCE side pouches can be afixed to a yoke and worn as a standalone pack. If, however, you have a shred of dignity and self respect, you will probably want to get yourself a purpose built daysack. The Northern Ireland patrol pack is a great piece of kit. Lightweight, simple and super cheap – mine was £10, I think. The NI pack can be squashed and rolled so that it fits snugly under the lid of a Bergen, to suit the neat freaks amongst you.
If you want something a bit more high speed, look to Mystery Ranch, Camelback or even the issue PRI 45l infantry Bergen.
Daysacks vary in size between 20l and 45l. At 20l you are comfortably self-sustained. At 45l you have enough space for your kit plus additional team kit like entrenching tools, med kit, comms, ammunition etc.
All you really need in your daysack is 12hrs’ worth of food (and spoon), some more ammunition, a poncho liner/woobie, a warm jacket and a waterproof jacket. Take the dry bag from your side pouch containing your Goretex and simply stuff it in your daysack before you go on patrol with it.
Hydration
When it comes to carrying water, I prefer issue 1l bottles. The reason being is that you can confirm the water level going down every time you get the bottle out to drink, and so ration your water consumption appropriately. When using a bladder it is easy to drink your water supply too quickly. I also learned the hard way that bladders burst but bottles don’t.
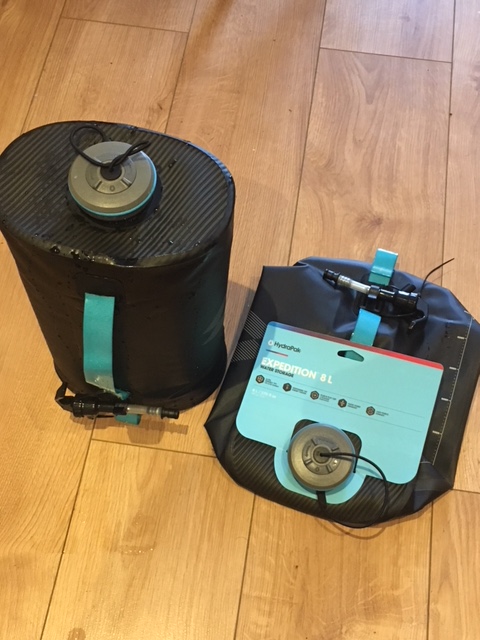
Bladders are great for short strike ops when you need to access water quickly, but when you are in the field for prolonged periods of time, bottles are the way to go in my opinion.
Conclusion
I hope this article has been informative or, at the very least, provided a shred of entertainment.
If after reading this you are interested in attending a recce/green exercise along the same lines of ISG’s successful CT exercises, feel free to get in touch.
We are looking to run some events in 2018, although I will be out of the country for a while so may not be on hand to instruct.
Finally, if you aren’t already stalking me, go ahead and follow @echo27_romeo on Instagram.
It will feed my vanity.
You can read more from E27 on The Reptile House:
E27: UKSF Impression Group – Interview
Head Up, Gun Up, Looking For Work – Exercise Oxcart AAR
Barely Airsoft – Exercise Final Encore AAR