Words and pics: Alex Ko (@kotactical)
The Summary:
The real Knights Armament SR-635 rifle is chambered in a proprietary 6x35mm caliber round.

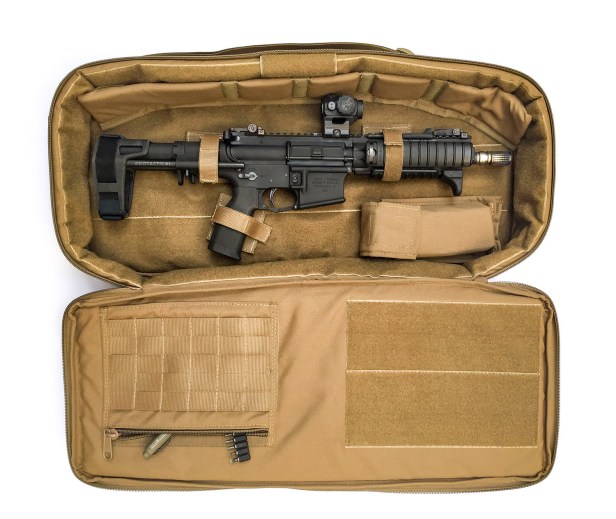
I loved the aesthetics but making a true replica wasn’t feasible due to not being legally able to own a short barrel rifle thanks to state laws, but also because I don’t have access to such unique/rare ammo.
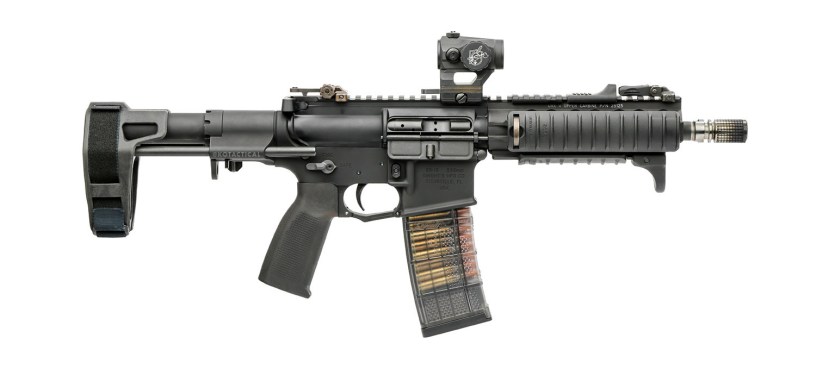
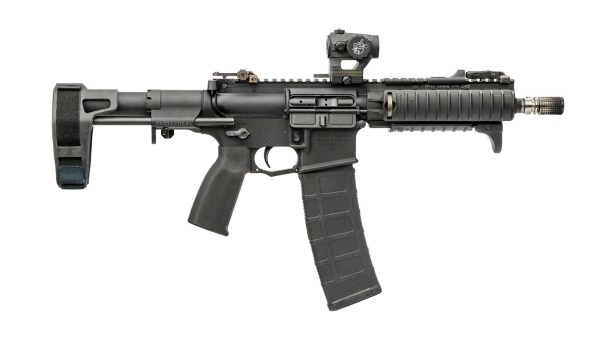
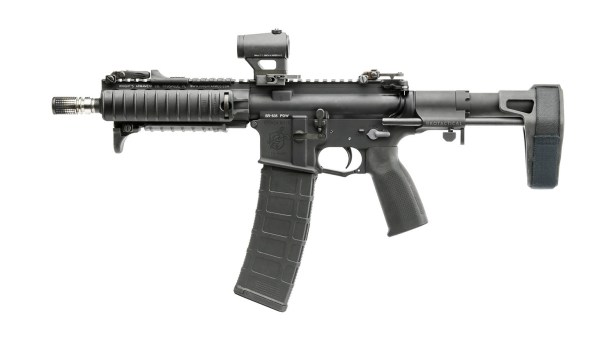
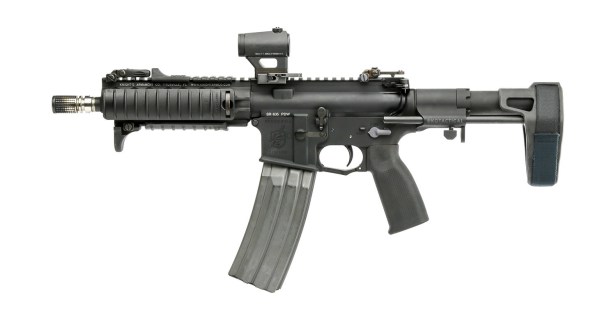
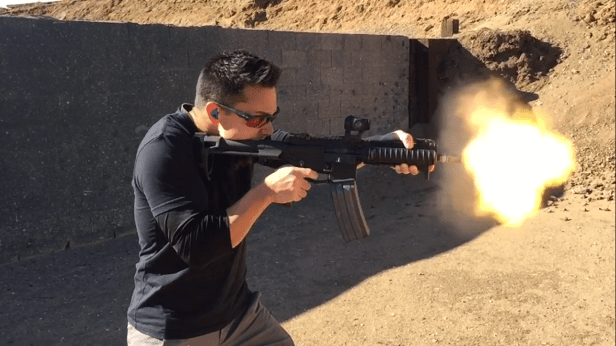
I decided to explore what my options were to create something similar, but chambered in the more common .223/5.56mm standard AR-15 round. What I was able to build was an AR-15 pistol, with an upper aesthetically similar to the real SR-635 in an overall compact PDW package. The firearm has been tuned to run standard .223 ammo and while it isn’t quiet by any means, it’s incredibly flat shooting with minimal recoil.
And it’s fun as hell to shoot.
The Details … Components:
Barrel. There are limited options for 8” barrels. This build uses a Spike’s Tactical 8.1” 5.56 NATO (1/7 Twist Rate, .750 Gas Block Seat) Black Nitride pistol barrel. It is accompanied by a Spike’s Tactical pistol length gas tube.
Upper Receiver. The real SR-635 has a slick side (no forward assist) upper receiver and I believe the platform used a converted 9mm forged upper receiver. Initially I went with a Colt 9mm upper however upon receiving it from G&R Tactical, I discovered that there were noticeable machine marks where the forward assist and case deflector were machined-off the forging by Colt.
I ended up using a Model 1 Sales 9mm upper that was flawlessly finished. Removing the bolt-on 9mm polymer case deflector and swapping the 9mm ejection port cover for a standard cover was simple. The difficulty was that the upper was designed for 9mm which doesn’t require a hole for the gas tube. I had my gunsmith/machinist precisely drill the upper for the gas tube to pass through.
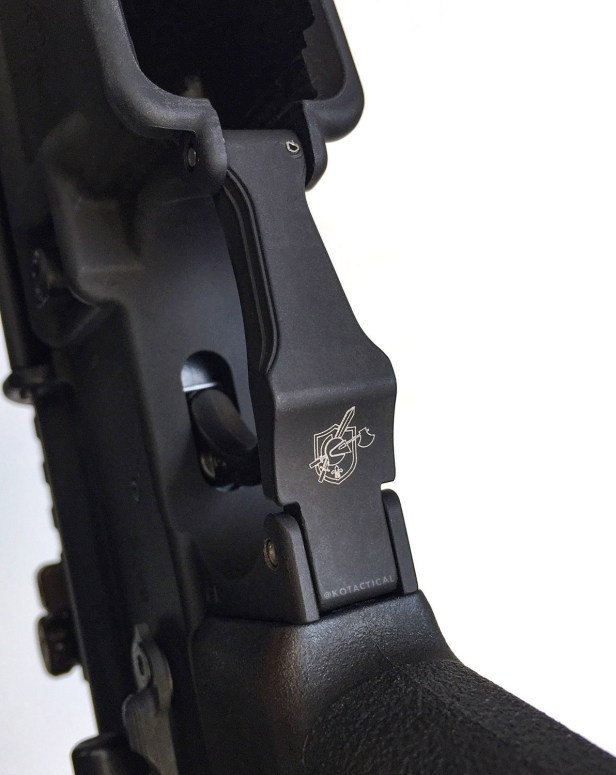
Lower Receiver. I had an unmarked 80% lower completed to 100% years prior. It wasn’t an E3 lower like that used on the SR-635; but it was essentially the same as the standard AR-15 stripped lowers that Knights sells, minus the correct markings. It still had the left side selector rotation limiter nubs (which I could machine off, but chose not to).
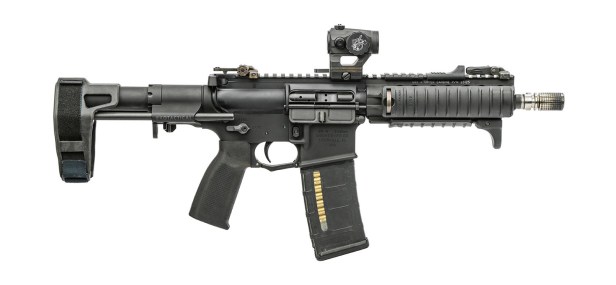
Using my real KAC SR-30 lower for reference, I precisely recreated the lower receiver markings (but with SR-16 as the model number) using laser engraving – but with the addition of my own personal serial number.
Rather than use off the shelf fonts I carefully recreated the exact style, shape, and depth to replicate the machine engravings KAC used on their lowers. In fact I had initially intended to have these lowers machine engraved and the vector markings were designed for that, but I ended up going with laser engravings for the sake of expediency and converted the vector data accordingly.
It’s interesting to note that there are some marking inconsistencies between the KAC E3 lowers and regular stripped lowers, that ranged from punctuation to logo sizing and other subtle differences. I based my engravings off my SR-30 E3 lower.
Upon completion of the engravings I had the lower sand blasted and re-anodized with Milspec Type III Hard Anodizing.
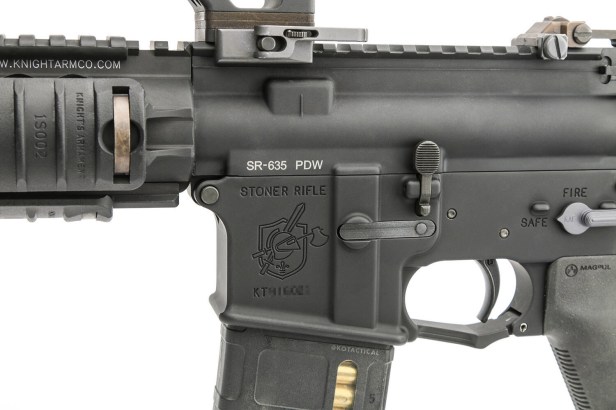

I also used this opportunity to laser engrave the upper receiver with the “SR-635 PDW” marking. Though this addition may not be considered 100% authentic, KAC does have a history of marking their upper receivers in a similar way. I felt it was a cool detail to include.
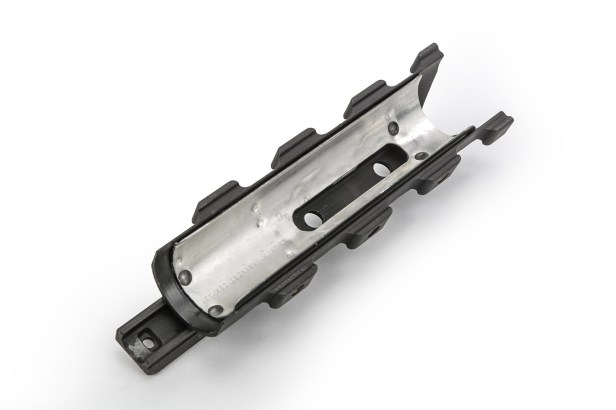
Rail / Handguard. Knights Armament URX II Carbine Length. Long since discontinued, I managed to find a URX II Carbine length rail on the collector’s market. It wasn’t cheap (more than double the original list price) but it was well worth it.
The first issue I had with this build was the barrel nut. The URX II barrel nut uses a non-standard wrench (which I didn’t have). I did have a URX III wrench and a spare URX III barrel nut which was compatible with the rail threads. However the URX III nut is longer than the URX II nut and prevents the lower rail from locking in place due to the heat shield getting in the way.
Some people suggested popping the heat shield off and discarding it, as many of the URX II rails shipped without them anyway. I decided that I wanted to keep the heat shield and carefully removed just enough material off the rear of the heat shield to clear the barrel nut.
It isn’t visible once assembled and didn’t require much effort.


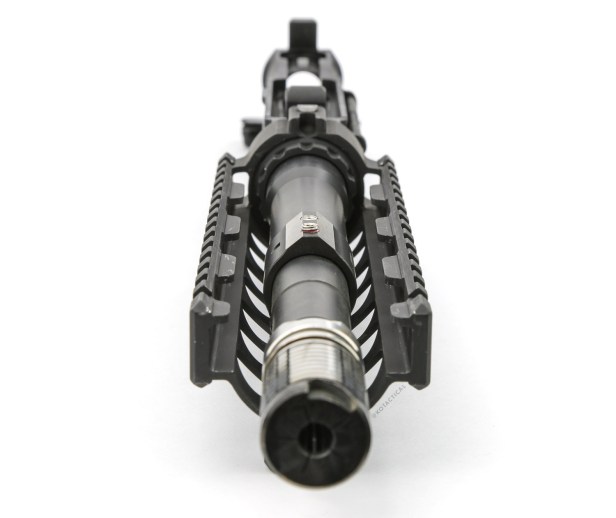
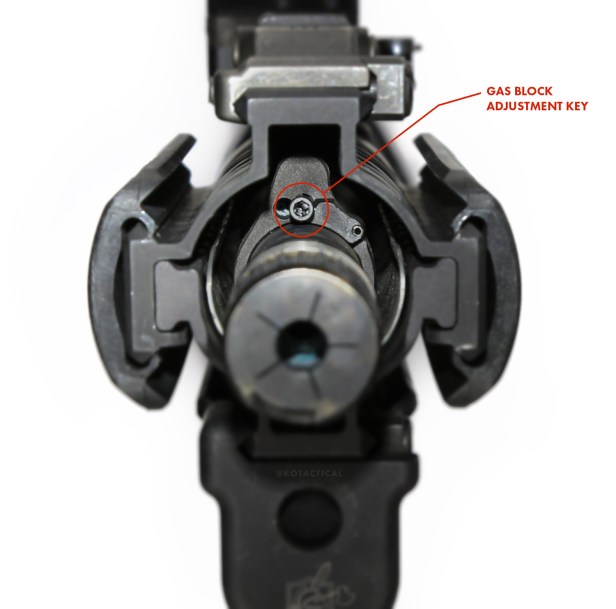
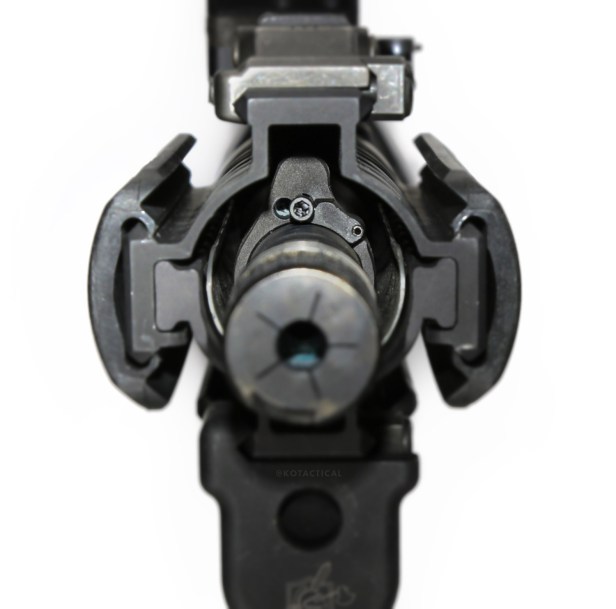
Gas Block. Since the gas block on the SR-635 is for the most part hidden under the URX handguard, I took some liberty in choosing this component.
Given the barrel length, AR-15 Pistols tend to be somewhat over-gassed and several companies now make low profile adjustable gas blocks.
Having seen how well the Superlative Arms’ Direct Impingement Bleed Off Adjustable Gas Blocks work with suppressed and unsuppressed pistols (as well as their ease of adjustment and retaining its setting), that’s the route I took.
The problem is clearance inside the rail. The bottom of the gas block wouldn’t clear the lower rail’s heat shield. My machinist removed some excess material from either side of the gas block, then he carefully cut a channel through the lower rail’s heat shield.
The width and length of the channel was measured to ensure it would allow the lower rail to slide on and off the body of the URX rail during assembly, and also that the gas block would never make contact with the free float rail.
The modifications aren’t visible once assembled. The bottom of the barrel was then correctly dimpled to lock the gas block in place using the rear set screw.

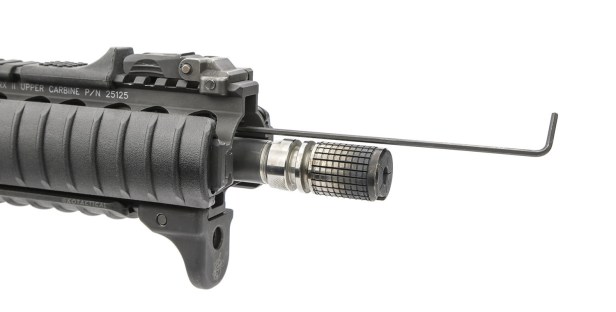
Adjustment of the gas block is pretty simple. Using a long hex key (included with the gas block) you unscrew the bleed-off valve all the way to its outer most position. You then incrementally turn in the valve until you get consistent lock back with the least compressible ammo you plan to use. Once a successful setting is found, you then turn it in a couple more clicks for reliability.
This gas block uses a spring detent to secure the valve position and doesn’t require threadlocker like some other adjustable gas blocks available on the market.

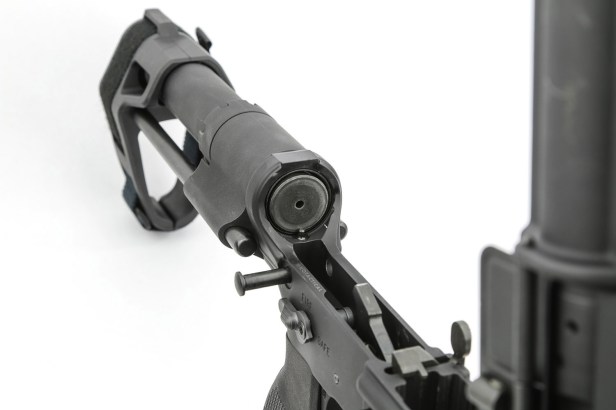
Arm Brace. This gun isn’t “legally” a rifle. It’s a pistol. And therefore I can’t put a stock on it. The next best thing for me was a Pistol Arm Brace. There are several options out there.
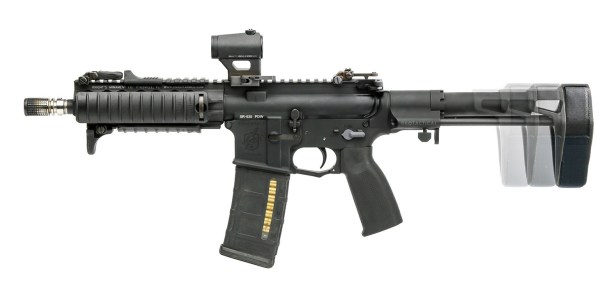
I’m a big fan of the SB Tactical PDW Brace. It’s compact, adjustable to three positions and looks great. I often get asked why I did not go with the Maxim Defense PDW Brace which is similar in design to the SB Tactical brace. While the Maxim brace definitely allows itself to be collapsed into a smaller package, it requires a dedicated proprietary buffer/spring assembly.
I knew that to get this gun running the way I want, it would require some testing of different buffers and buffer springs. Hence the SB Tactical PDW Brace that uses any regular type carbine springs and buffers would be the way to go.
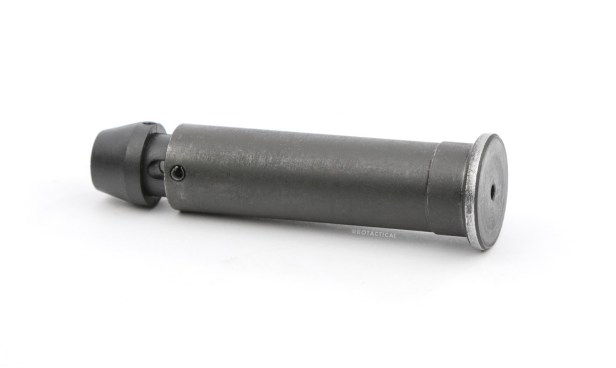
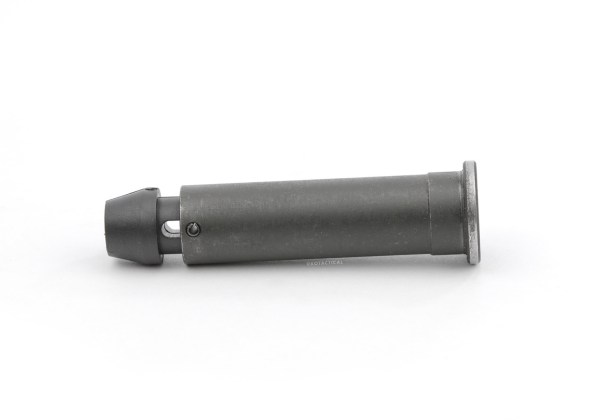
Buffer Spring and Buffer. This setup is running a JP Enterprises JPSOSC Enhanced Carbine Buffer Spring and a MGI Carbine Rate Reducing Buffer. The gun is remarkably soft shooting and that is partly due to the adjustable gas block, but it’s more thanks to this buffer and spring combination.
The MGI buffer is heavier than most aftermarket buffers, but also has an internal spring that compresses to absorb additional recoil before it reaches your shoulder. This one component made an incredible difference in felt recoil. So much so, I’m considering putting it in more of my guns.
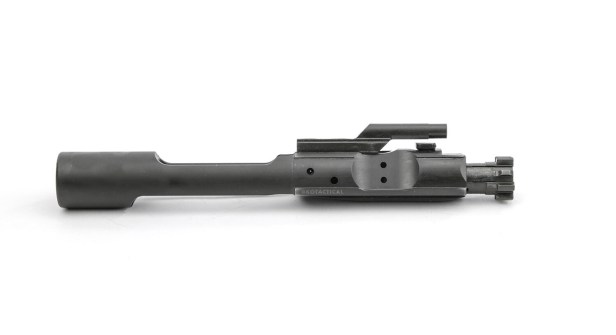
Bolt Carrier Group. The SR-635 has no forward assist mechanism and the Young Manufacturing YM SP-1 Bolt Carrier Complete (YM-056) used in this build is in the phosphate finish and has no forward assist notches on the side.
The Bolt Carrier in the real SR-635 also didn’t have forward assist notches, though its manufacturer is unknown to me. The SR-635 has the KAC E3 bolt whilst mine is a standard AR-15 bolt pattern.
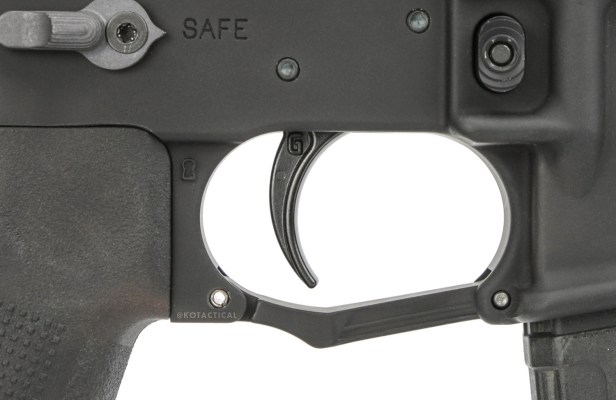
Trigger. I’ve always been a fan of Geissele Automatics Triggers. This particular lower has a Geissele SSA-E trigger.
Miscellaneous Accessories:
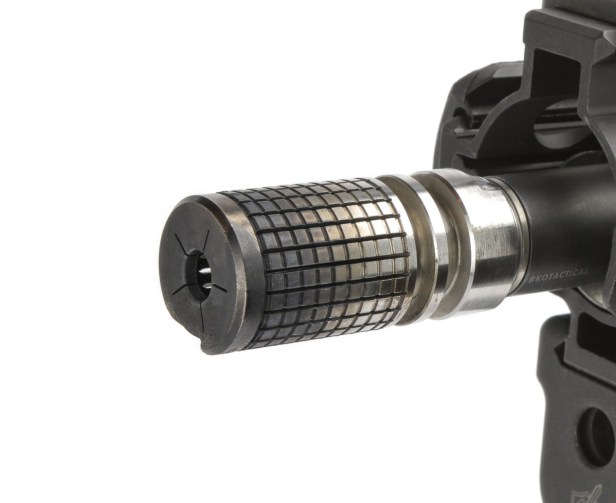
– KAC Inconel Triple Tap Muzzle Device
– KAC Aimpoint Micro Mount with Aimpoint Micro T-1 and KAC Aimpoint Battery Cover
– KAC Micro Front BUIS
– KAC Micro Rear 300m BUIS – on the real SR-635 this is a BUIS built into the upper receiver using components from a KAC 300m offset rear BUIS.
– KAC Ambidextrous Safety Selector (Semi-Auto) : I prefer the scalloped selector option on the right side.
– KAC Trigger Guard
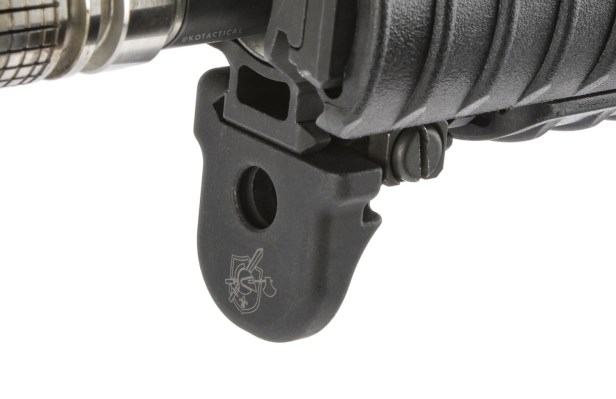
– KAC Handstop for 1913 rails with QD sling socket

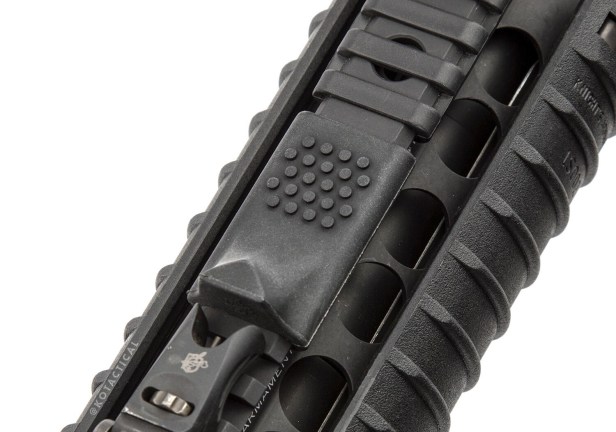
– KAC 11 rib panels (x2) and a 6 rib panel
– KAC Thumb rest : Not seen on any of the photos depicting the SR-635 (the thumb rest came after the SR-635 unveiling). However, I find the thumb rest when used in conjunction with the rail panels and handstop allows for great ergonomics and gives maximum front end control to the gun.
– Charging Handle standard milspec
– PTS EPG-C (Enhanced Polymer Grip – Compact). Yes it’s a pistol grip made by an airsoft company (formerly Magpul PTS, the airsoft arm of Magpul).
It’s also made using authentic DuPont polymers and I had a significant role in the grip’s design. While it’s not advertised for real firearms (for liability’s sake) it drops in on any real firearm without modification.
The grip angle is more vertical than A2 grips – allowing for a more natural grip with this compact setup – and it’s incredibly ergonomic; with great texture for maximum traction.
In short, it’s one of my favorite grips. The real SR-635 pistol grip is believed to be a milspec A2 grip that’s been modified (finger humps removed; the sides have been planned down and dimpling applied to it). It’s not commercially available in its finished state.
Either way, the EPG-C is quite simply a superior grip.
Conclusion:
This was a labor of love. Some parts were easier to acquire than others. Some parts required modification. Until I fired that first shot I wasn’t entirely sure if the firearm was going to work. Once tuned (took approximately 20 rounds to adjust it to the right setting) the gun quickly became one of my favorites.
Granted, shooting .223/5.56mm out of an 8.1″ barrel has debatable ballistic capabilities, but I knew from the outset this probably wouldn’t be much more than a range toy. I was okay with that.
All in all, I’m exceptionally happy with the end result and I can’t wait to take it out for some more range time!
Follow Alex on Instagram @kotactical
The Reptile House Blog is back on Facebook and Instagram