

Words and pics: Milsimminded (CT-13)
My Airframe build has a long story behind it, so tweak your Camfits tight and strap in!
Before I start my epic narrative, here’s the purpose behind the lid project:
- To protect my head in a comfortable way
- To give me a platform to carry equipment like NVGs, lights, strobes, earpro and comms

Before the CAG Impression
Prior to my CAG impression, I met @Nayton03 from TACTbelgium. His gear inspired me – especially his Airframe. Later I was influenced by some of the other titans on the European CAG impression scene; including Seraph and Dutch from Sweden’s now defunct TF Green, and Norway’s mighty HHK. I actually ended up joining TACTbelgium – a year after meeting Nayton03 – as CT-13.

While I was inspired by CAG-orientated teams, I actually started to build my Airframe with handpicked gear – way before I thought of doing a CAG impression. So, it’s been iterative.

First, I bought a TMC airframe (old gen). The shell was ridiculously off spec and paper-thin. The rails were next to useless. The finish was reflective. The pads offered no protection and little comfort.
The next step was to buy Crye rails. These offered the level of stiffness I needed to run accessories.
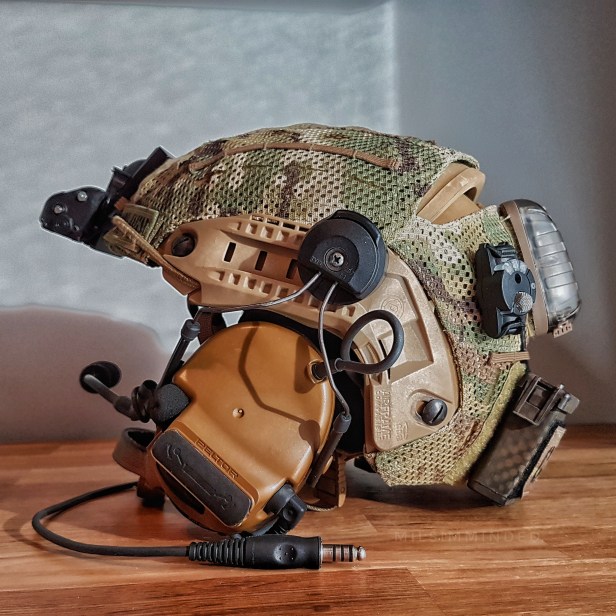
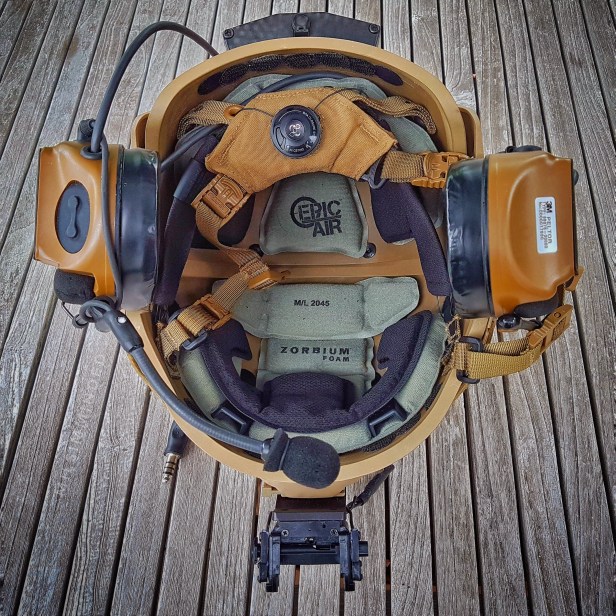
The Team Wendy Epic Air Liner was recommended by Nayton03, I bought it together with the company’s Camfit. This combination makes the Airframe as comfortable as a baseball cap; and it can improve your safety – providing you use a safety rated shell.
The combination allows me to route my Peltor wires in a comfortable way inside the shell. And it really helps to ventilate the lid. In summer, this goes a long way in helping me cool my head and avoid fogging my eyepro (I use EDGE Acid Gambit glasses, BTW – as recently reviewed by Rich Norman right here on TRH Blog).
The Camfit give you a dial to lock the lid tight to your head. A band grabs your head around the temples, so it provides an extra surface with which to distribute weight. This gives the lid a lot more stability when using nods.
It also delivers extra retention. I don’t even need to close the chin strap to keep the Airframe on my head – even when I’m inverted.
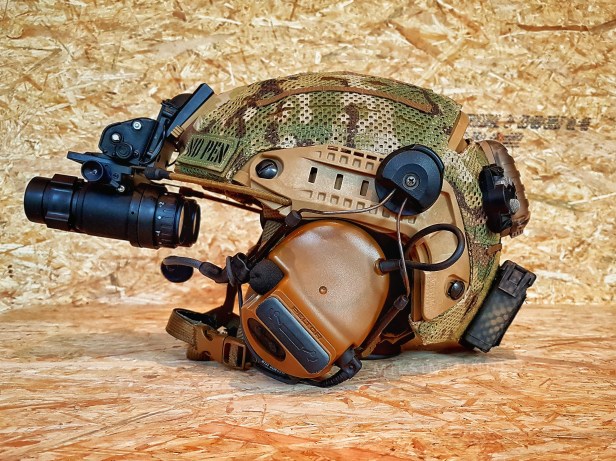
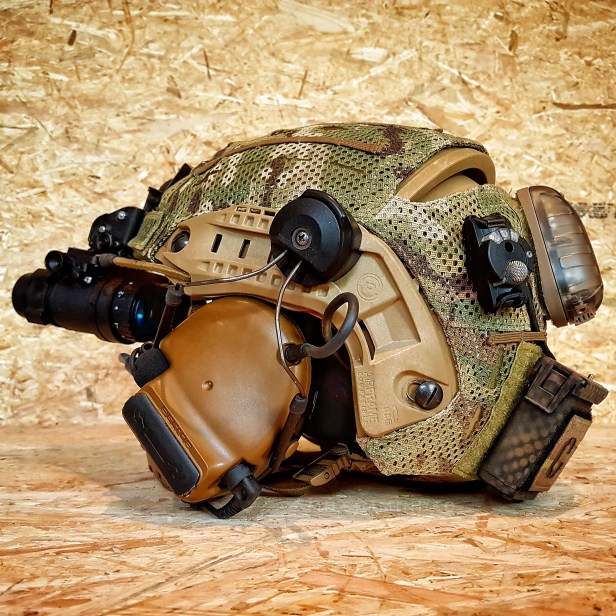
Next, I bought a Spartan Village Multicam cover, added a V-light and a repro Manta for night games.
Then I bought a set of Peltor XPIs. They were great, but when I eventually started my CAG impression, I traded them in for Comtac 3s.
I use Comtacs 3s, as they both protect and enhance my hearing – while giving me great comms; especially when combined with the Arc rail adapters. This way I can remove them from my head at any given time – for when I need to cool off, or need to get a better feel for sound at a distance.
The only thing to keep in mind while wearing Comtacs is to wear compatible glasses. I once almost lost an eye because of this – so beware!
But I’m getting ahead of myself…


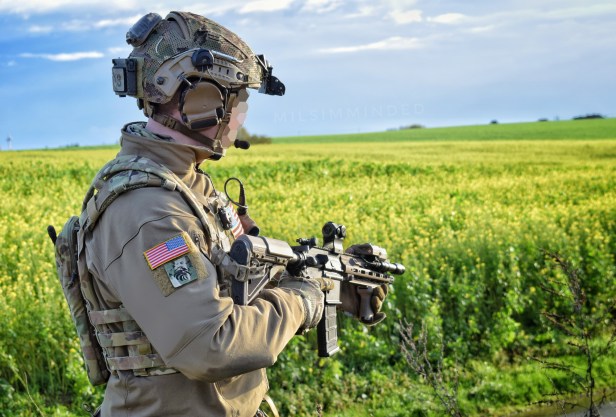
The CAG Impression
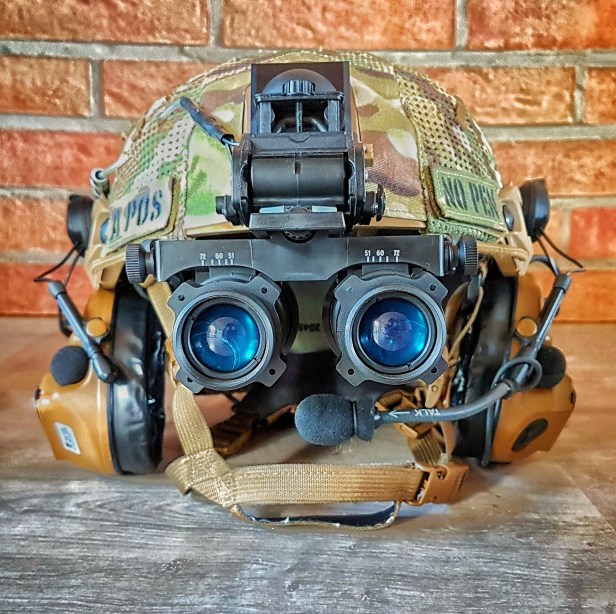
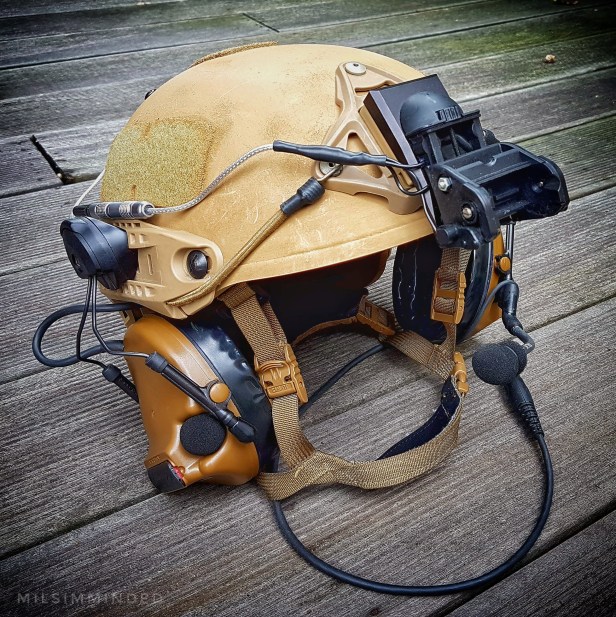
The first real step on the CAG road was to get rid of the Spartan village cover, and run a Crye cover.
I used a TMC knock off until I sourced an RS one. I changed the Manta strobe for a Helstar 6 (however, I have since learned that it’s incorrect for my current time period, so I will change it to a more appropriate one soon).
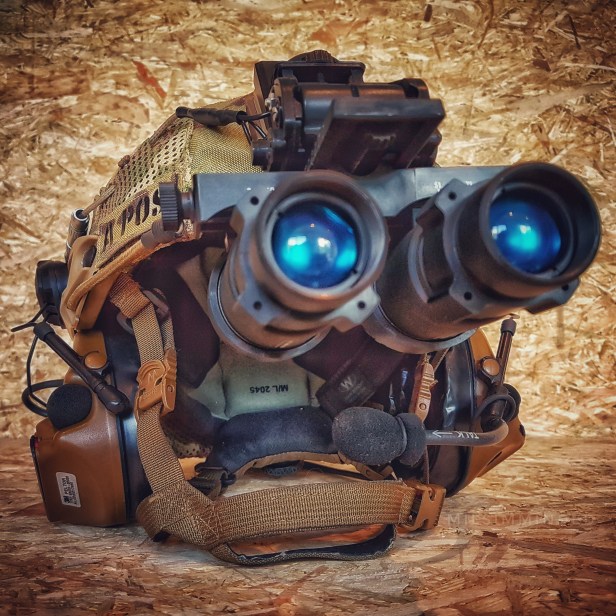
I tracked down an Anvis mount and a battery pack. Most people would go with direct mount, but the base plate allows me to run a skeleton shroud; so I can run any kind of NVG I want.
I swapped the old gen TMC shell for a new gen. The sizing is perfect compared to the old gen. I painted it the correct colour and also used a trick Gearmonkey75 told me about, to get the texture to look more realistic. Hit him up if you want to know more.
The weight and build quality of the new gen TMC shell is worlds apart form the old gen. It is a lot heavier now, but it adds to the immersion.
I added blast gauges – just as details to get a more kosher look. They don’t have a function at all (but it’s all about the small details).

Next Steps
The Helstar 6 will be transferred to a future bucket (that will represent a more recent CAG impression), and the Helstar 5 will take its place. I’ll also change the battery pack to a more modern remote battery pack.
And, when I can source it, I’ll swap the older Anvis mount to a DPAM mount.
Parts List:
- -TMC Airframe (New Gen)*
- -Crye Precision Cut-out cover
- -Blast gauges*
- -Helstar 6
- -Peltor Comtac 3 Tan (single)
- -3M Arc rail adapters
- -Team Wendy Epic Air Pads
- -Team Wendy Camfit
- -Opscore skeleton shroud
- -Anvis mount on base plate*
- -Low profile NVG battery pack*
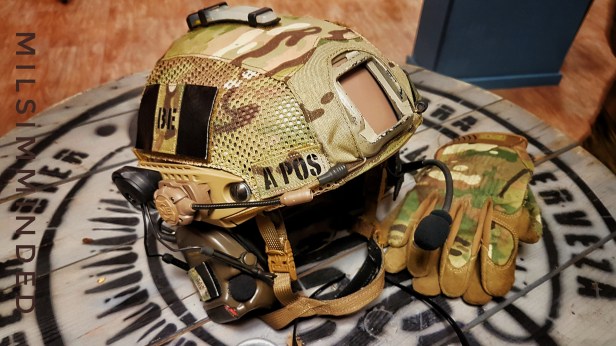
- -IR reflective blood group and allergy patch
- -Crye Precision Rails
- -Ferro Concepts Second Chance
- -Crye Precision Arc Rail Adaptor Set
- -S&S M-ax mount*
- -Crye Precision velcro for Airframe – Tan
- -Contour mount (placed on the right side)
*Denotes repro
