Introduction
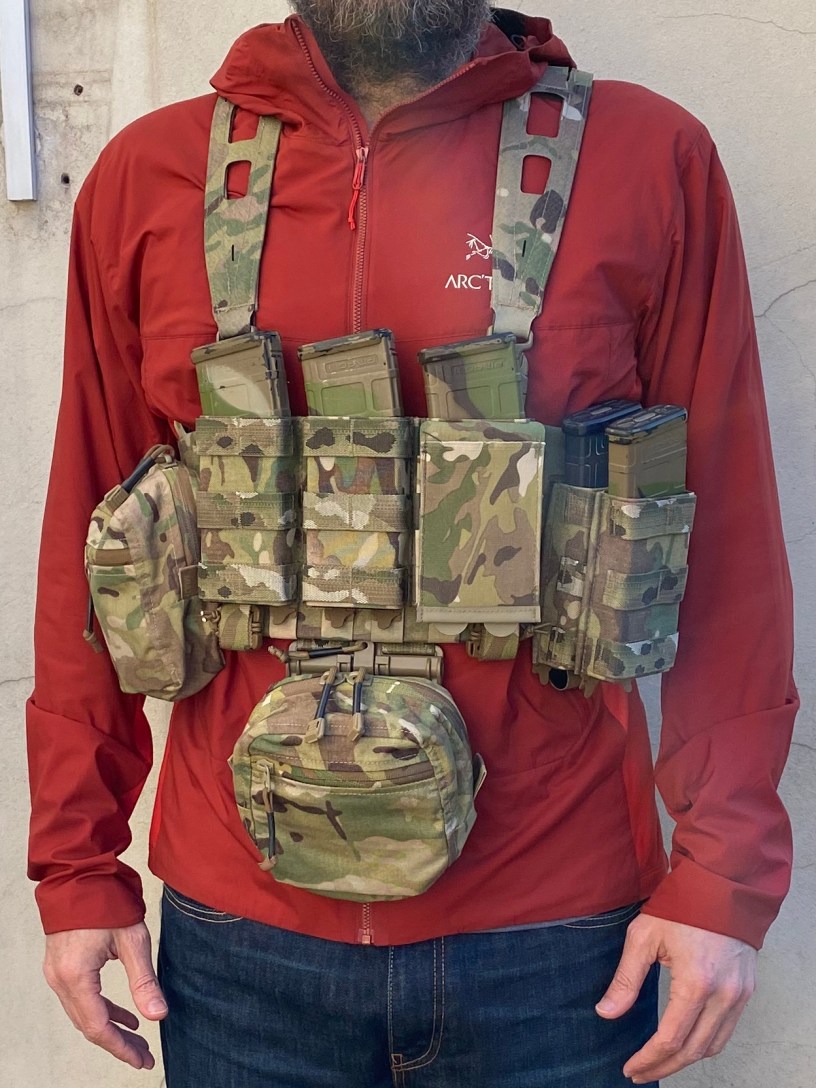
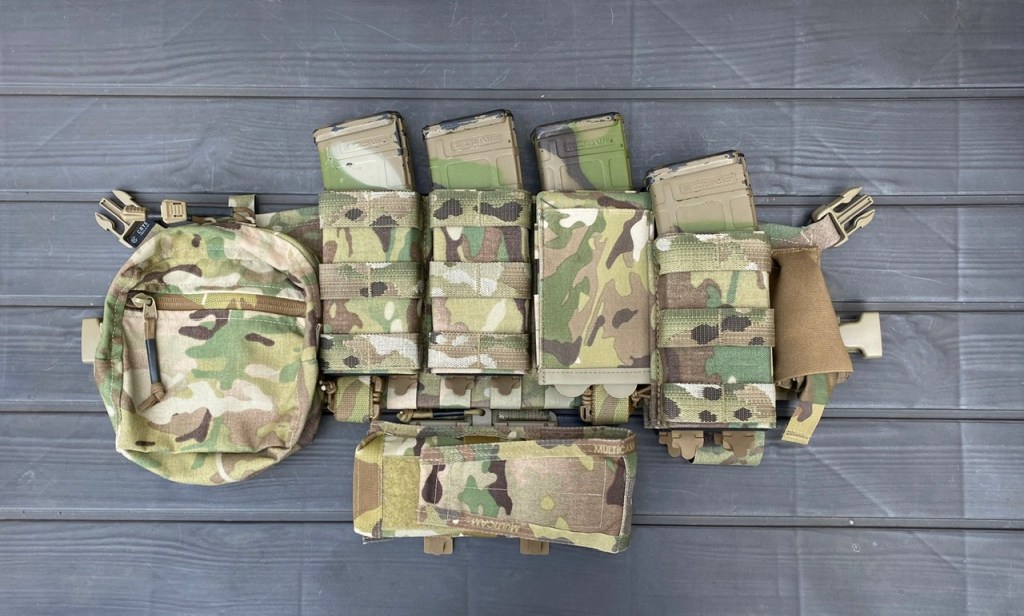
For my uses, Crye’s Airlite Convertible Chest Rig is damn near perfect – as readers will know from my long term review.
That is, except for one aspect.
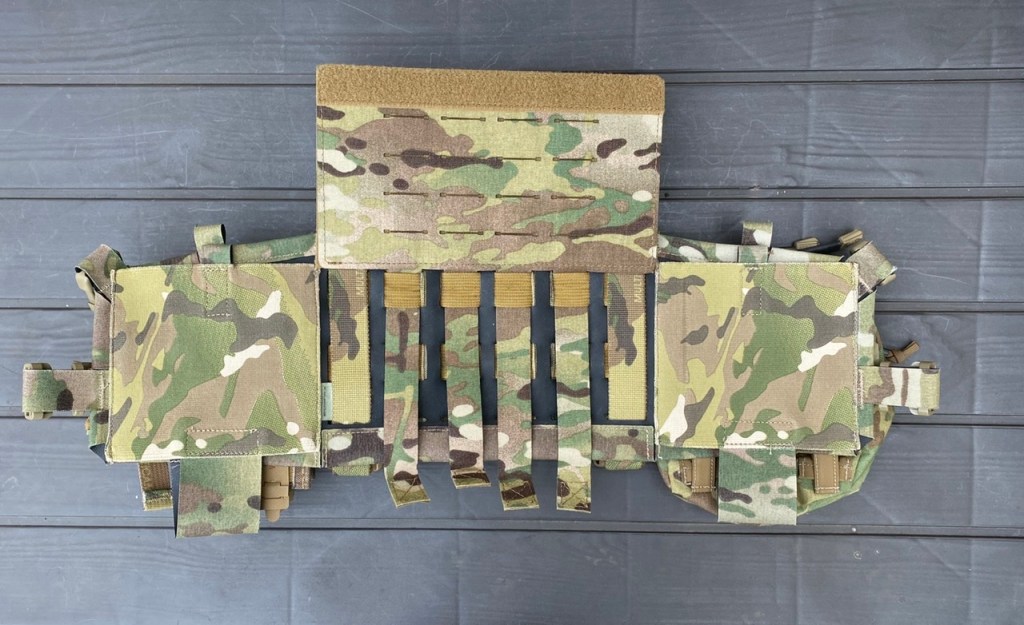
Mayflower’s PC placard attachment method has become the industry standard for chest rigs. Fastex clips above and hook velcro on the reverse means rigs to this standard can be used as placards; providing that the PC in question is outfitted accordingly (and nowadays most PCs are, or can be adapted using AXL ancillaries).

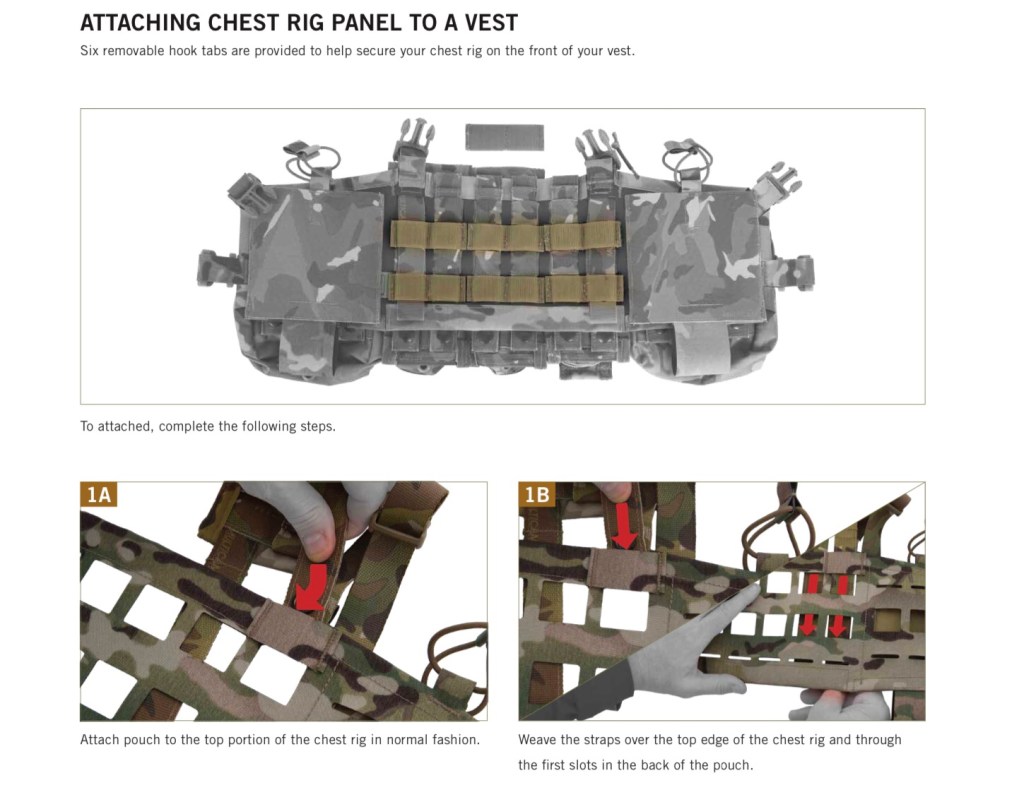
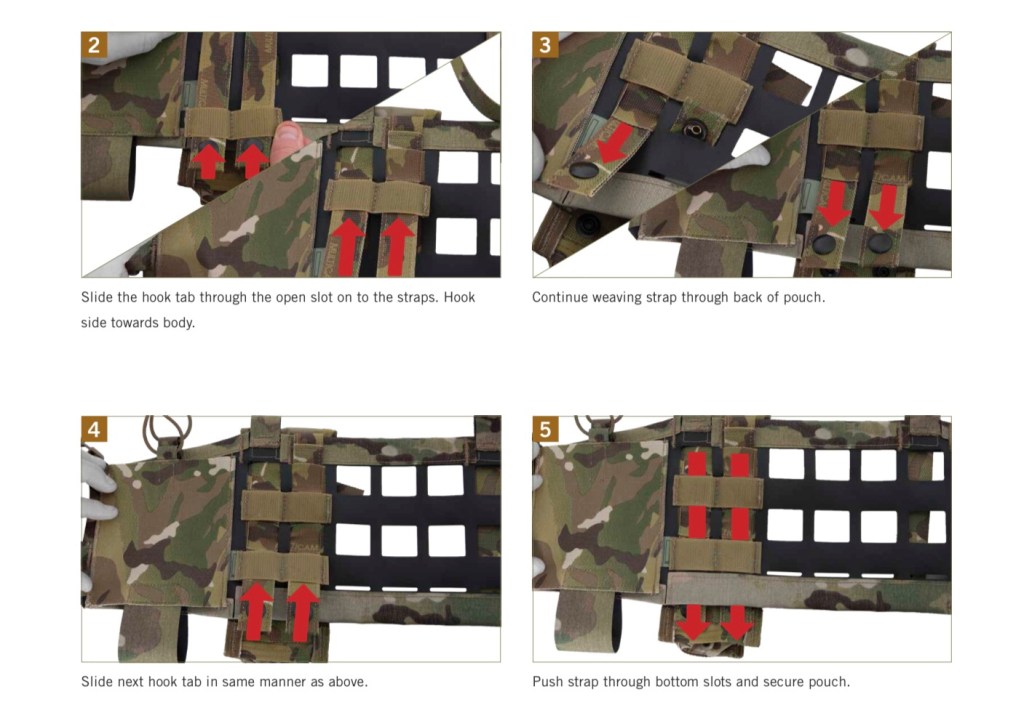
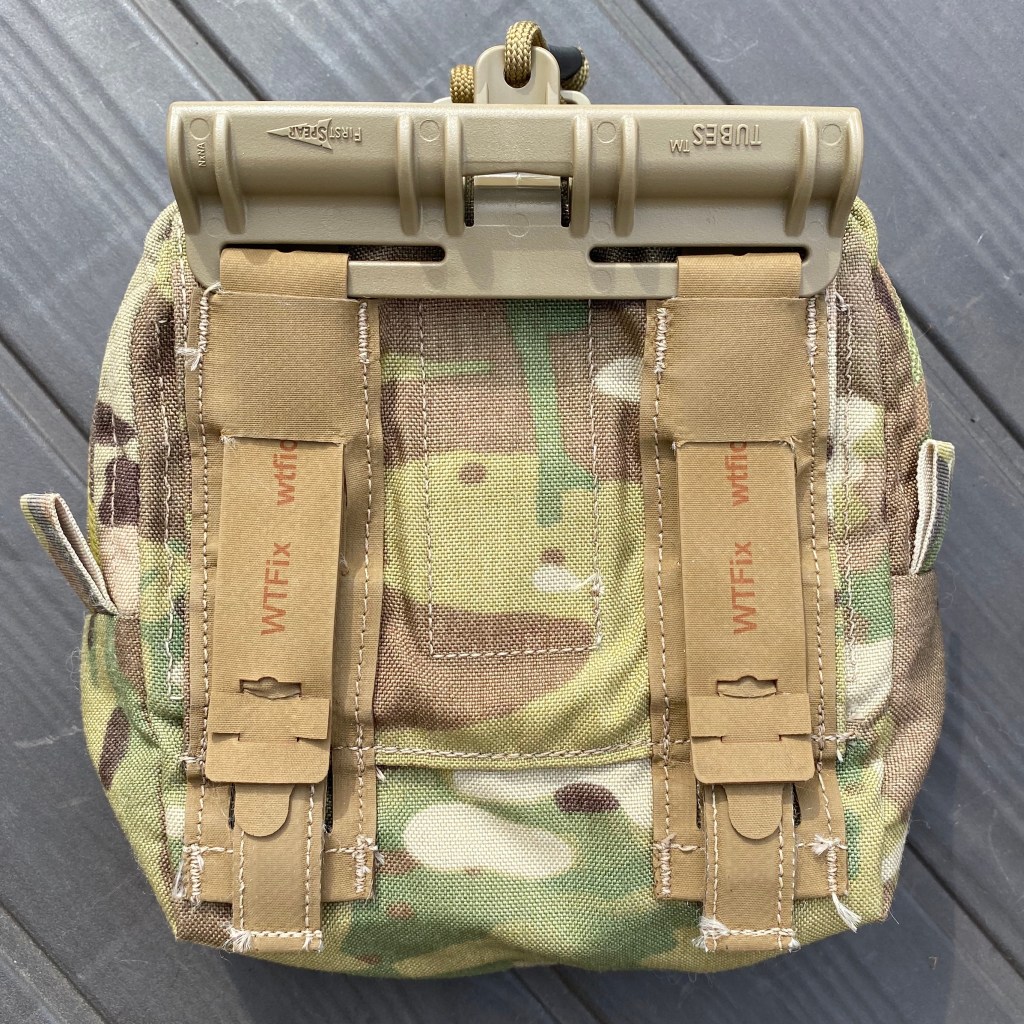
In fairness to Crye, they’ve not ignored this in their implementation. Fastex clips are not only present, but rig ride height is adjustable through their use. Double points. That being said, the company’s solution to adding hook velcro to the reverse of the rig is less robust an idea; relying only on a sparse handful of hook sleeves. (See Appendix for Crye’s illustrated instructions.)
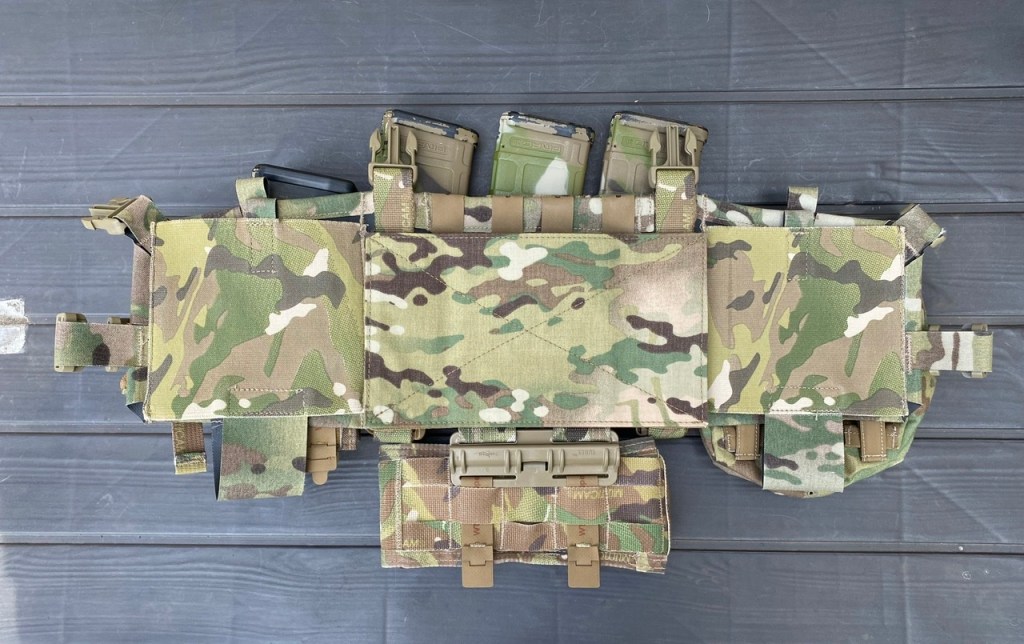
Why does this less than optimised velcro contact matter, with the ability to lash the rig’s wings to the PC? Well, there’s also the question of securely attaching an ever popular dangler style pouch to the rig. I doubt whether this escaped Crye’s attention, and I’m sure they were expecting the aftermarket to quite literally fill the gap.
Development
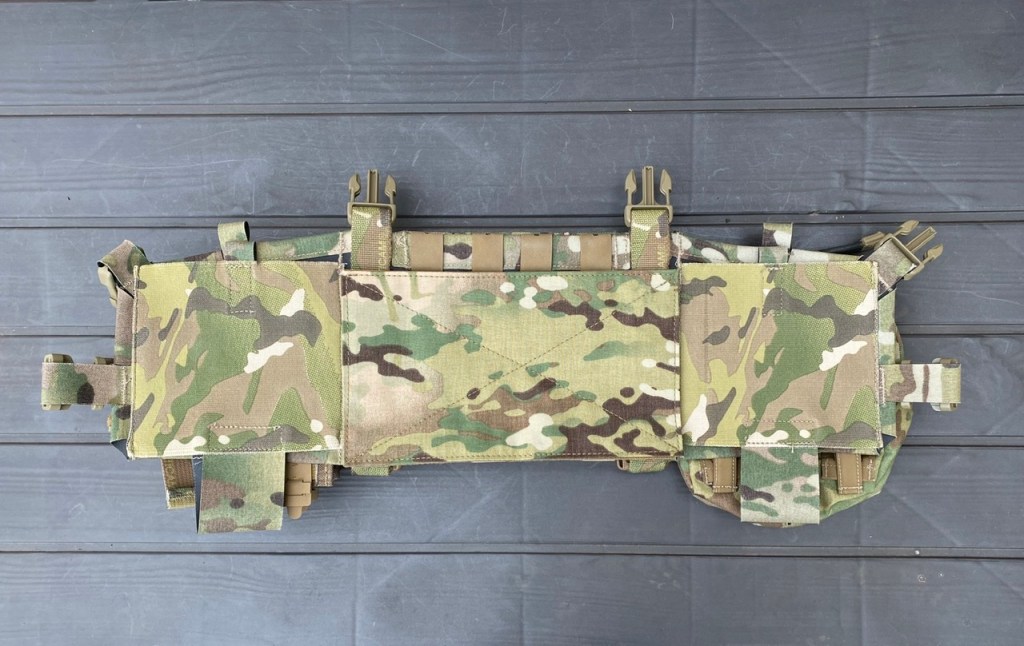
I decided not to wait. I worked with my good friend Andy from TacBelts to come up with something simple, but effective enough to provide a solid foundation to progress my Firstspear Tubes hack.
And that’s really the motivation for doing things the way we have, with the resultant PALS backed hook velcro panel.
There are any number of useful, lo pro and expedient methods for adding velcro to the rear of the Crye rig.
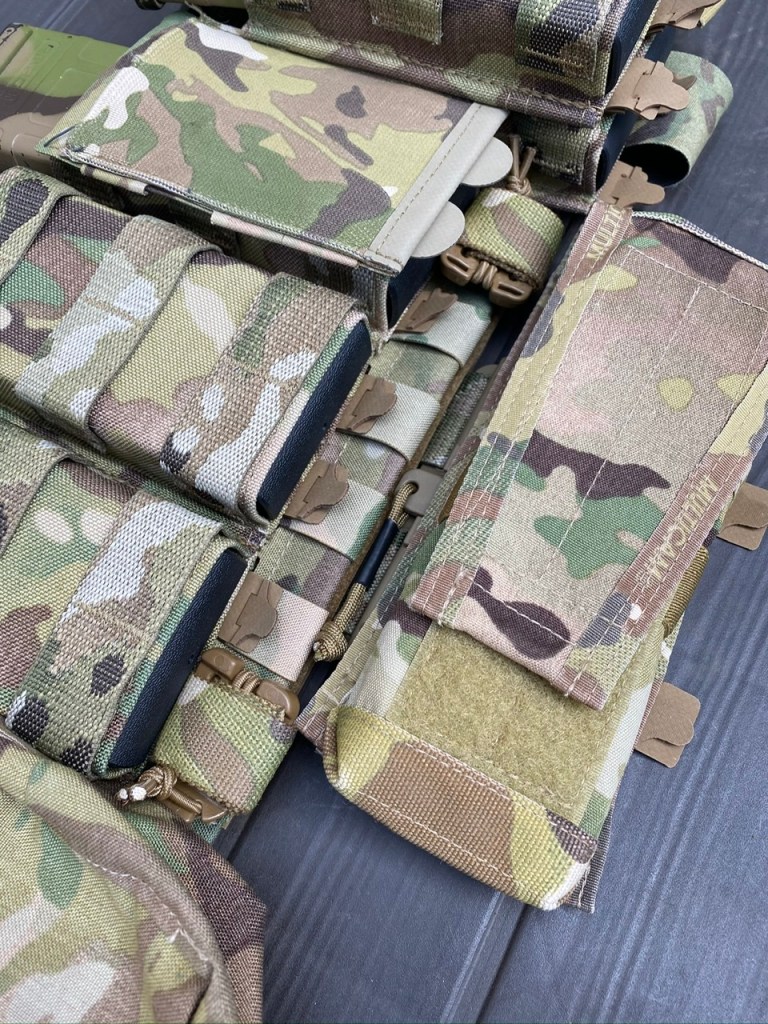
However, the weaker foundations tend to warp or move under the force required to separate a Tube. I discovered this only when testing – it hadn’t occurred to me prior.
That’s why the panel Andy and I decided on is, while uncomplicated, very much belt and braces in terms of torsional stability. It also adds some thickness to what is, luckily, a very thin rig – but that’s the opportunity cost of enhanced capabilities and to be fair it goes unnoticed when worn.

I enjoyed working with Andy and it was an interesting process. Needless to say I’ve seen enough of his high quality products to know his skills in principle, but it’s the first time that as a client I’ve said, “I want to do this. How do we do it?”
In addition, you won’t find Andy’s level of precision (no pun intended) in Crye’s stitching. Mass produced is one thing and a bespoke, artisan implementation is – self-evidently and by definition – another.
Articulating the Design
I started by taking measurements from the back of the rig, where the panel would integrate. The annotated pic I produced was simply for mine and Andy’s reference purposes – especially since the rig was with me and not Andy (which would have been the optimum situation for both of us).
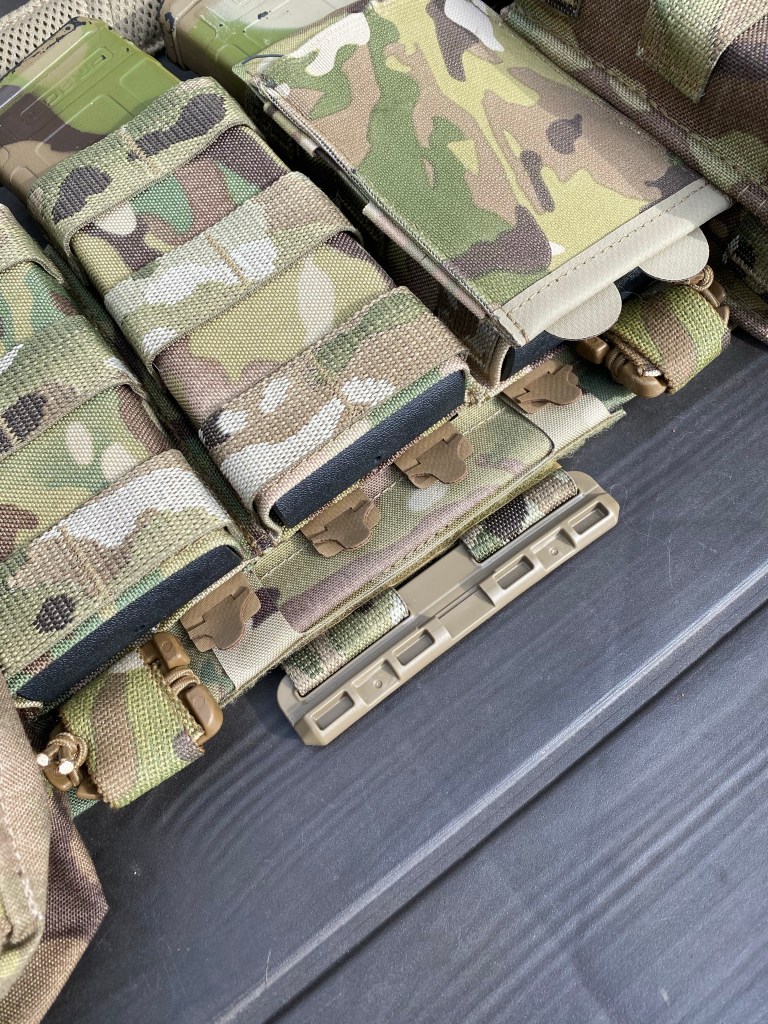
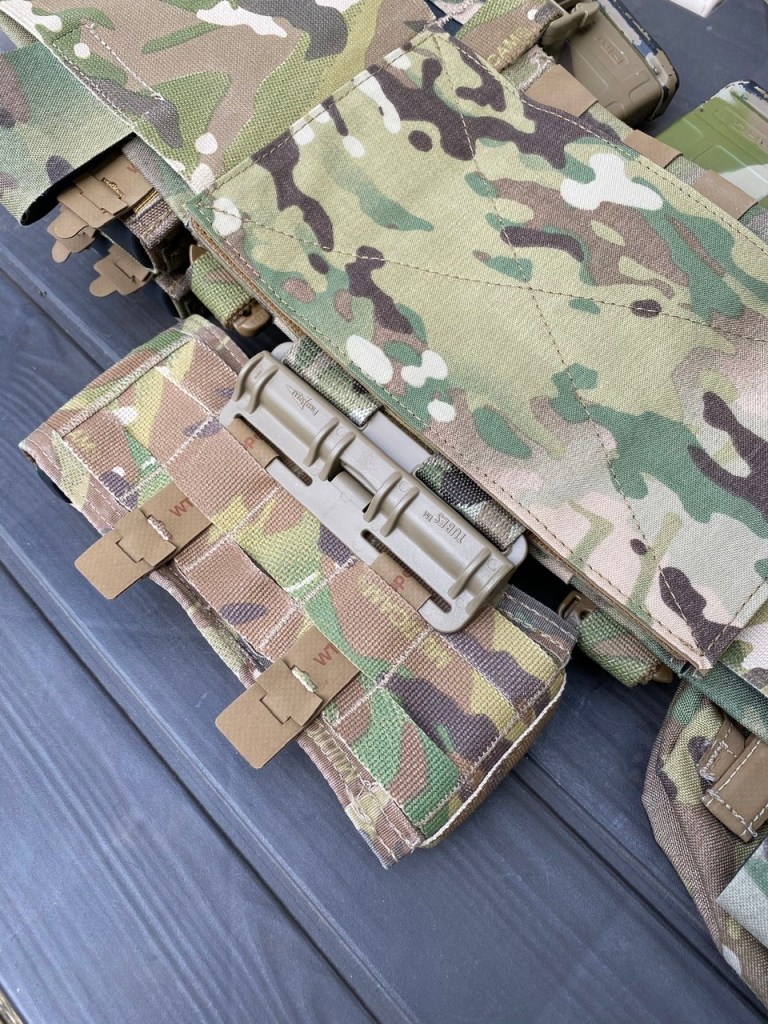
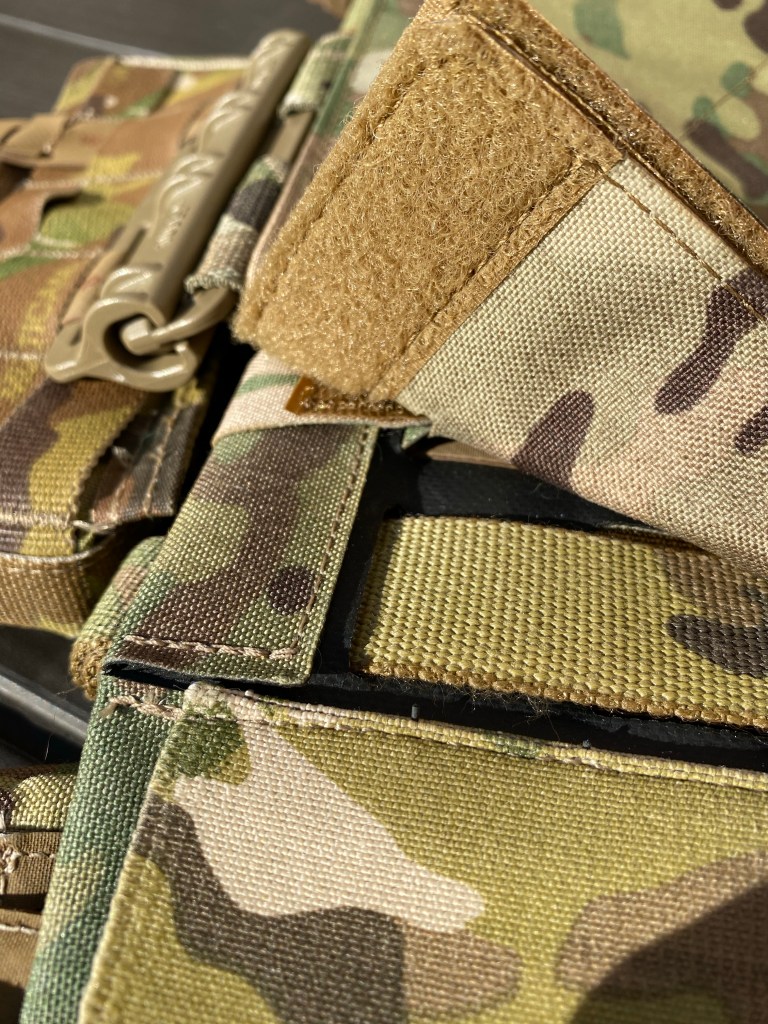
The exposed PALS columns on the rear of the rig’s pouches would be used as the panel’s main anchor points. In fairness to Crye, that’s a really useful feature which makes this hack possible.
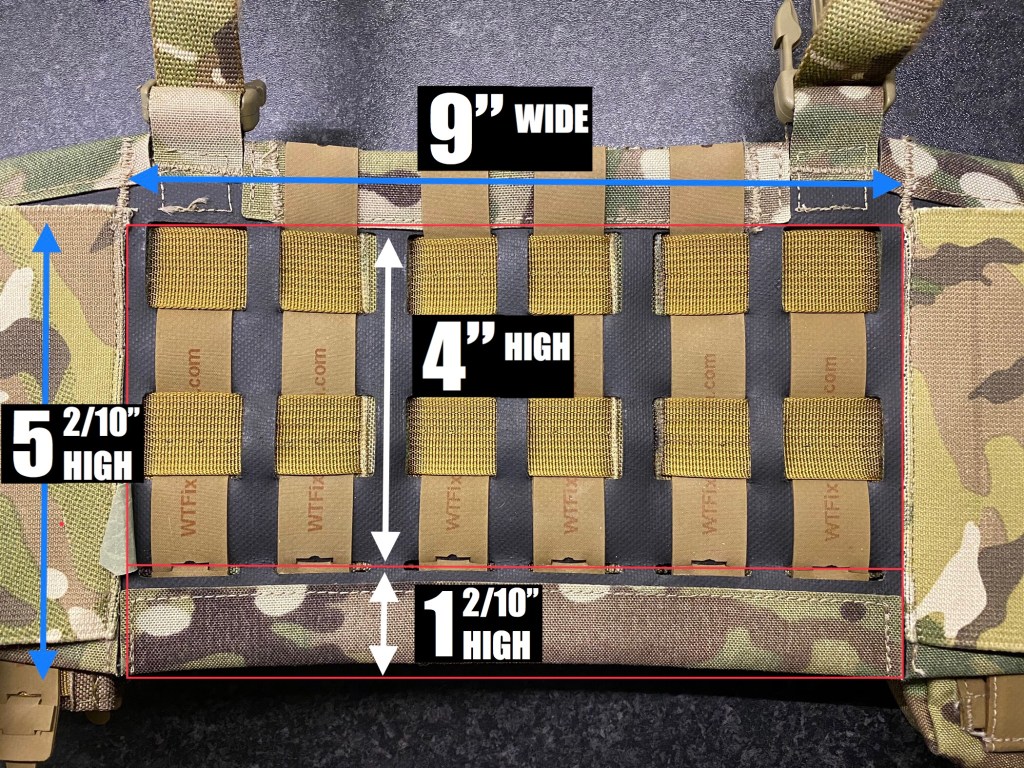
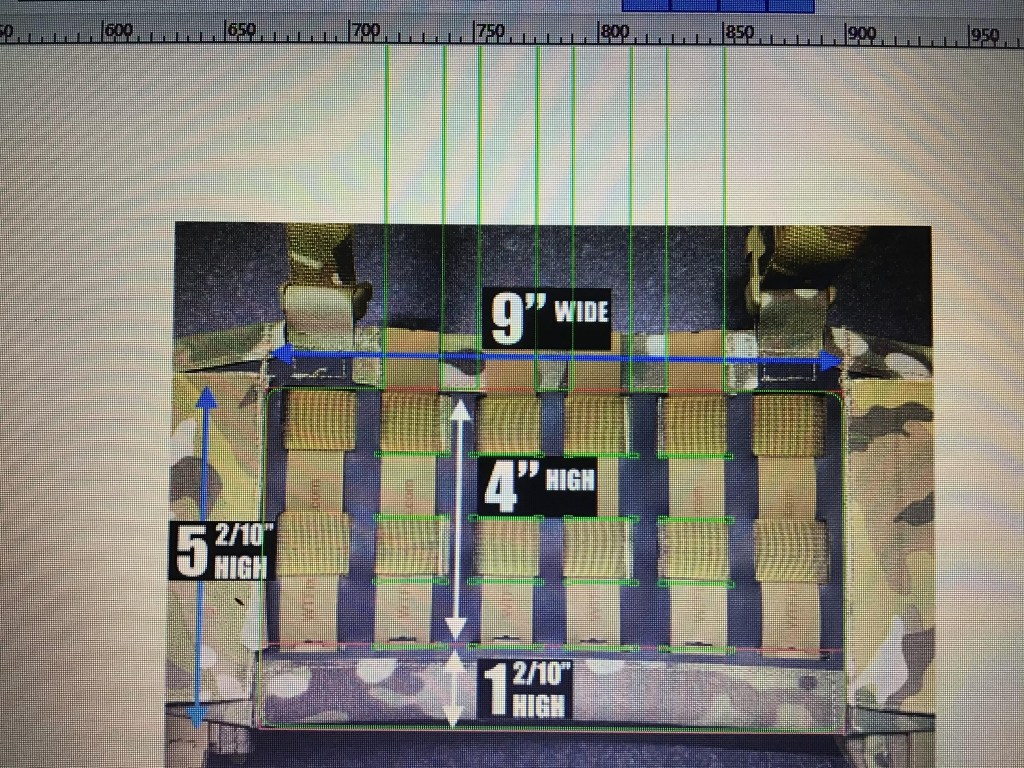
Although the panel would span all six columns at 9” wide, it would utilise the central four columns only. That’s because I use the flanking columns to tidy or repurpose excess webbing from the Fastex clips.
Next, I tried to articulate the idea visually with just pencil and paper. The diagram didn’t need to be to scale, which was great because I didn’t have A3 paper to hand. In addition, drawing stuff in imperial measurements (US made stuff isn’t usually metric) or converting back and forth to metric is a PITA.
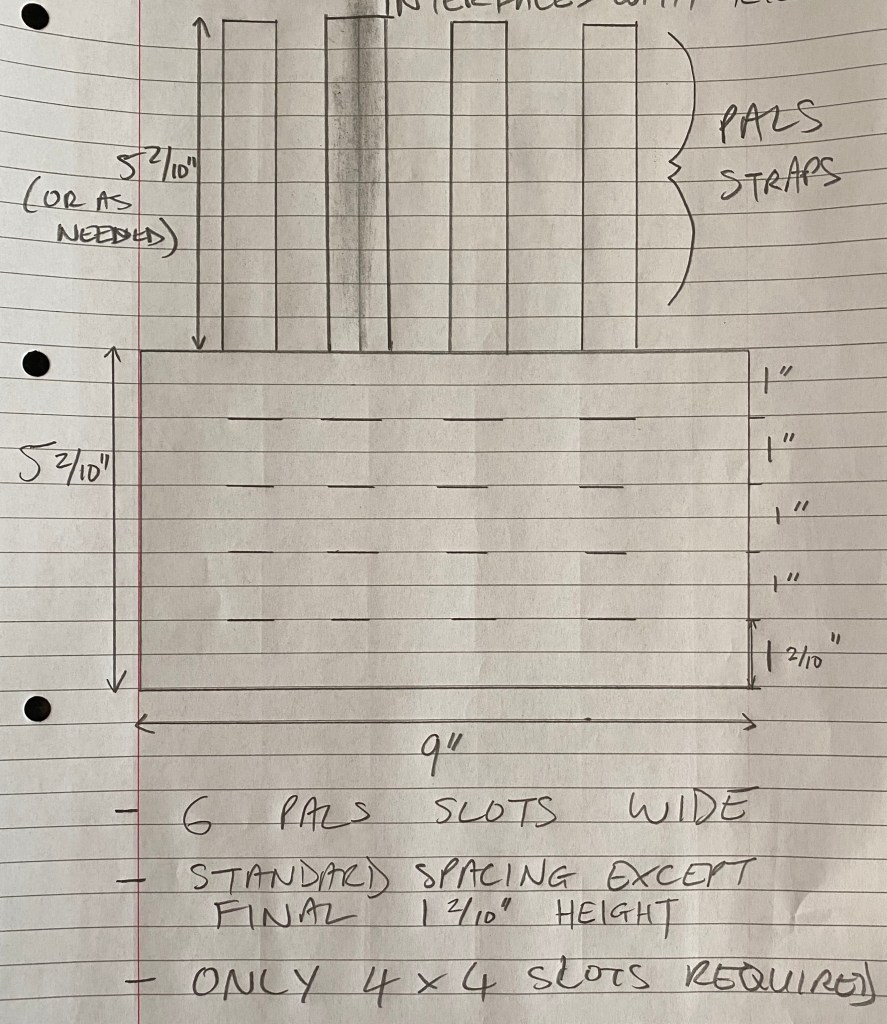
Don’t let the poor quality of my work fool you. This was the hardest part for me, having not taken pen or pencil to paper in some time. Having done it once, it now fills me with less trepidation for future projects.
Clarification and Design Revisions
Next, Andy and I spent 30 minutes on a Skype call to make sure we understood each other; Andy leading with an assessment of my requirements and practical design solutions: choosing the right materials, deciding the width of the PALS straps to ease threading, deciding how the PALS straps would attach to the panel at their termination point, and giving me a steer on how he’d approach the job. The first 15 minutes was related to the project and the rest was spent catching up, as we’ve not had a proper chat since a game before lockdown.
Afterwards the second guessing began (simultaneously the super power and bane of the conscientious). We traded some messages and realised that we were actually correct in the first place. It’s better to reflect than to go ahead with something that could be sub-optimal, but luckily we simply reaffirmed what we initially devised.
Andy then checked that his own articulation of the design was a match with the rig.
Implementation
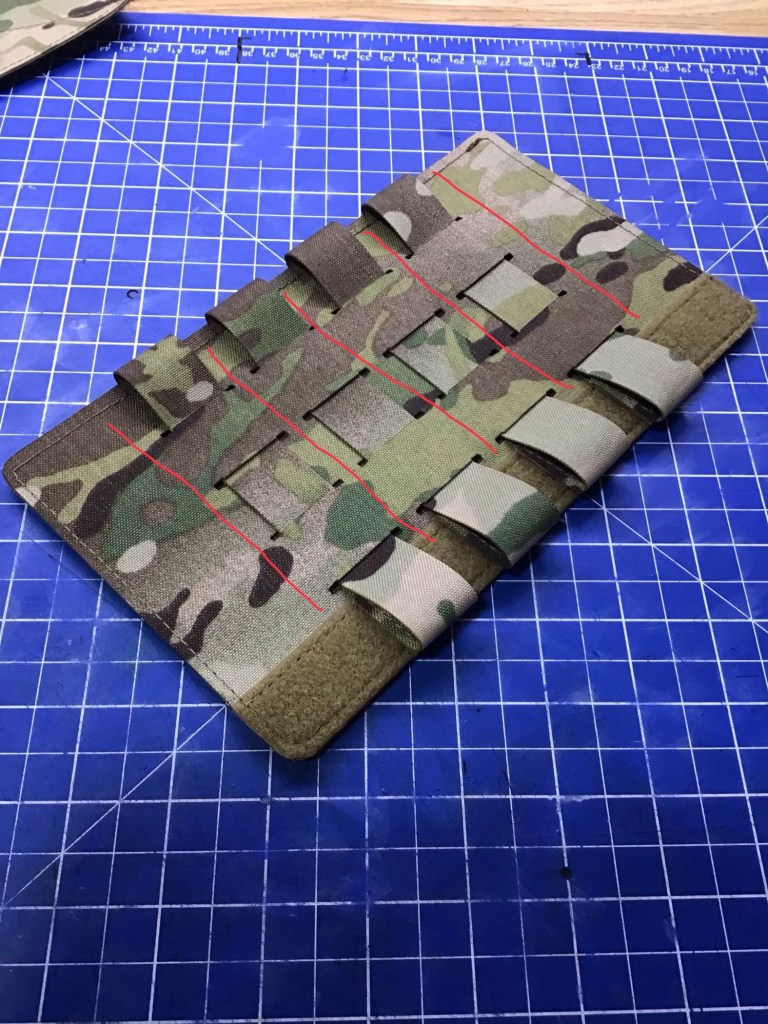
Andy works fast! Pretty soon the panel (and its cover) were potentially finished, but Andy’s attention to detail left one final question.
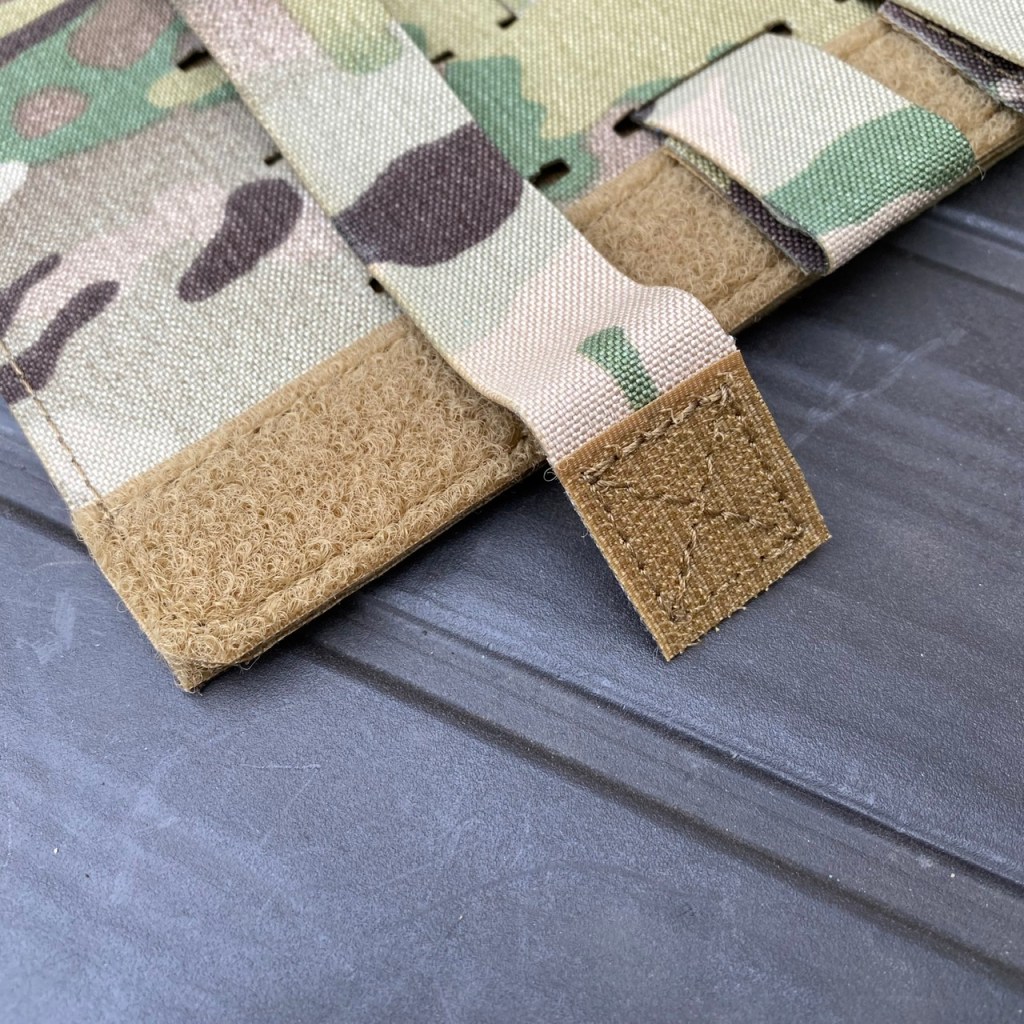
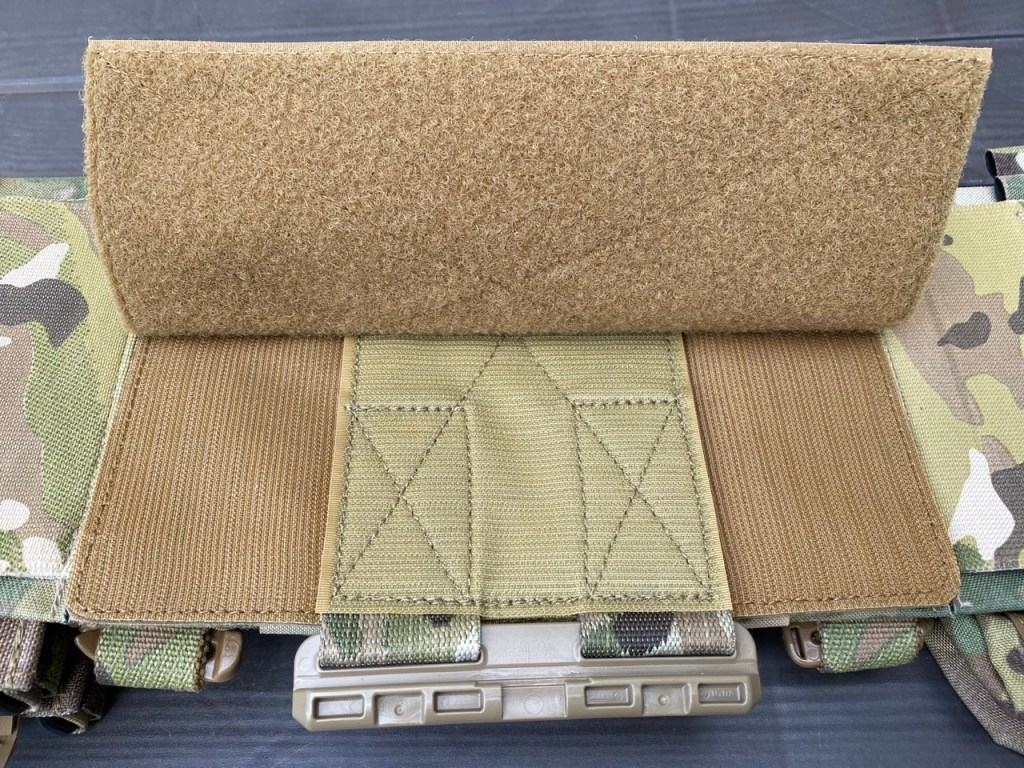
Should the areas marked red be stitched down? We agreed they didn’t because in doing so it would not add much torsional stability, while it would make threading a lot more difficult. This was a good call, as I found when weaving the PALS straps.
The Panel Arrives
Andy doesn’t live too far away from me, but with the post as it is right now I was surprised to find the panel arrived next day.
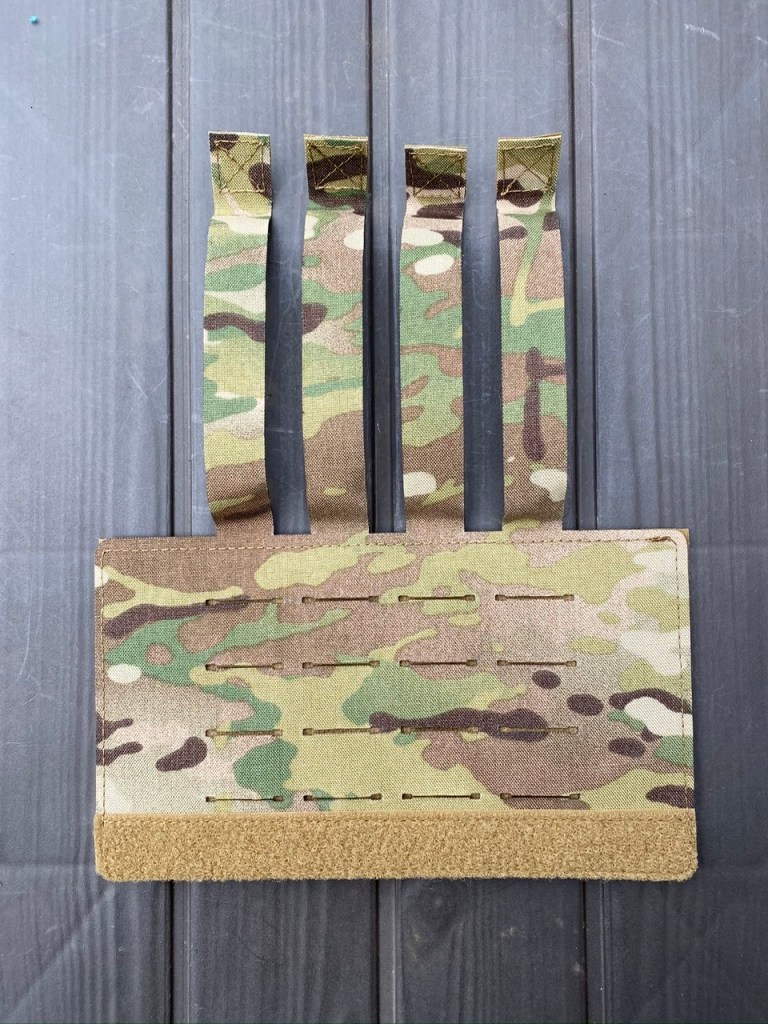
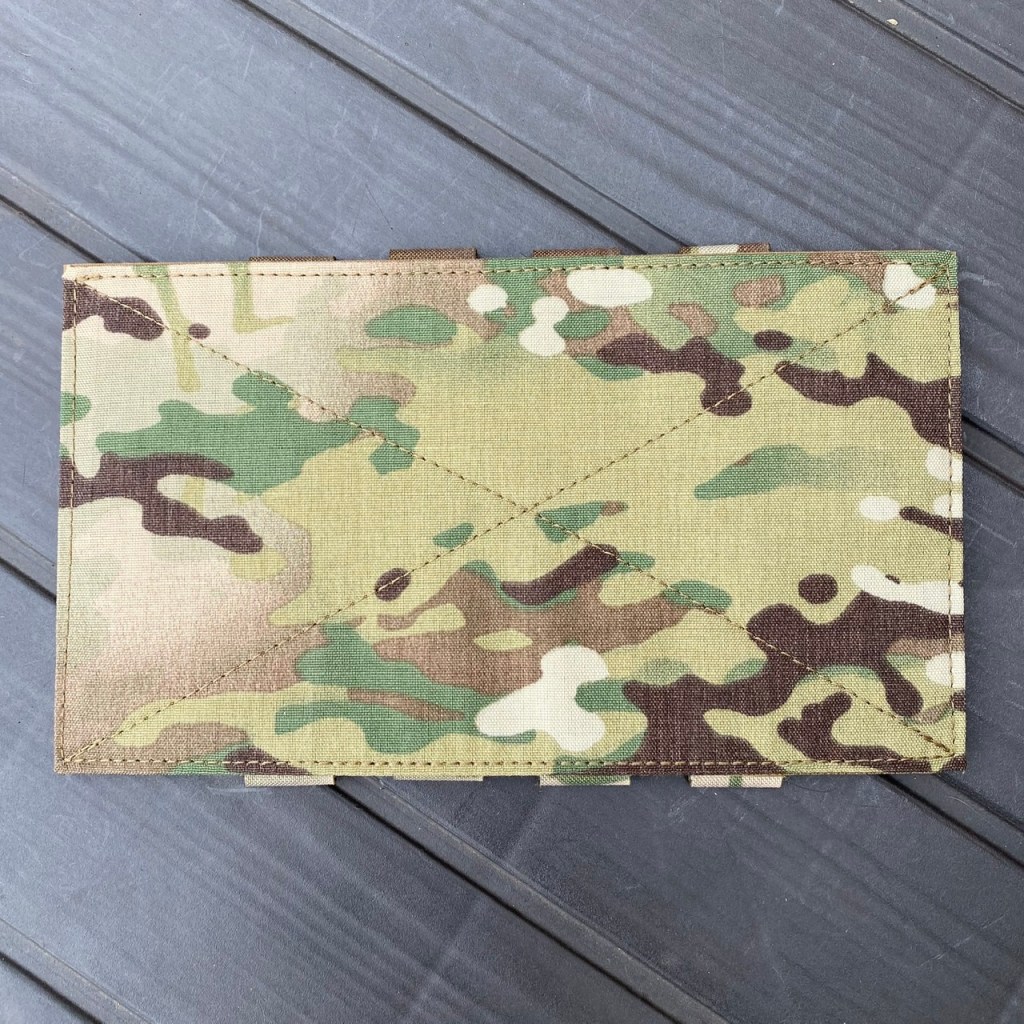
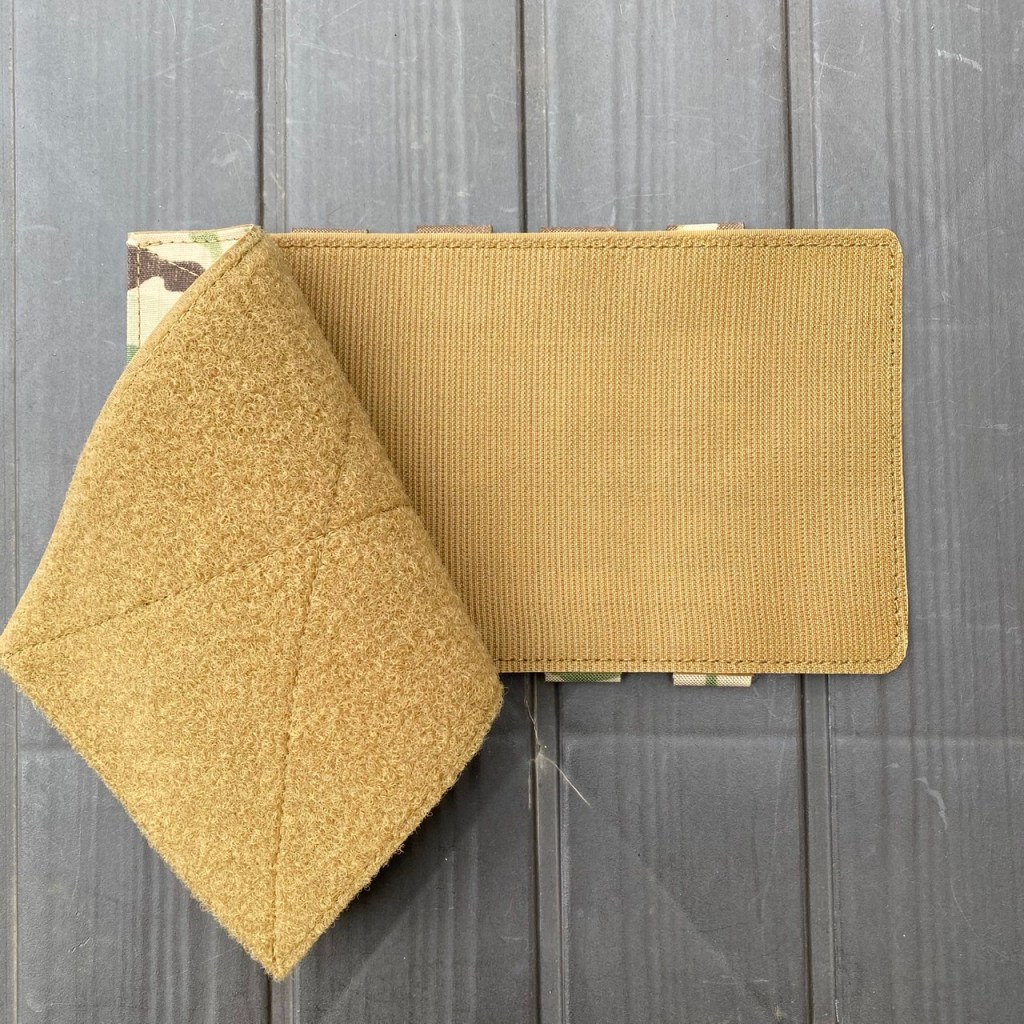
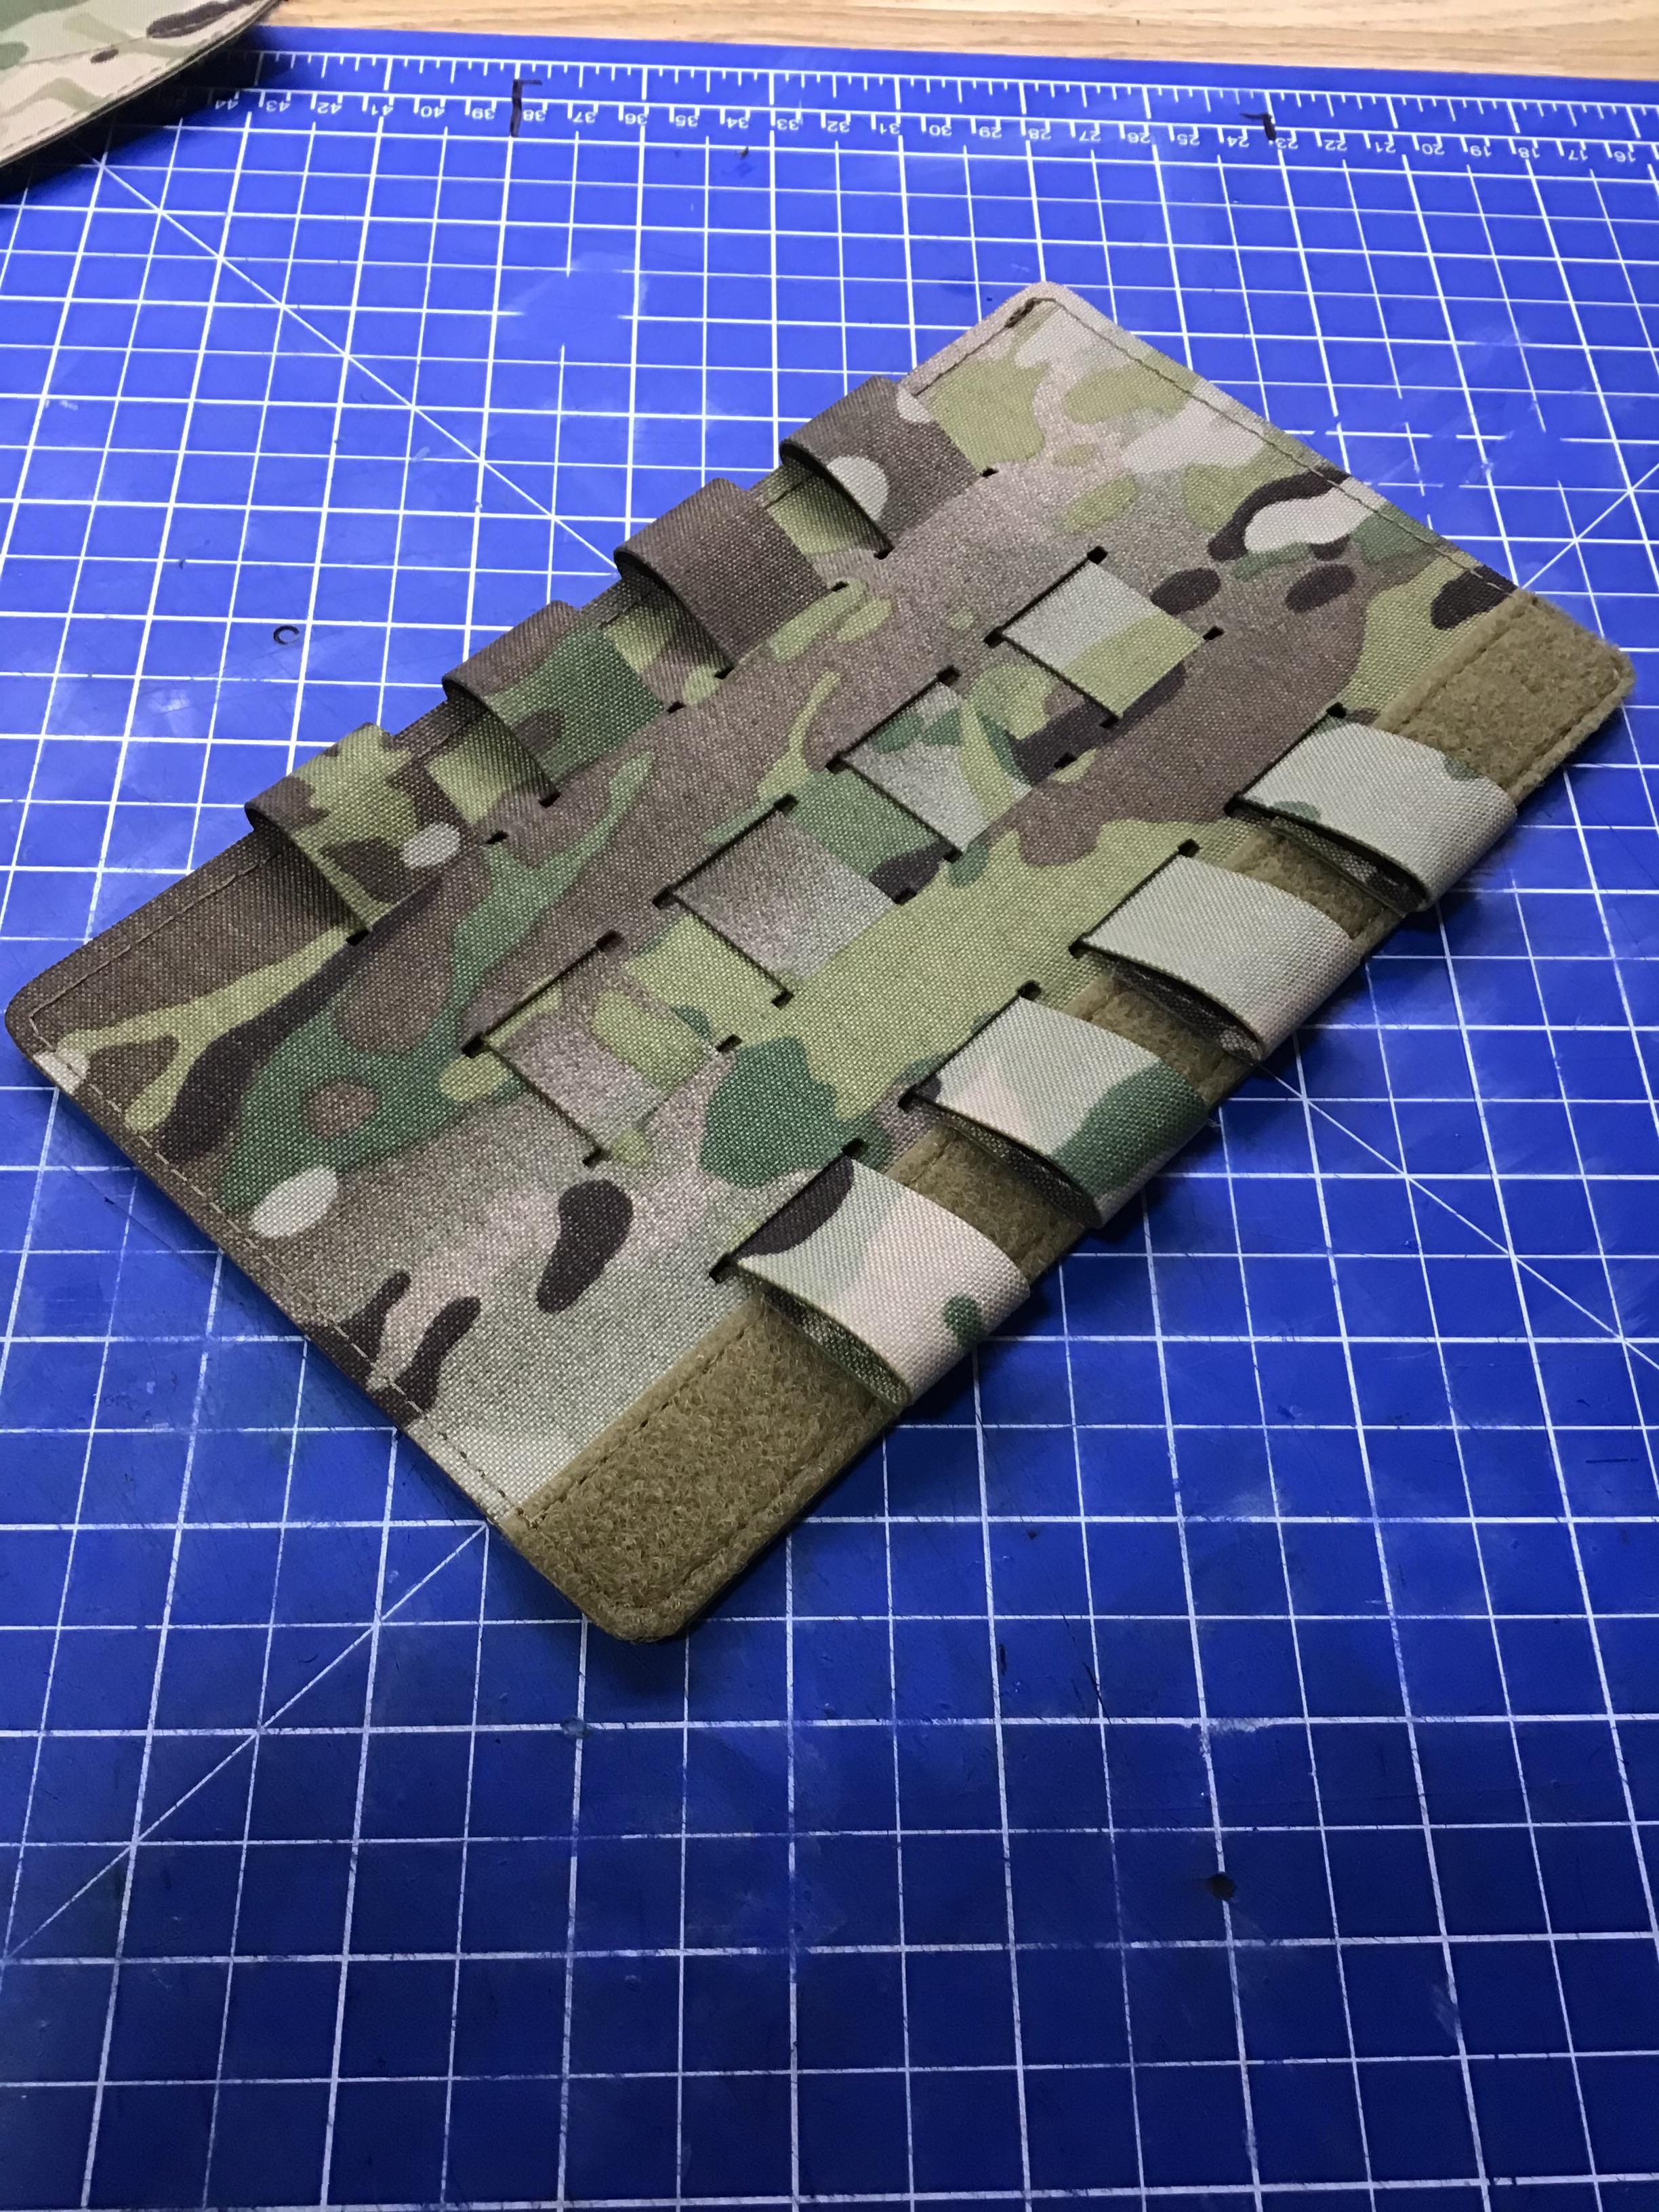
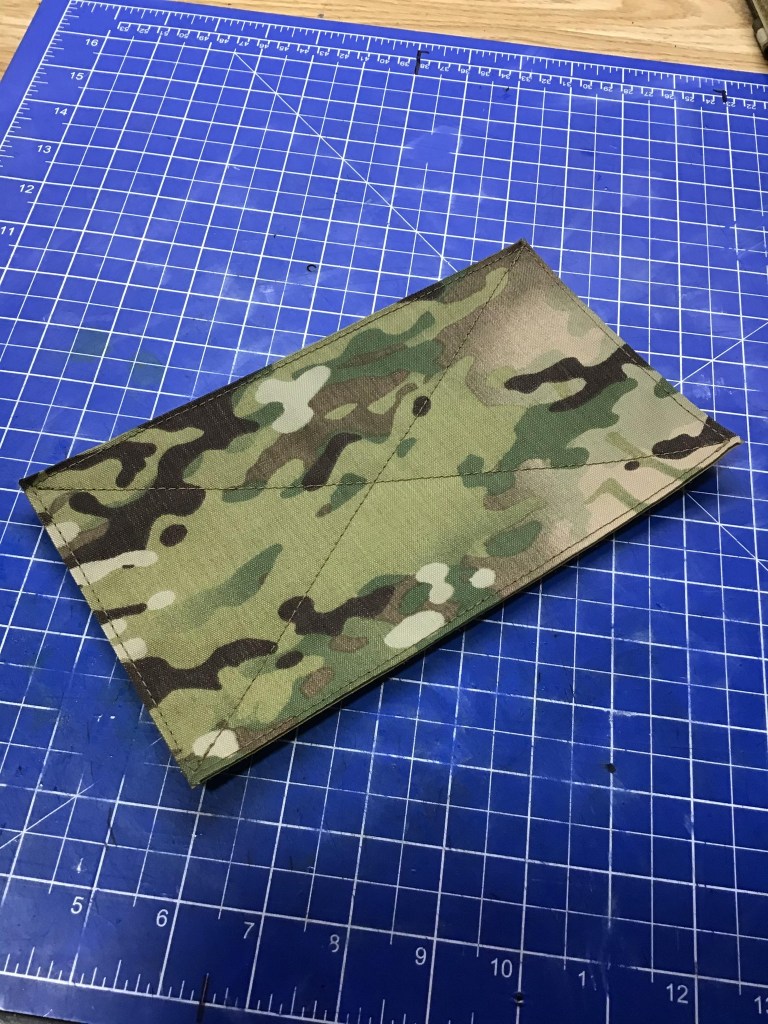
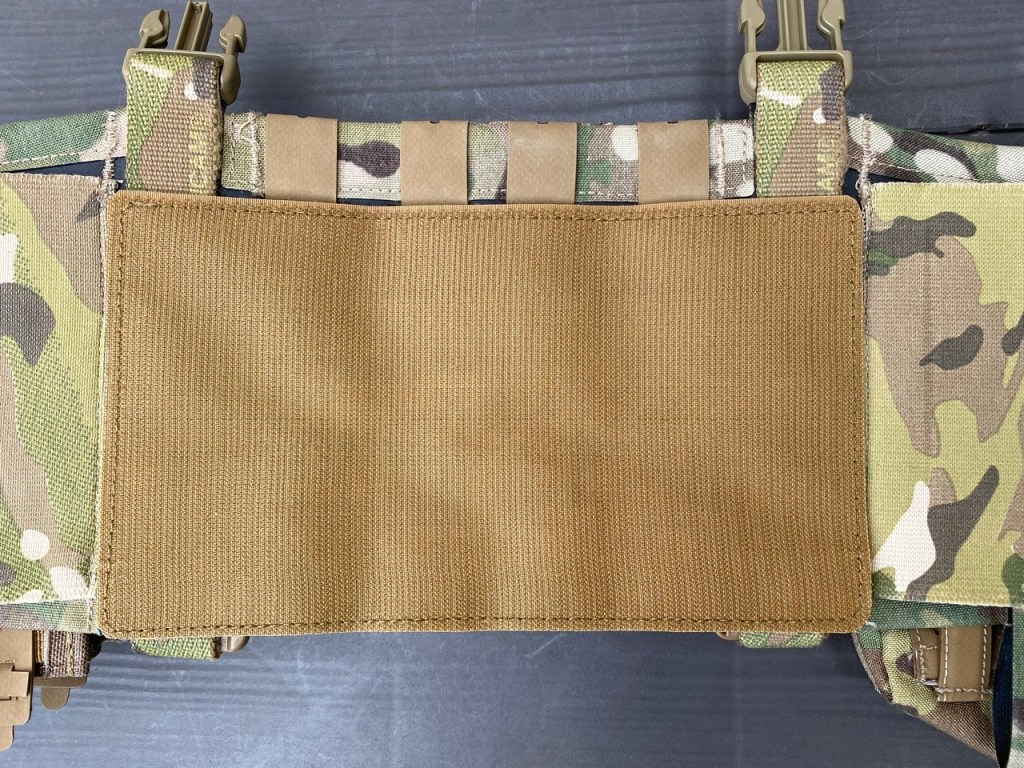
It’s mainly composed of 500D-faced laser cut laminate, with velcro in the appropriate places – including where the free ends of the PALS straps secure to the panel. The loop velcro cover which faces the wearer has a 330D top sheet.
Just look at that stitching. It’s perfect.
Both Andy and I thought it would be a tight squeeze threading the panel onto the rig, but while involved it wasn’t too onerous.
What Would I Do Differently?
Not much, as it happens.
The only slight change I’d suggest for anyone who wants Andy to make this panel for their rig, is to slightly shortern the PALS straps; or extend the velcro. Given that the length required was an estimate (and will vary according to the style of PALS used on the back of the pouches) it’s very close to perfection.
As it is, there’s no way the panel is moving anyway.
Conclusion
I’ve ended up with something that is perfect for what we set out to achieve: a simple way to add hook velcro to the back of the Crye rig – to the Mayflower standard – with enough torsional stability to support the use of the FirstSpear Tubes system.
Once more, I’d highly recommend working with Andy on this kind of project.
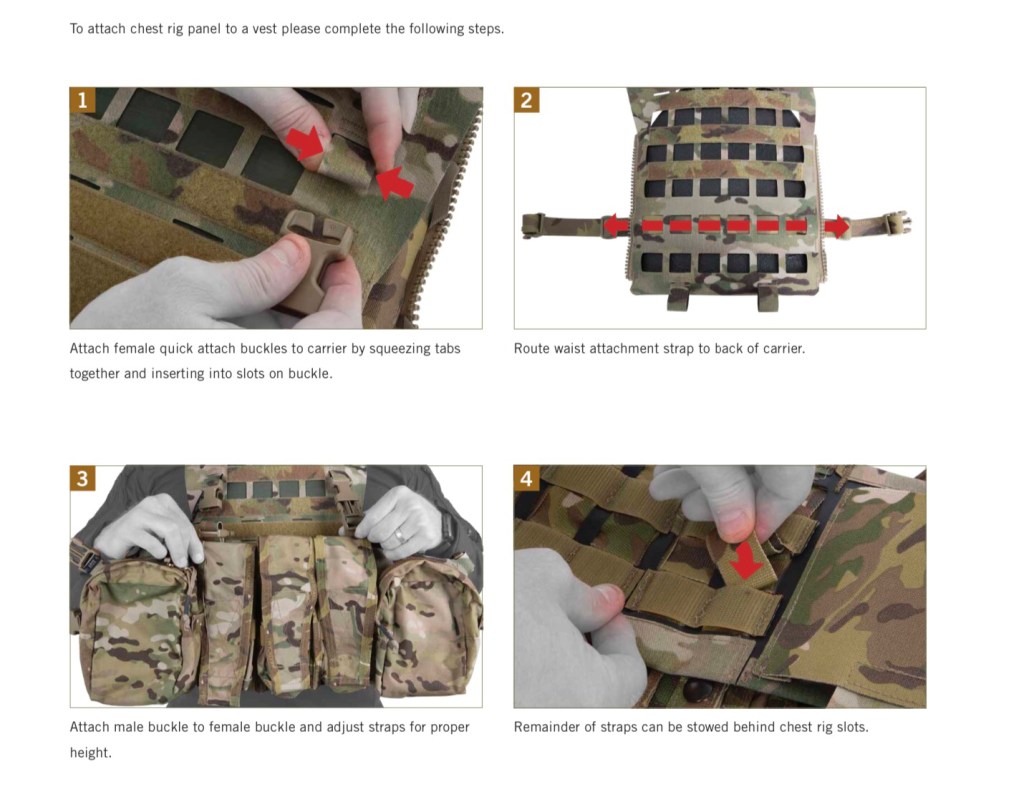
Appendix