
N.B. There is an updated review of this chest rig, utilising the Mk4 Chassis on the blog – published in June 2020.
Introduction
No MOLLE, but sold on its modularity? This is the system which sparked the micro chest rig revolution.
Reviewing the Spiritus Systems MK 3 Micro Fight Full Kit so late in the day is an intimidating undertaking.
Everyone has one and speaks very highly of it, right?
However, when the challenge arose I was eager to accept. I loved Spiritus’ Medium GP Pouch, so the lineage seemed solid and I very much hoped this would be another win for the company.
Spiritus’ reputation is in making products for unoccupied niches and the Micro Fight is their flagship chest rig offering. Other companies talk about disruptive events which shape paradigm shifts, but it was Spiritus which came from nowhere to totally change the narrative.
I have this kit on loan from Spiritus’ UK distributor Tactical Kit. That means I’m unable to give long term feedback – so bear that in mind. Now you know some of what this review isn’t, please be read on…
Overview
The Full Kit is what you need to get a fully functional Spiritus chest rig, rather than cherry picking from the individual components which are sold separately.
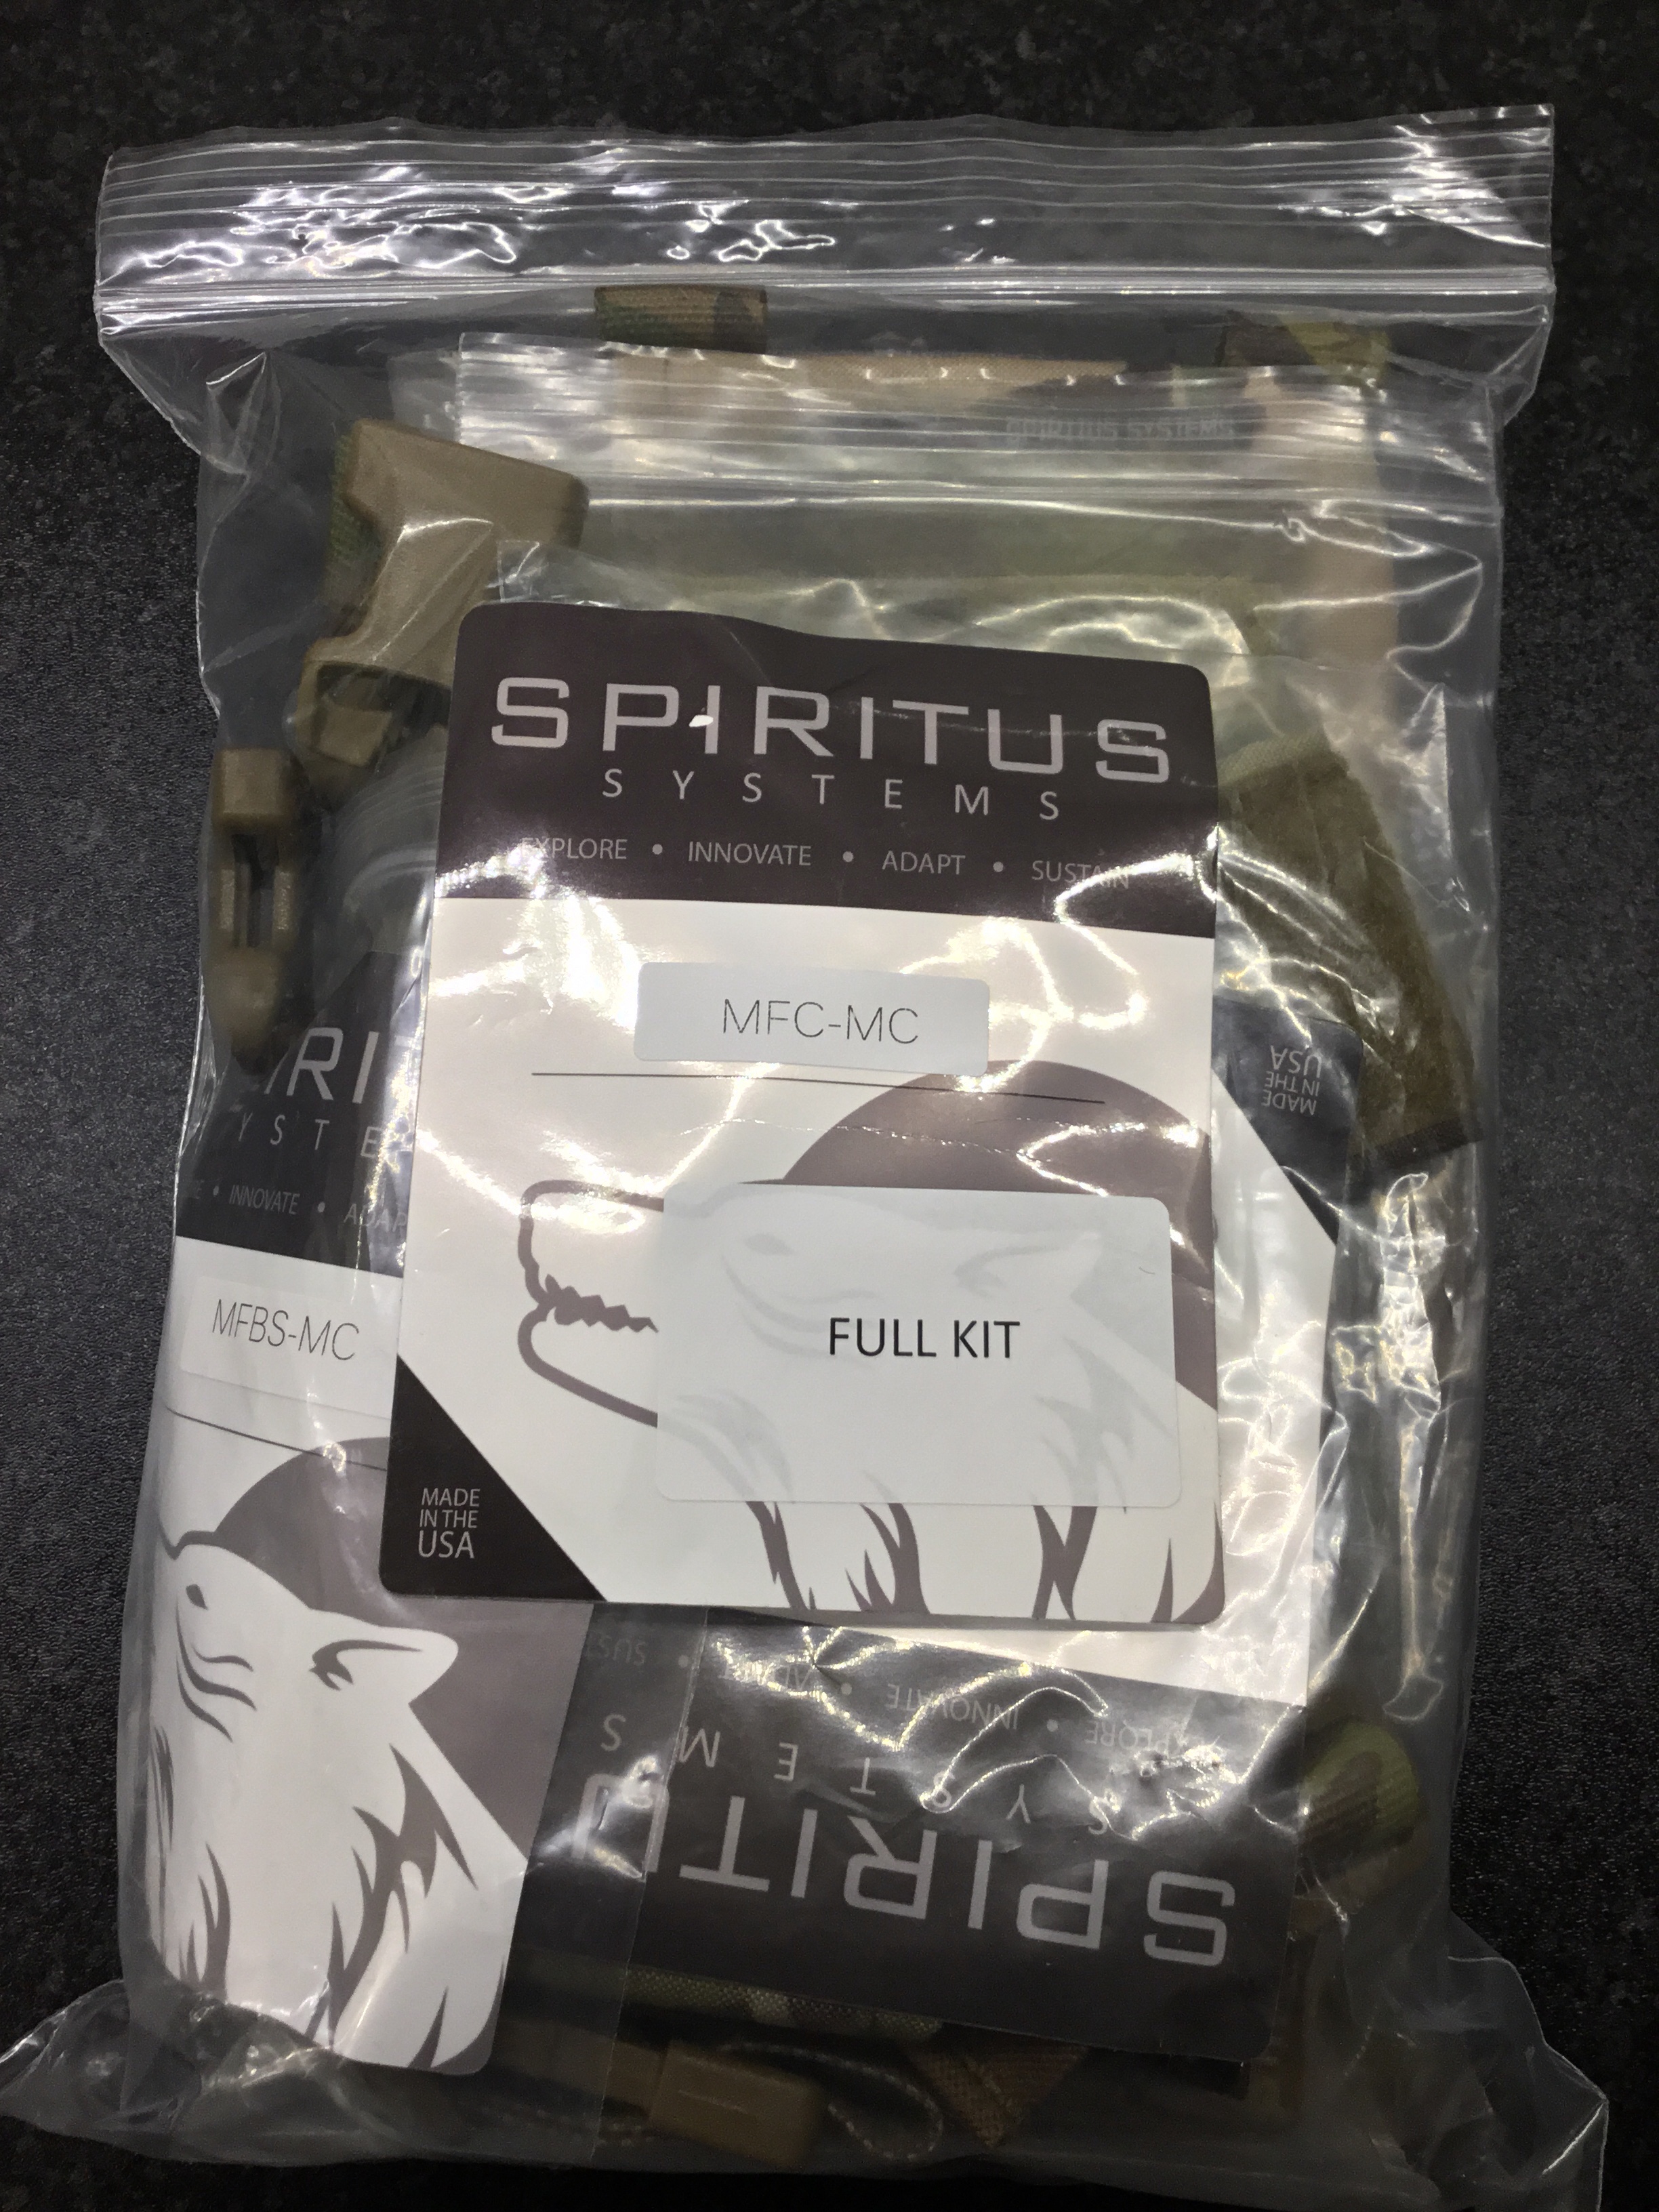
Inside are the following items:
- MK3 Chassis
- Clips
- 556 Rifle Insert
- Full Flap
- Fat Strap and Back Strap

1. MK3 Chassis

The Chassis is the system hub. At the top, it exhibits two male Fastex clips for PC or chest rig harness integration, and four webbing loops to aid the latter with the addition of the included female Fastex clips. These loops are located at the sides of the Chassis. The face of the unit is covered in a colour-matched loop field.
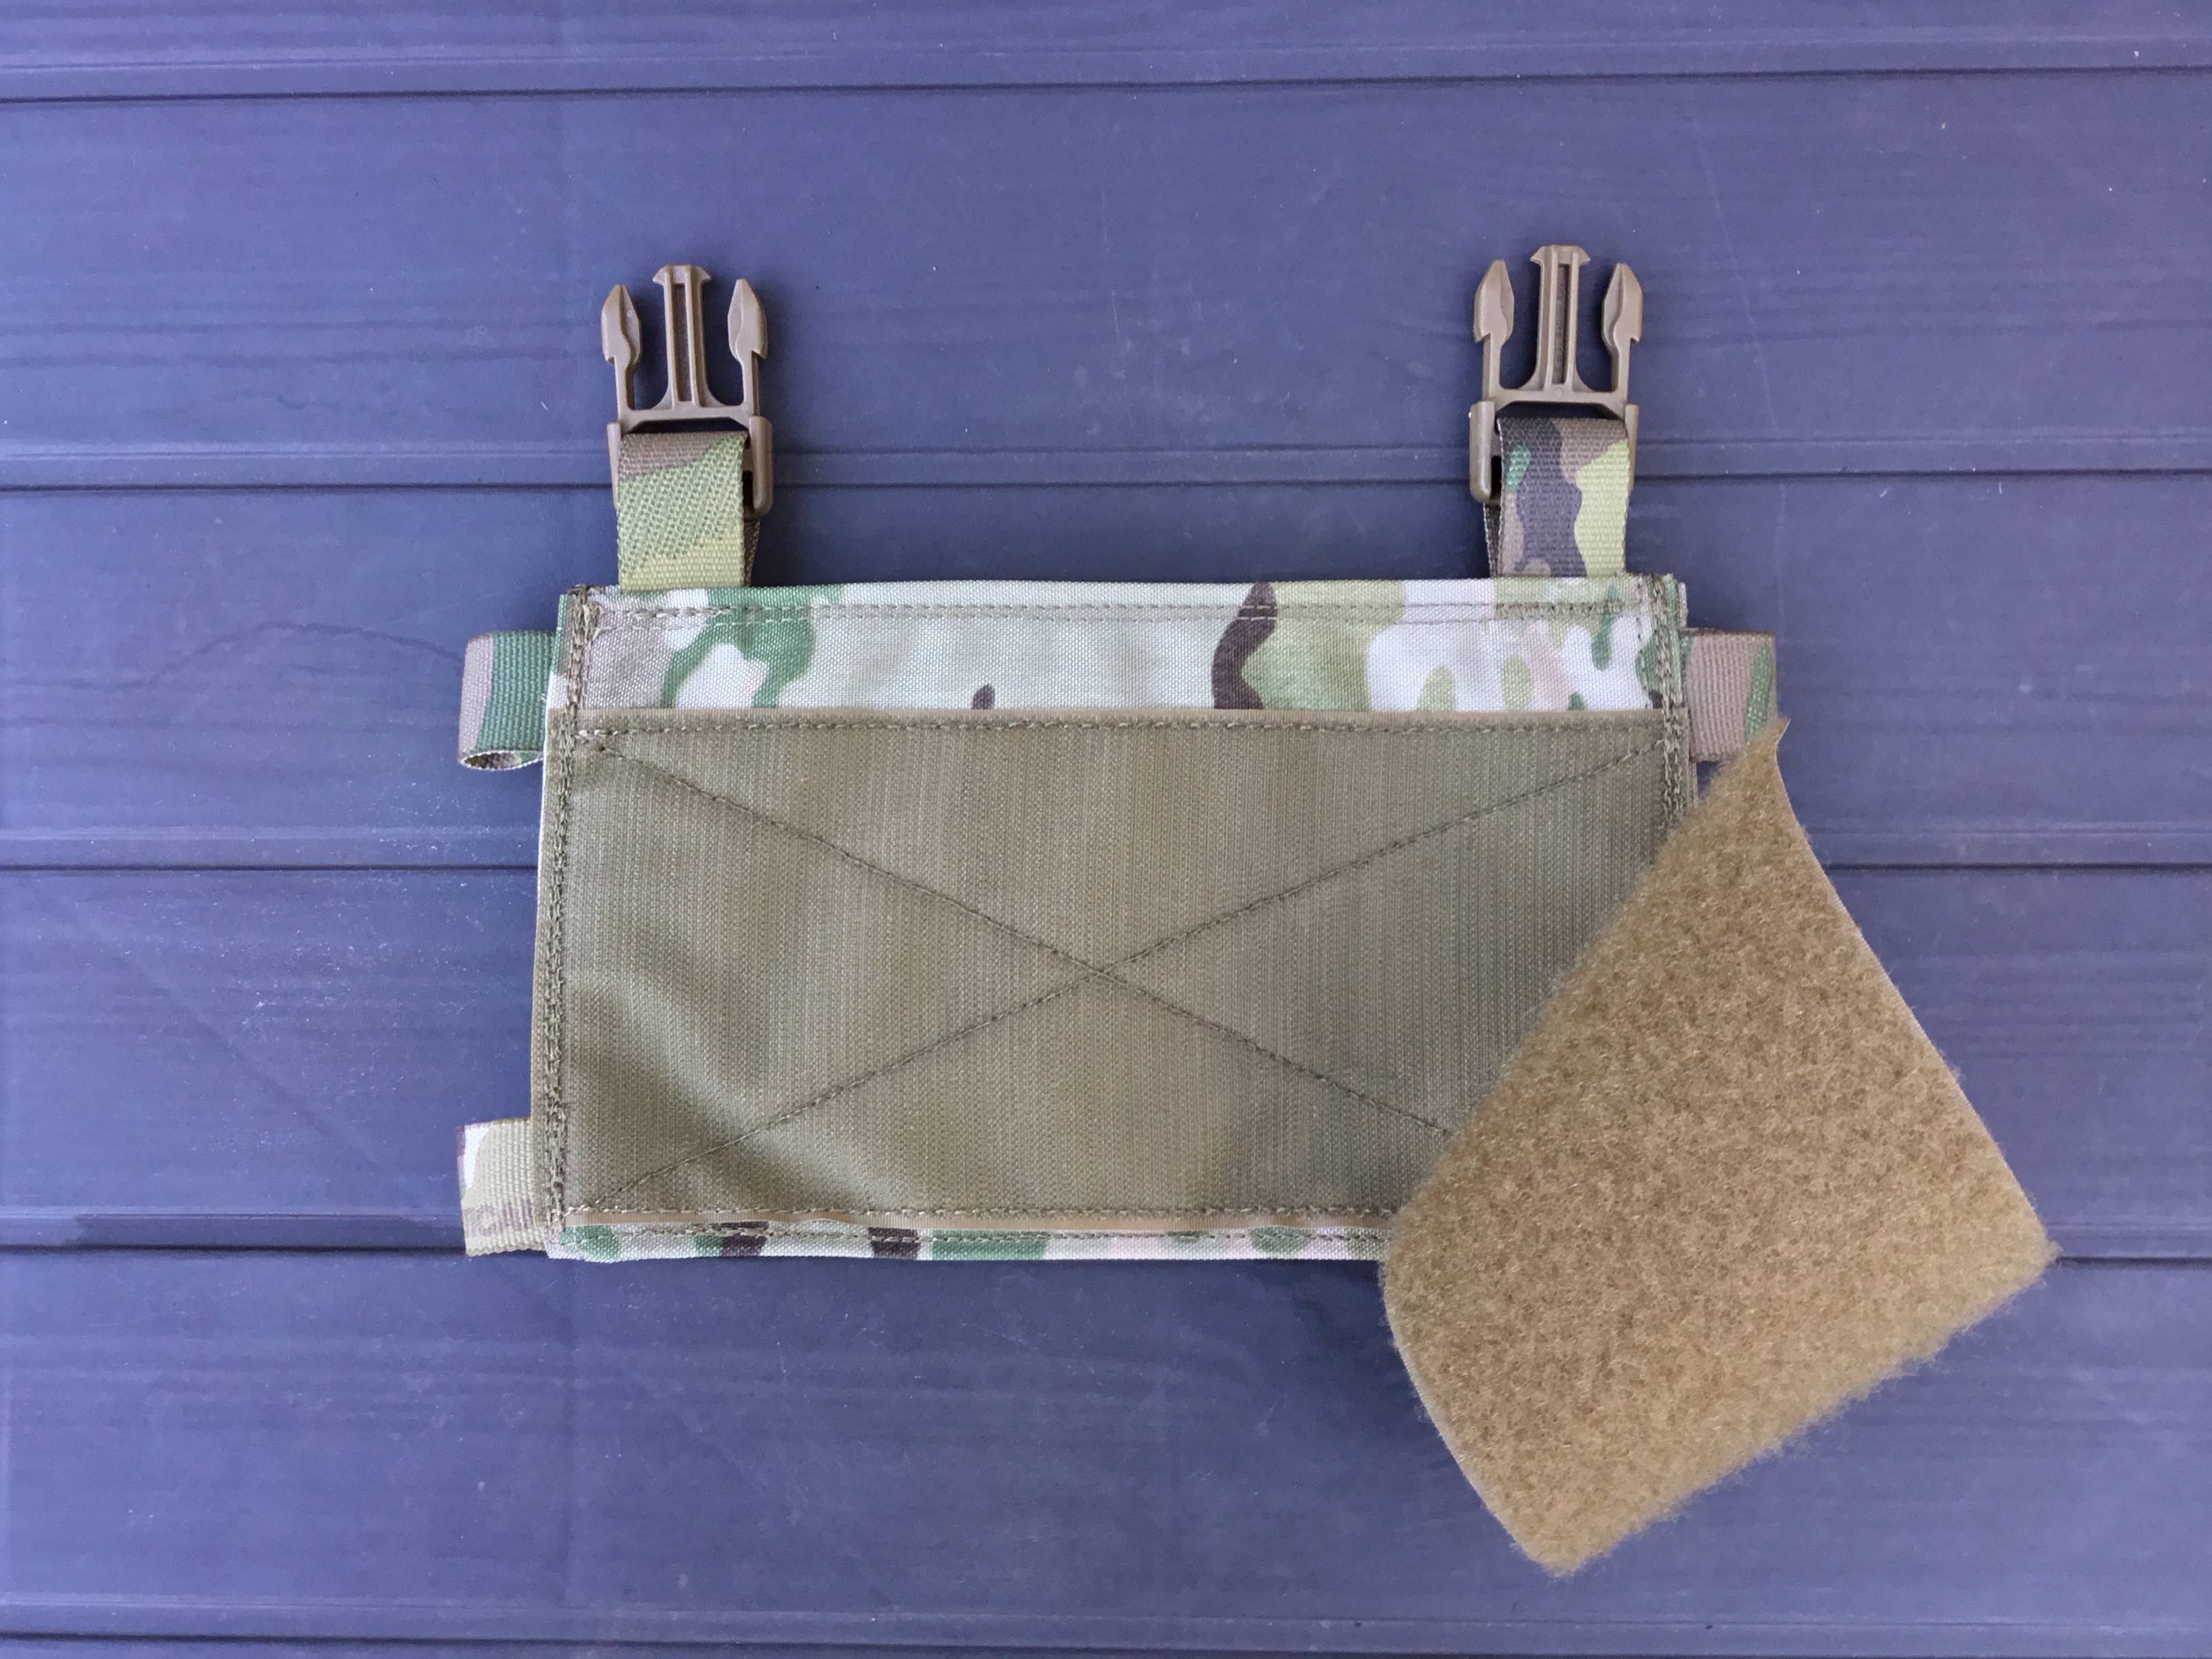
On the reverse, again to aid PC integration, there’s a hook field in the Mayflower style. This can also be used to integrate Spiritus’ SACK or Lunchbox – sold separately.

The Chassis is divided into two, loop lined compartments (the Fastex clips you can see at the base of each compartment were simply there to open things up for pics).
These compartments are of equal size, to optimise the Chassis’ modularity. So, for instance, you could insert a 556 Rifle Insert into each compartment in order to carry six mags.
The base exhibits a drainage grommet, per compartment.
2. Clips
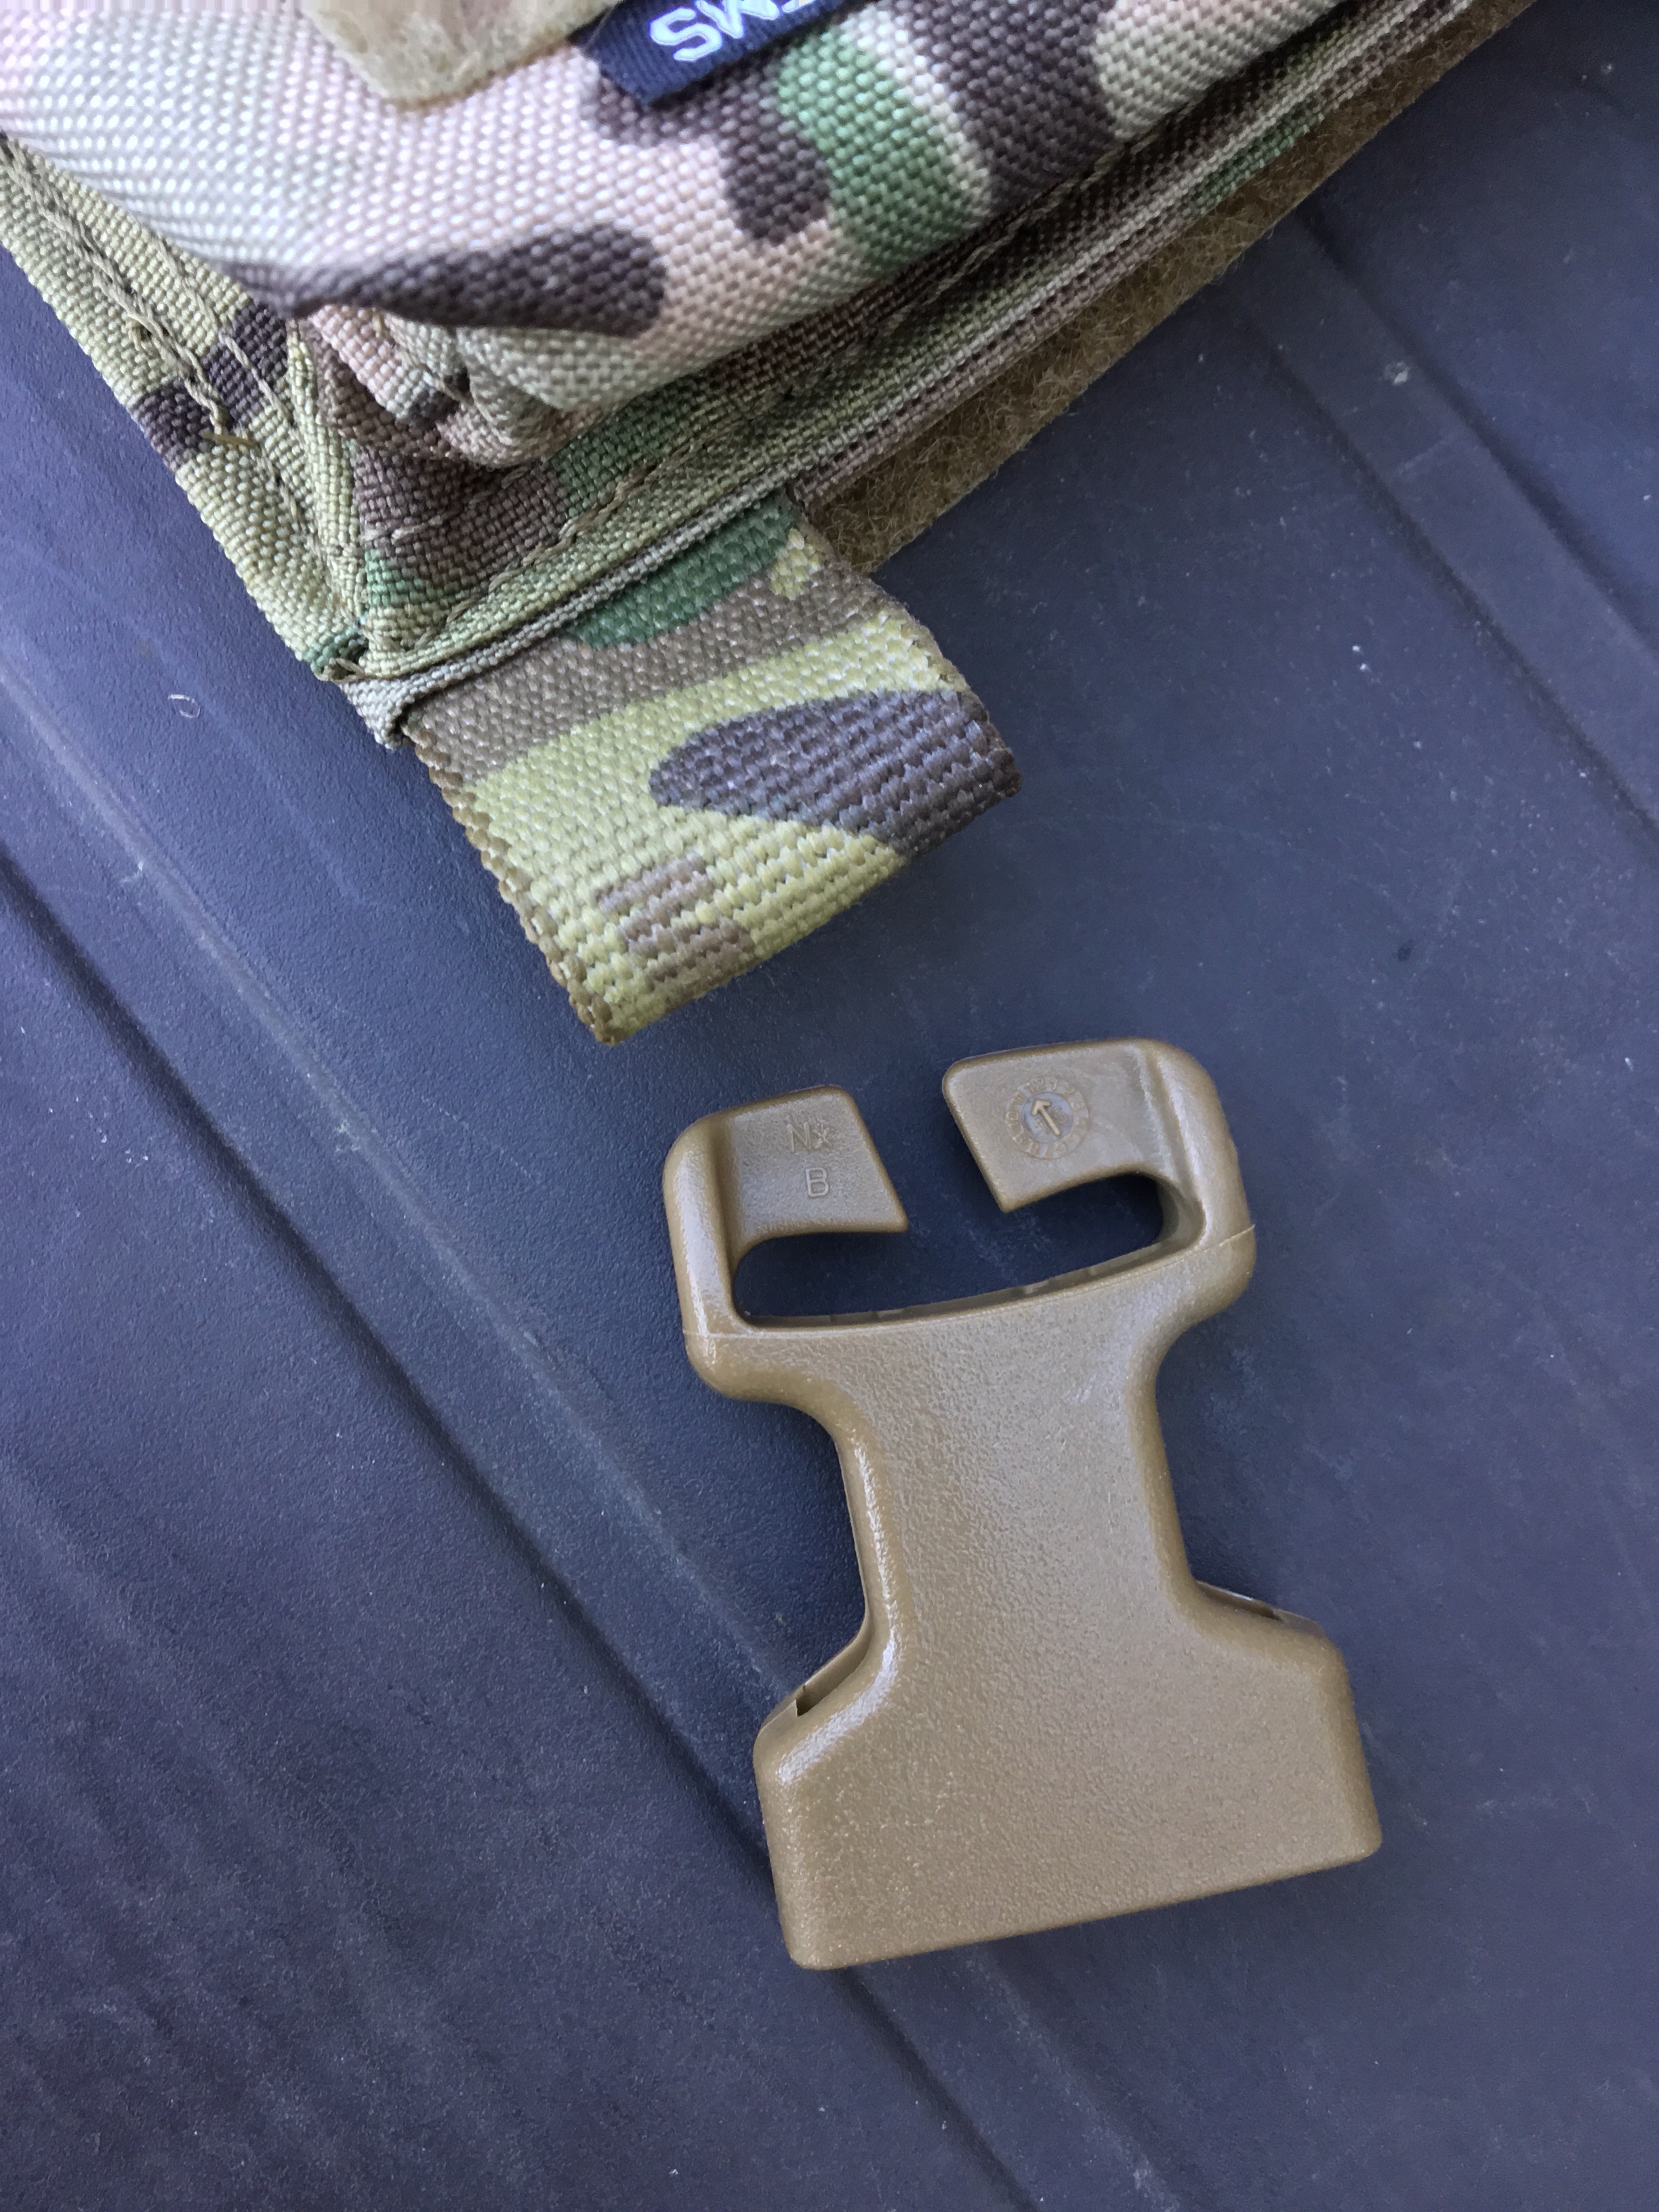
The Full Kit comes with four female Fastex clips, which integrate with the Chassis in chest rig mode. They are, of course, excellent quality.
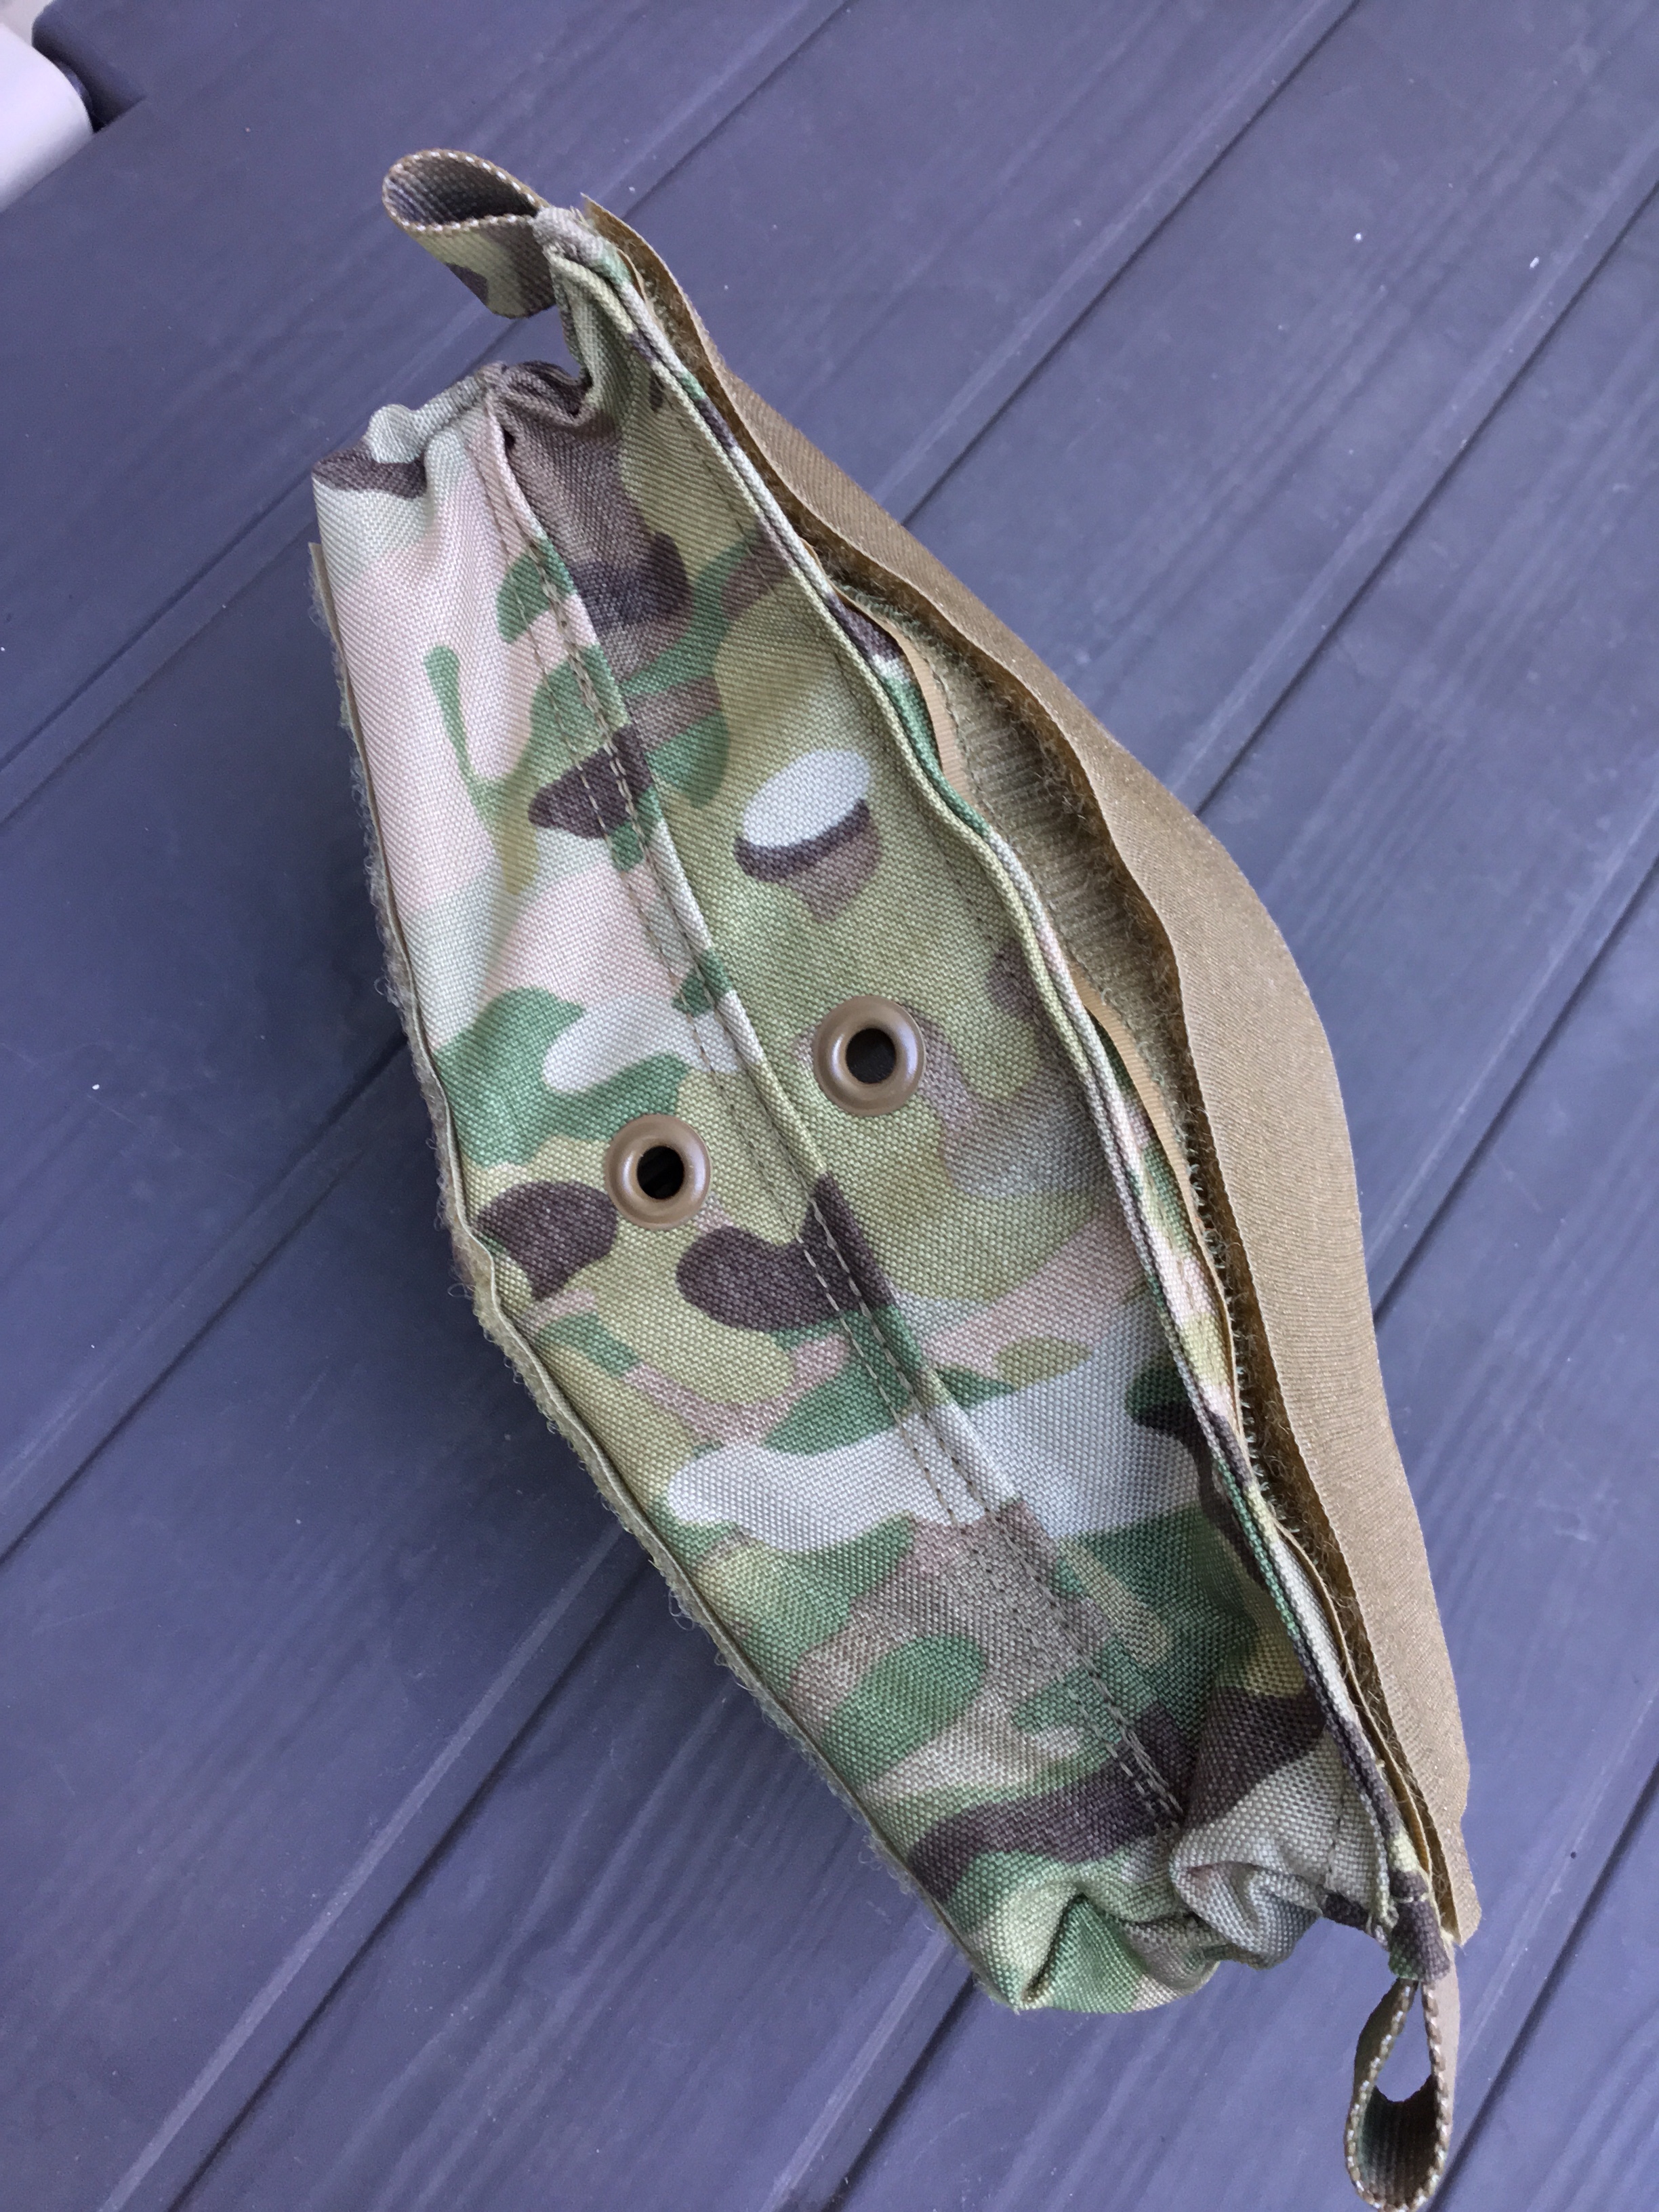
3. 556 Rifle Insert
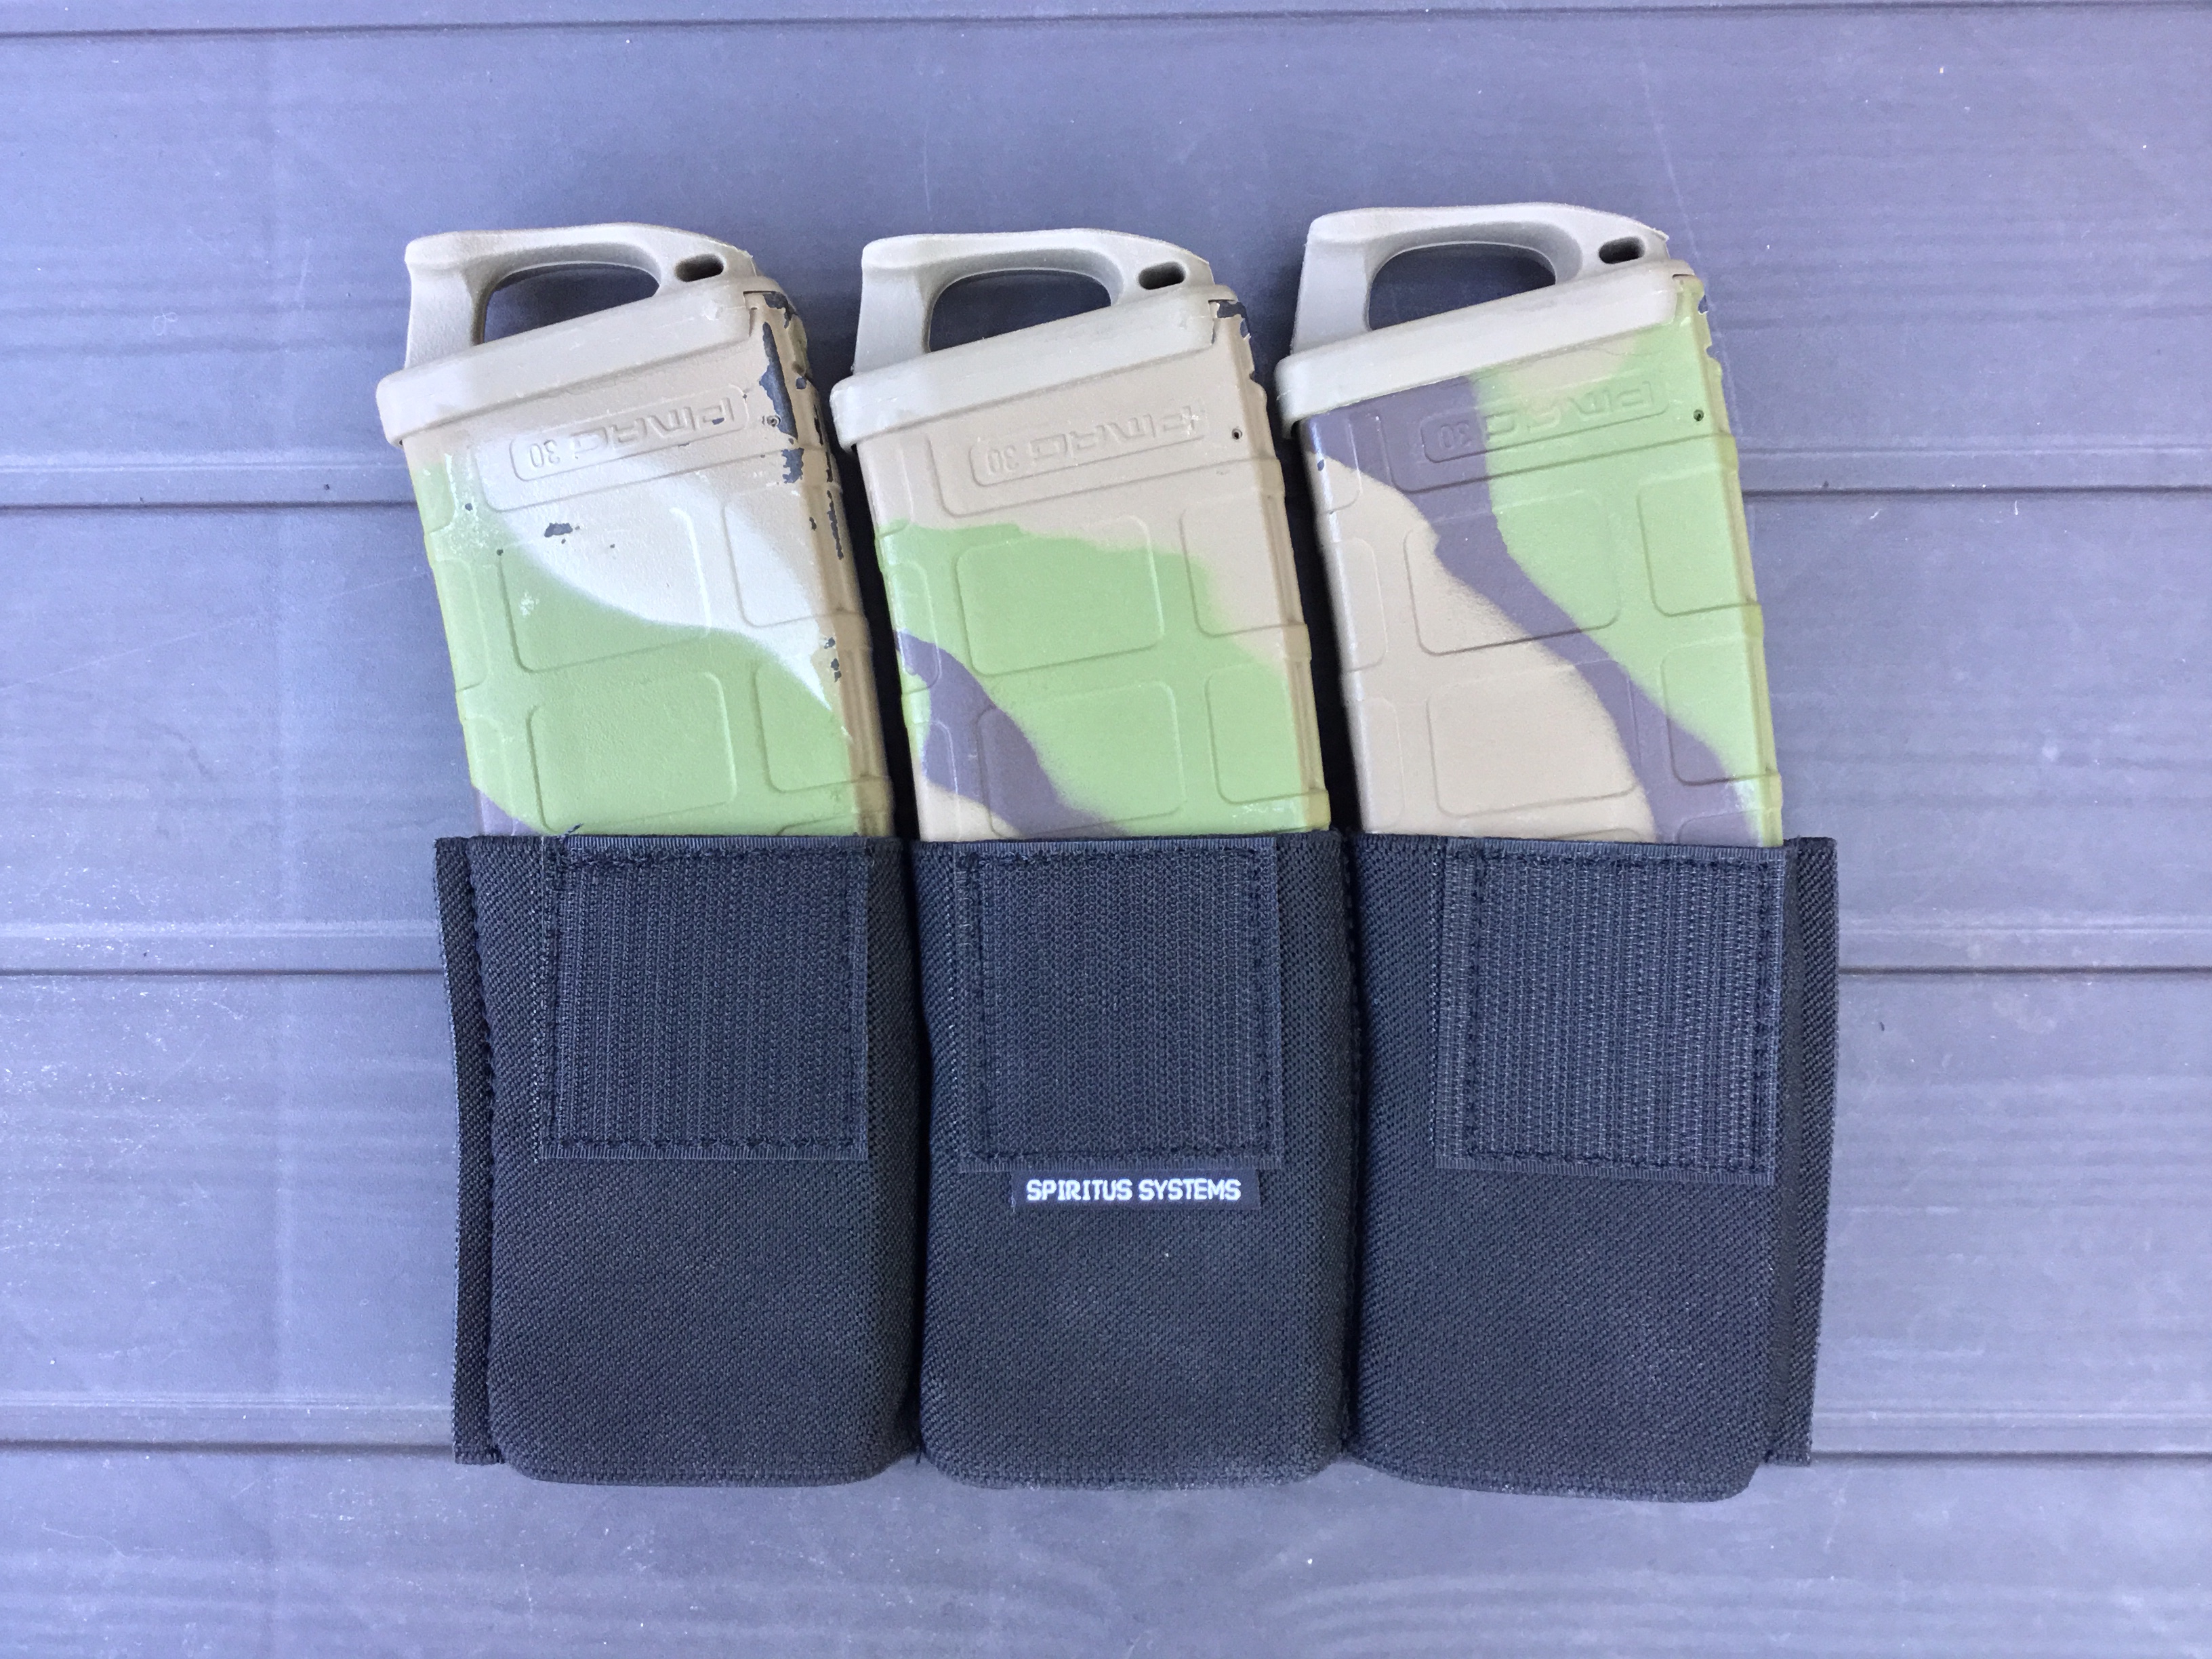
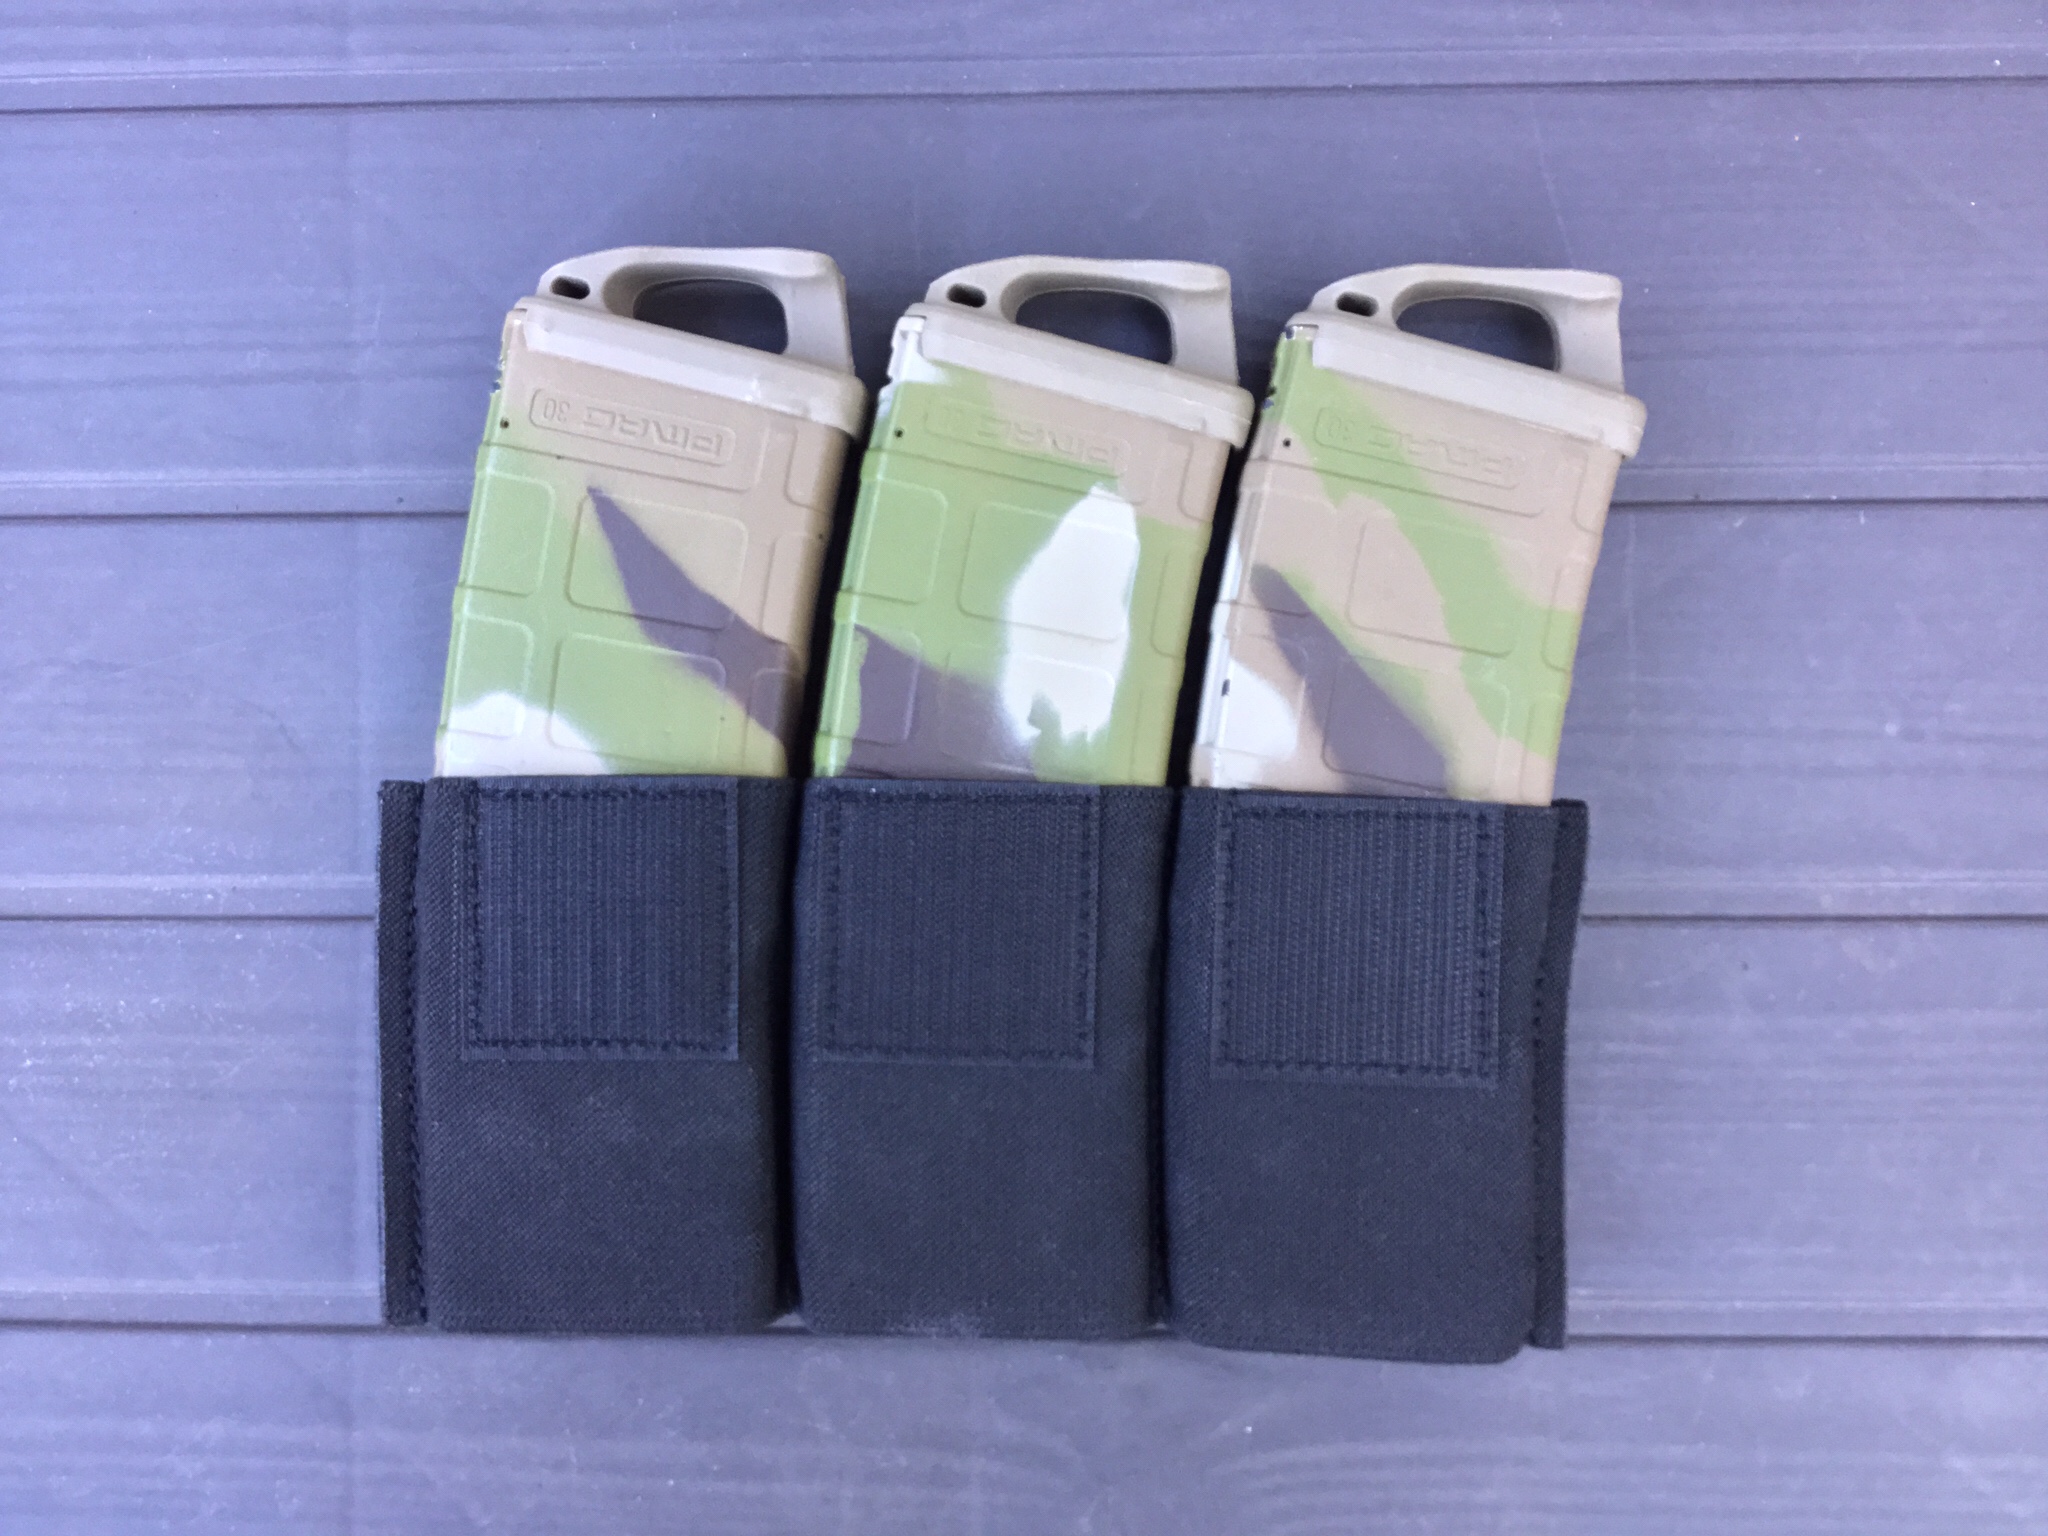
The Insert is composed of elastic and takes three 556 mags. Hook Velcro is attached both sides.
I’ve got to be honest, I’m not keen on elastic mag retention. While drawing a mag is fine, re-indexing under pressure can be a pig. I was expecting the worst from this Insert, but reserved judgement until I could use it.
We’ll come back to this later. Or, if you’re already bored, skip to the “Use Notes” section at the end of the review. That’s the exciting bit (relatively).
4. Full Flap

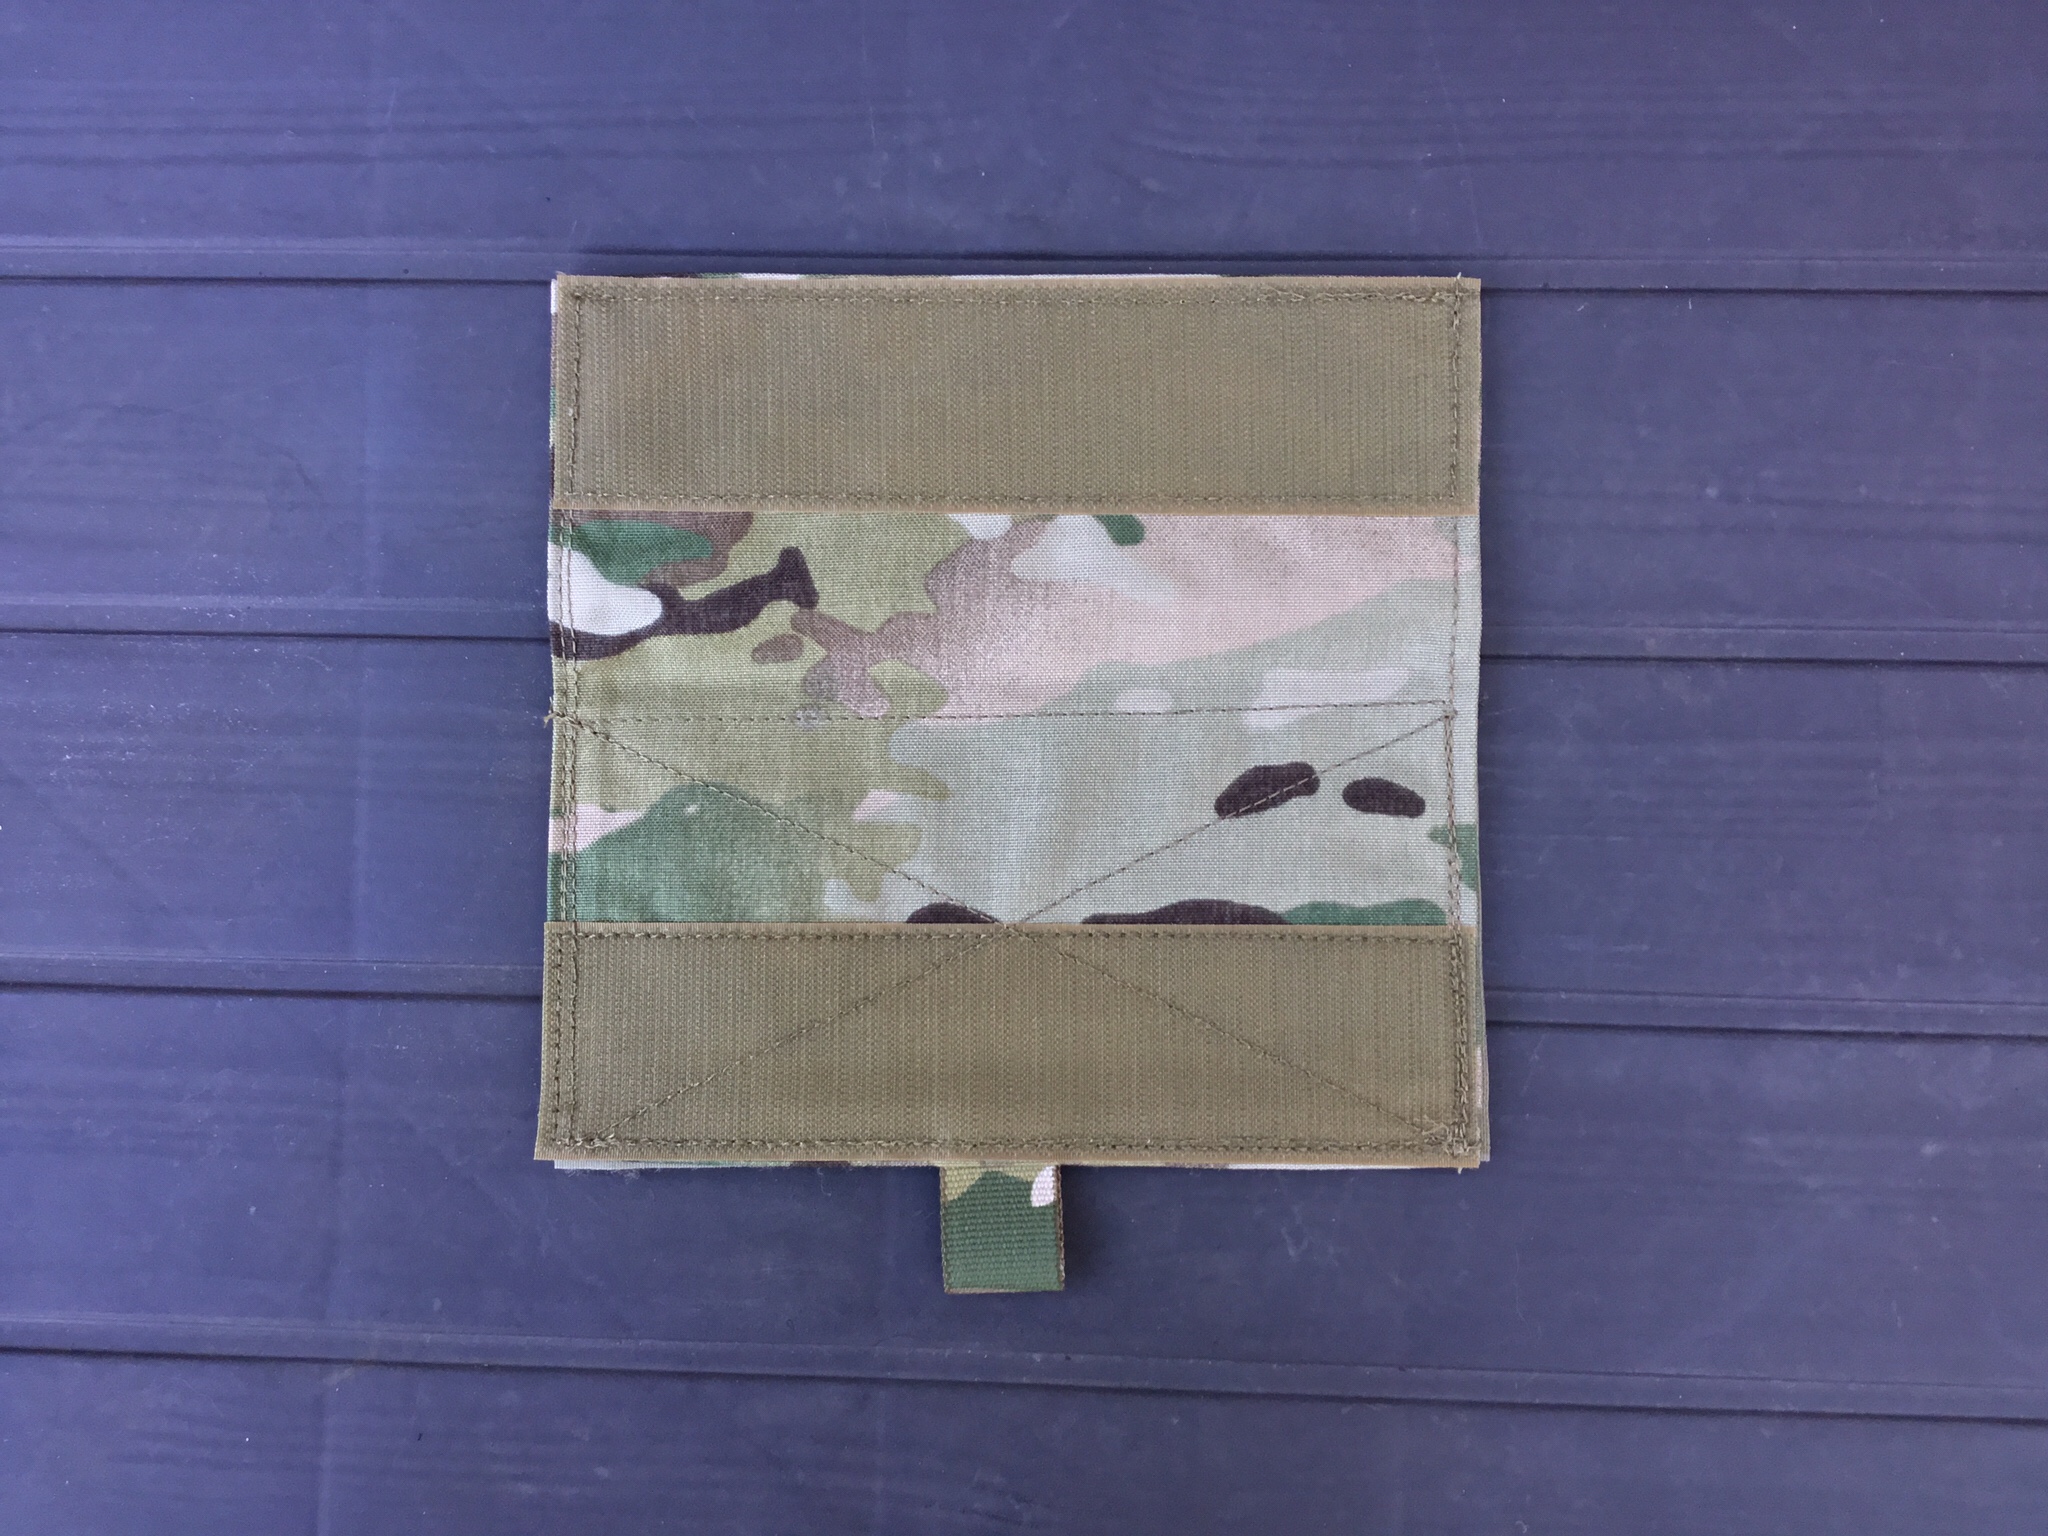
The Full Flap converts the Chassis’ front compartment in to a flapped GP pouch. Spiritus also sells a Half Flap, should you wish to use half of the front compartment as a GP pouch and the other half to carry, say, an additional mag (they also sell individual 556 mag inserts, as well as pistol mag inserts).
Velcro is the mechanism for securing this accessory on to the Chassis, and which also allows it to be secured shut.
The Flap exhibits a webbing tab for ease of opening. On the face of the Flap is colour-matched loop Velcro for morale patches, etc.
5. Fat Strap and Back Strap


An area where chest rigs so often fail, Spiritus’ strap system has been properly thought through.
For a start, the Fat Strap is an H-harness (which I prefer to an X-harness, right now).
Secondly, it has a wide range of adjustment. Often, chest rigs straps are sized to work over body armour. Since the removable placard system was standardised by Mayflower and adopted by pretty much everyone, who actually wears a chest rig over body armour anymore?
Consequently, you find that some chest rigs won’t cinch down effectively for use without armour – especially if the adjustment system is captive (feeds into itself, rather than leaving ends free).
Luckily, Spiritus’ adjustment mechanism is free at the ends.
The straps also exhibit horizontal mounting platforms, composed of webbing or elastic. These can be used to route comms or hydration, for example. There’s also a loop field on the H-harness’ cross-strap.
For me, the strap system is the most exciting part of the Full Kit so far; but, like tactical Lego, the really exciting stuff is only realised when you start locking stuff together.
Configuring Chassis for PC Placard Use

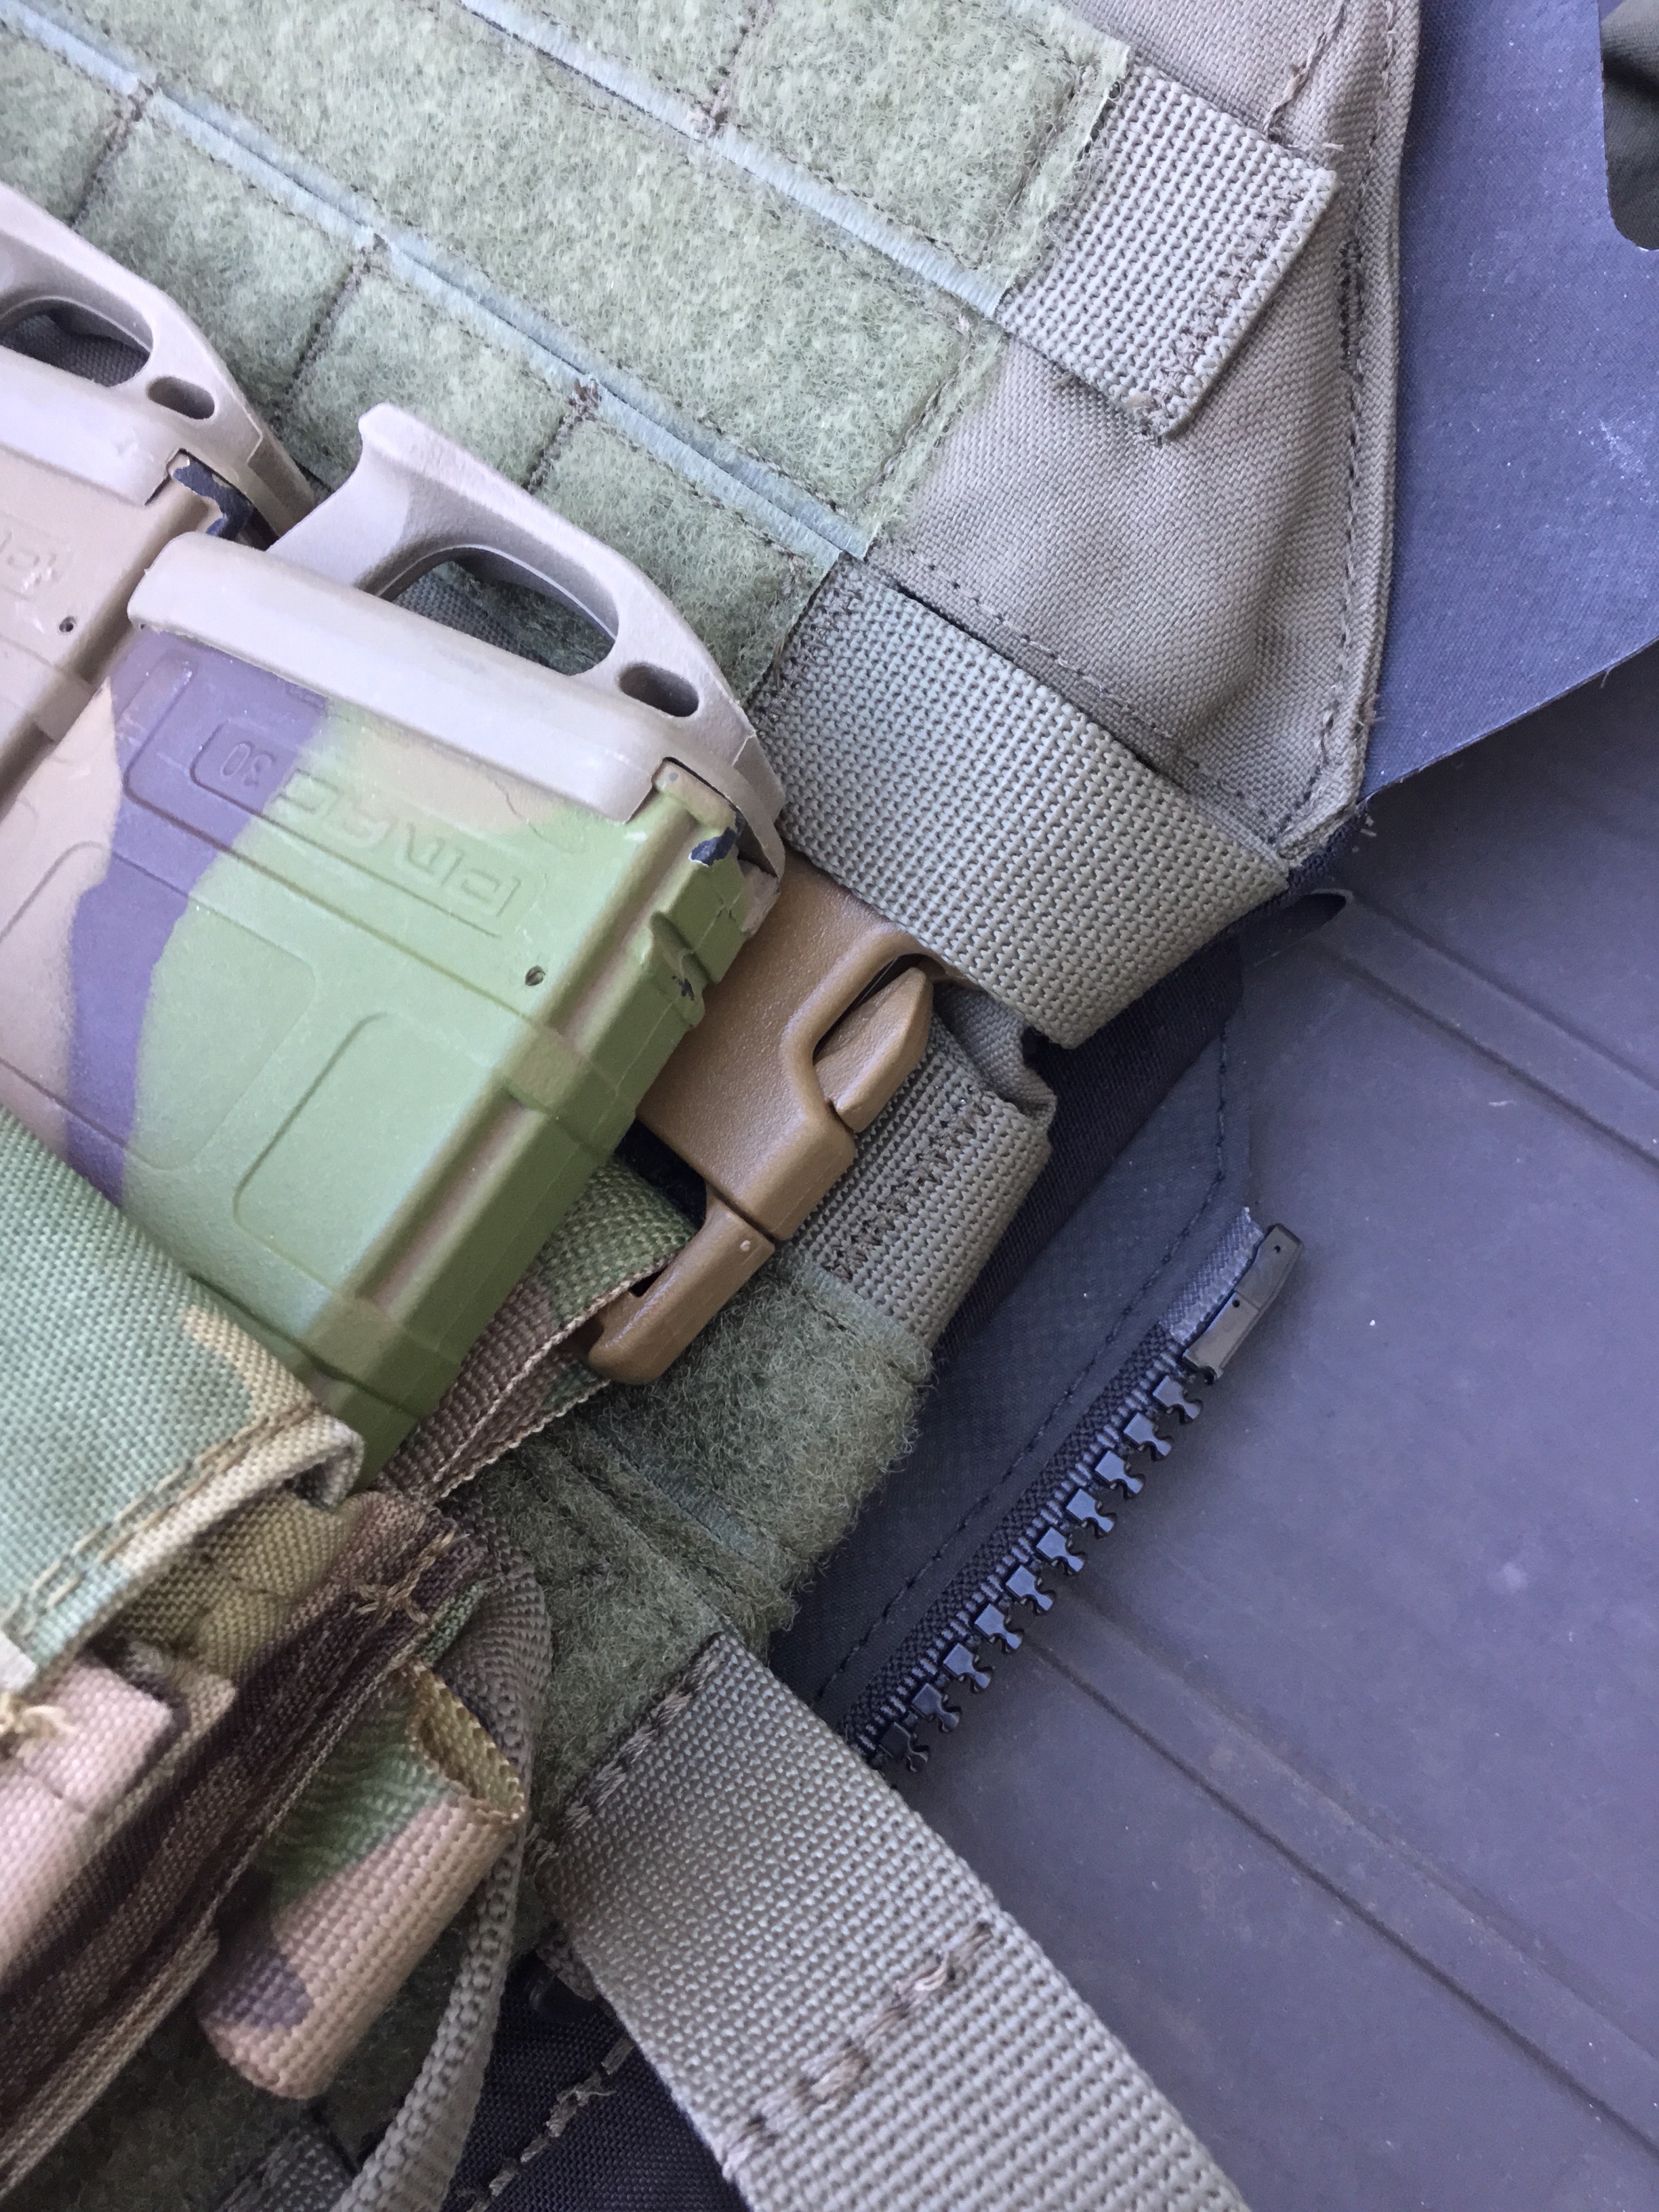
Inserting the Full Flap and 556 Rifle Insert into the rear compartment of the Chassis readies the unit for action.
The Flap goes in first, and is relatively straightforward to attach, but remember: even though it covers the front compartment, it must be velcroed into the rear.
Next, the 556 Rifle Insert…
Do not attempt to place the Insert into the compartment, without first putting mags into the Insert to stiffen it. Then, bundle the mags into a triangle, and place one flat side of the triangle into the compartment.
Get the hook Velcro on the Insert lined up where you want it. I decided to go flush with the height of the loop field inside the Chassis’ compartment.
Next flatten the triangle, pushing the mags which formed the apex into the corners of the compartment. Squeeze all mating surfaces together.
That’s how I do it, anyway.

Now expose the hook field on the rear of the Chassis. This will secure to the loop front panel of your plate carrier, subsequent to the next step.

Using the Chassis’ attached female Fastex clips, connect it to a compatible PC. Here I’m using one by a new company called Cray – or Crye – or something? It’s really nice to see Spiritus helping out the little guy by making their products compatible 🙂
Now hinge the Chassis down to the PC, mating the the hook and loop surfaces.
That’s it. It’s a really clean process, because you don’t have to bugger about with the side clips, like you do with a four mag placard chest rig. Also, this way of doing things leaves you with some handy webbing loops to attach stuff to.
It’s a really neat unit and although this configuration is only one of a multiplicity, it works really well.
Of course, if you only ever wear a PC, you can save some money and simply buy these items:
- Spiritus Systems Micro Fight Chest Rig Chassis MK 3
- Spiritus Systems Micro Fight Full Flap
- Spiritus Systems Micro Fight Rifle Magazine Insert MK 3
Configuring Chassis for Chest Rig Use

This is even more straightforward, because everyone has added or removed the straps on a chest rig. The only slight difference here is adding the provided female Fastex clips to the webbing loops at the sides of the Chassis; in order to fit the Fat Strap and Back Strap.
Also remember to cover the hook field on the rear of the Chassis, or it’ll chew up whatever you’re wearing.
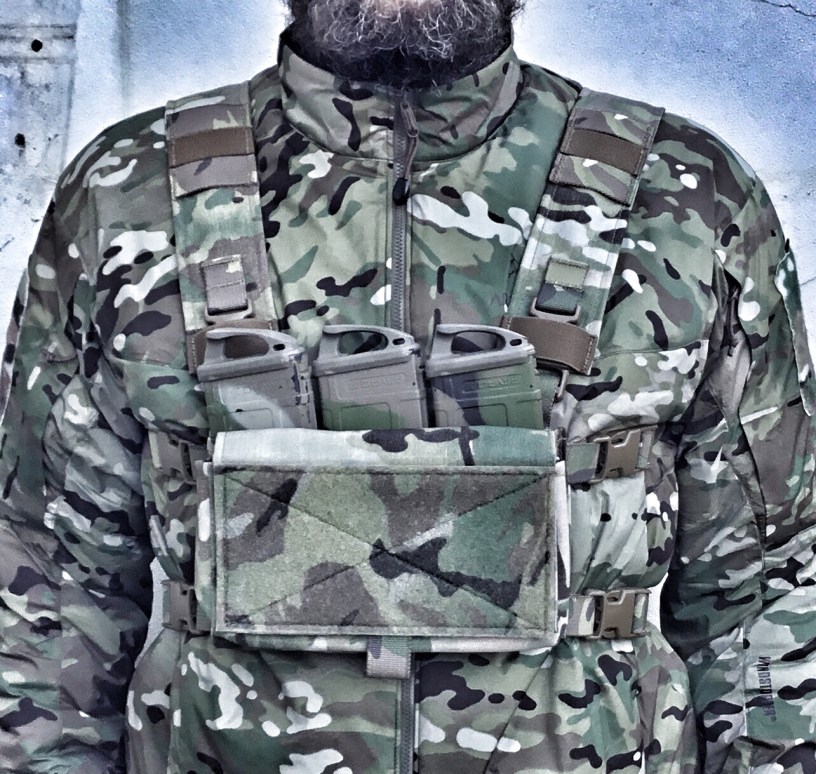
Once it’s together and adjusted, chest rig mode looks like this:
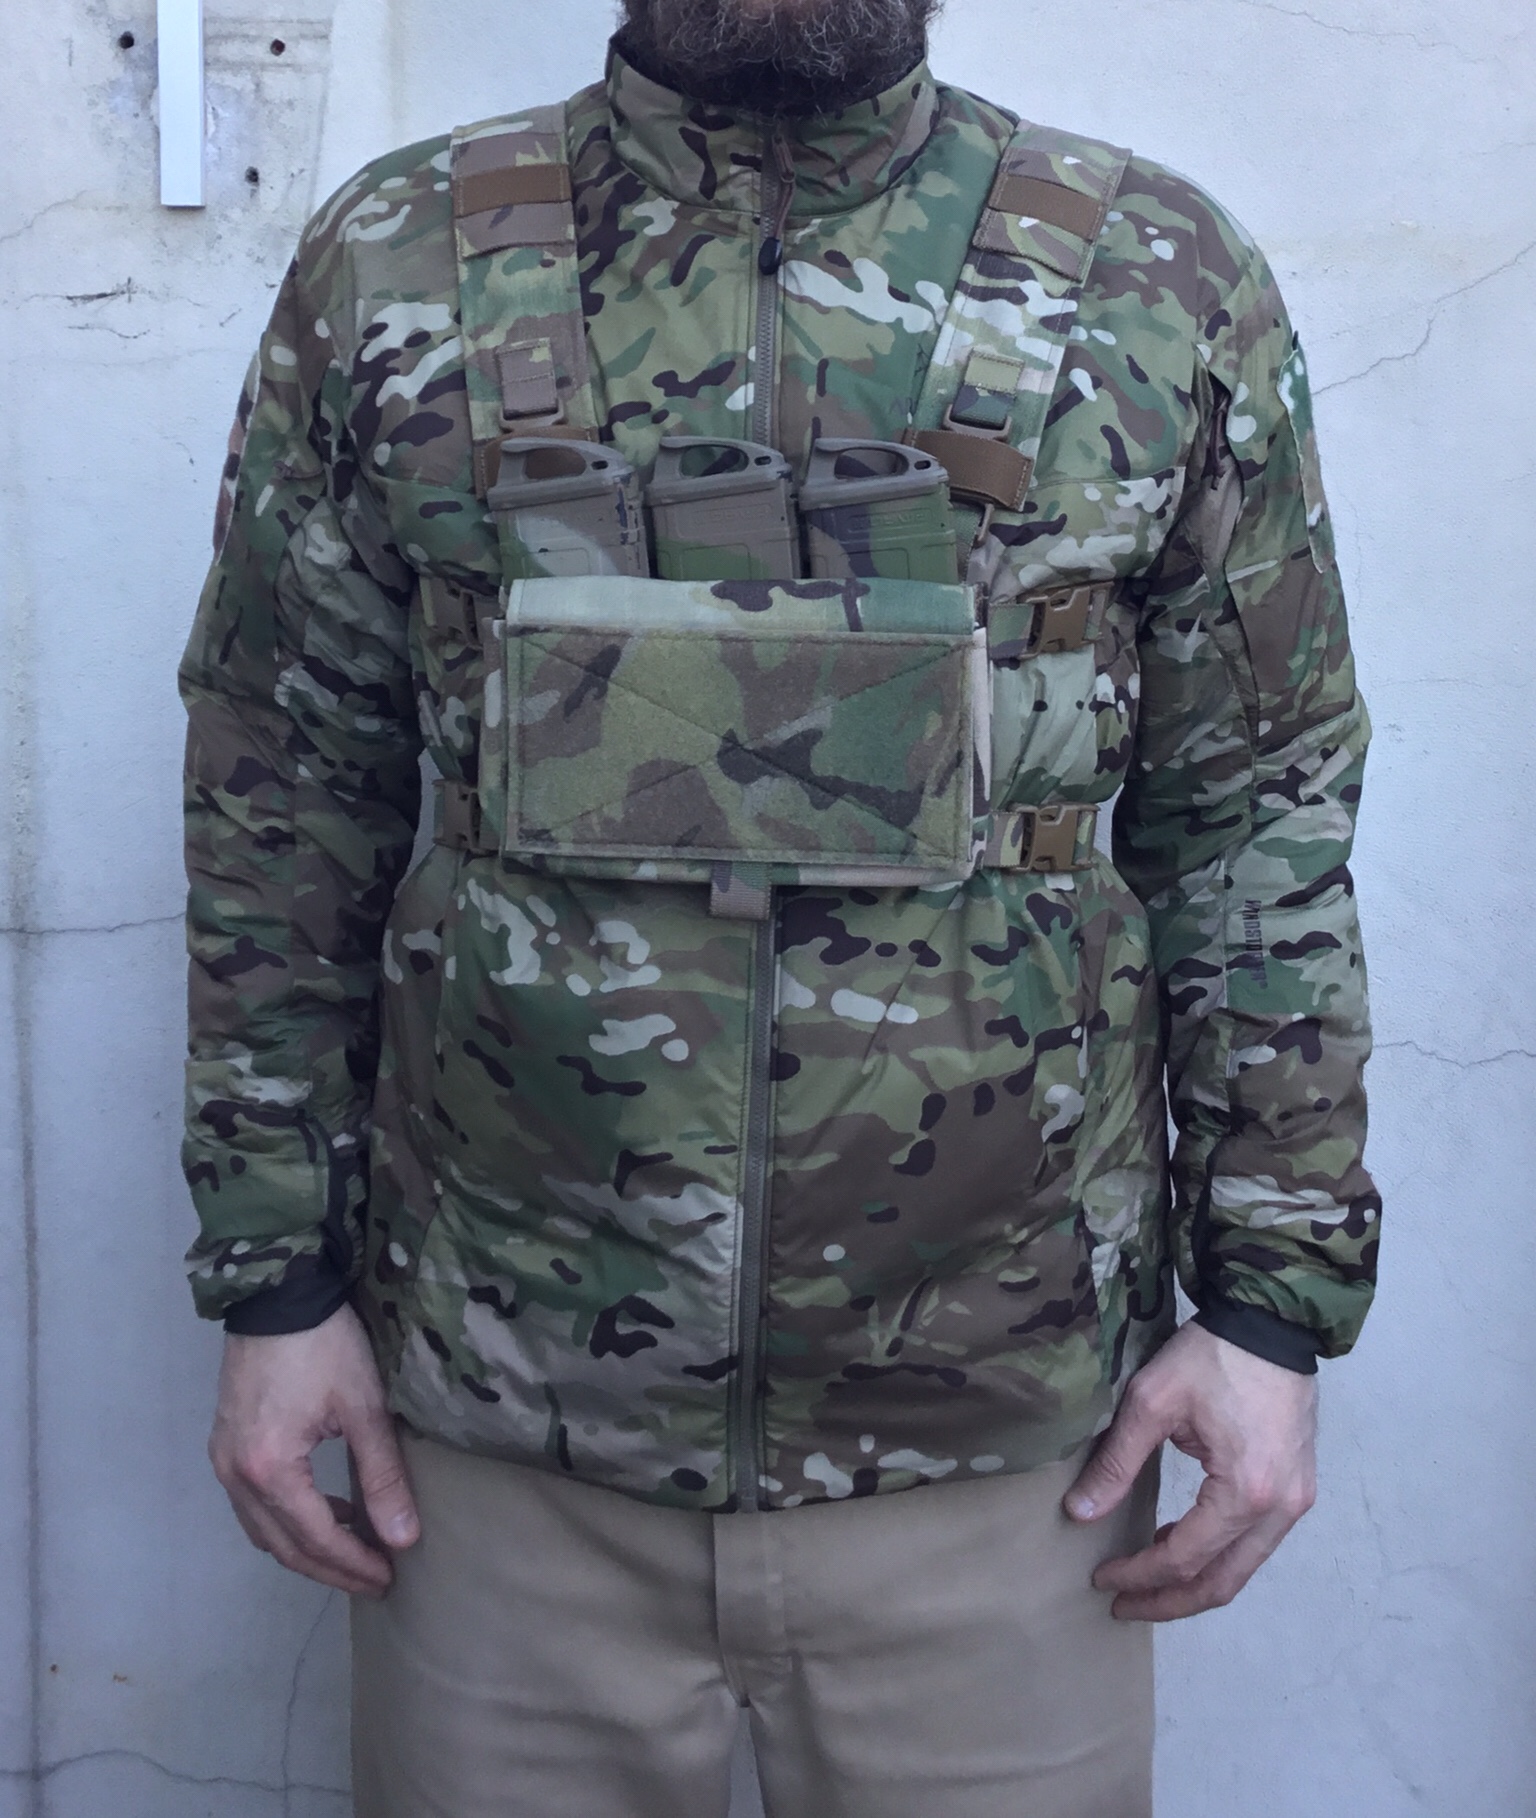


It’s comfortable, stays put and is discrete. It also rides nice and high, which is my preferred position.
Use Notes
556 Rifle Insert – A Pessimist’s Dream
I’ll tackle the thorny 556 Rifle Insert issue first.
Unlike a lot of other solutions, it’s a slim, discrete unit which keeps the Chassis’ profile super-low.
And, it actually works really well.
Basically what happens is that when the mags are inserted, the elastic forms to their shape and stays there, rather than springing back when the mag is withdrawn. It’s very clever and took me totally by surprise; although thinking about it now, it seems obvious.
The tension of the elastic is such that it retains a mag effectively. However, when a mag is removed, the elastic doesn’t react by pulling the walls of the Chassis inwards to a catastrophic extent. Thus, the structure of the Chassis keeps the elastic open for effective re-indexing.
Even if you at first dismiss it, keep going. Muscle memory makes everything better.
Ergonomics and Comfort
Speaking of muscle memory, the layout tested here was highly intuitive and user friendly. Three mags front and centre are a lot easier to draw and re-index than four, as regular PC users will attest.
In addition, a generous single utility pouch was a breath of fresh air. One flap, one sizeable opening to get my (massive) hand in – and add-in organisation that you can buy if required.
Obviously with such a modular system, you can do as you please. But the default configuration is sound and in chest rig mode the platform rides high and stays put – even compared with the benchmark D3CR (review here).
I think part of this is to do with the Chassis itself having such a small footprint: it seems that the wider the chest rig, the less conformal it becomes and the more it bounces with exertion. That may not be science fact, but it’s what I’m inclined to pursue until proved otherwise.
As mentioned earlier, I’m a big fan of H-harnesses, so I’m glad Spiritus decided to go with this over an X-harness. Donning and doffing is easier with an H and when properly adjusted it will stay put as well as an X. I’ve wobbled before on whether I prefer an H to an X, but the Spiritus will be difficult to beat.
Adjustability is also spot on, as touched on previously.
Quality
Like the Spiritus Medium GP Pouch I reviewed a few weeks back, the quality of this product is second to none.
I’ve had a couple of high end US-made items recently which were not as well made as they should have been, so simply stating something is US made isn’t enough of a guarantee for me any more. It has to live up to those very high standards that American tactical nylon manufacturing is synonymous with.
That’s why I’m glad to say that this bundle does American manufacturing proud.
There is an updated review of this chest rig, utilising the Mk4 Chassis on the blog – published in June 2020.
