
People often ask what technique I use to paint my blasters and those of my mates’ who’ve trusted me to paint theirs. I make no secret of it.
Cargo net.
That’s all there is to it…along with a bit of prep.
After masking adequately, get the kettle on and make a brew. With the rest of the boiled water and a little cold, submerge the rattle can you intend to use for the base coat. Take the can out of the water after a few minutes and shake it. Then replace it. After 5-10 mins (depending on the size of the can), the paint should be nicely warmed through. Shake well before use.
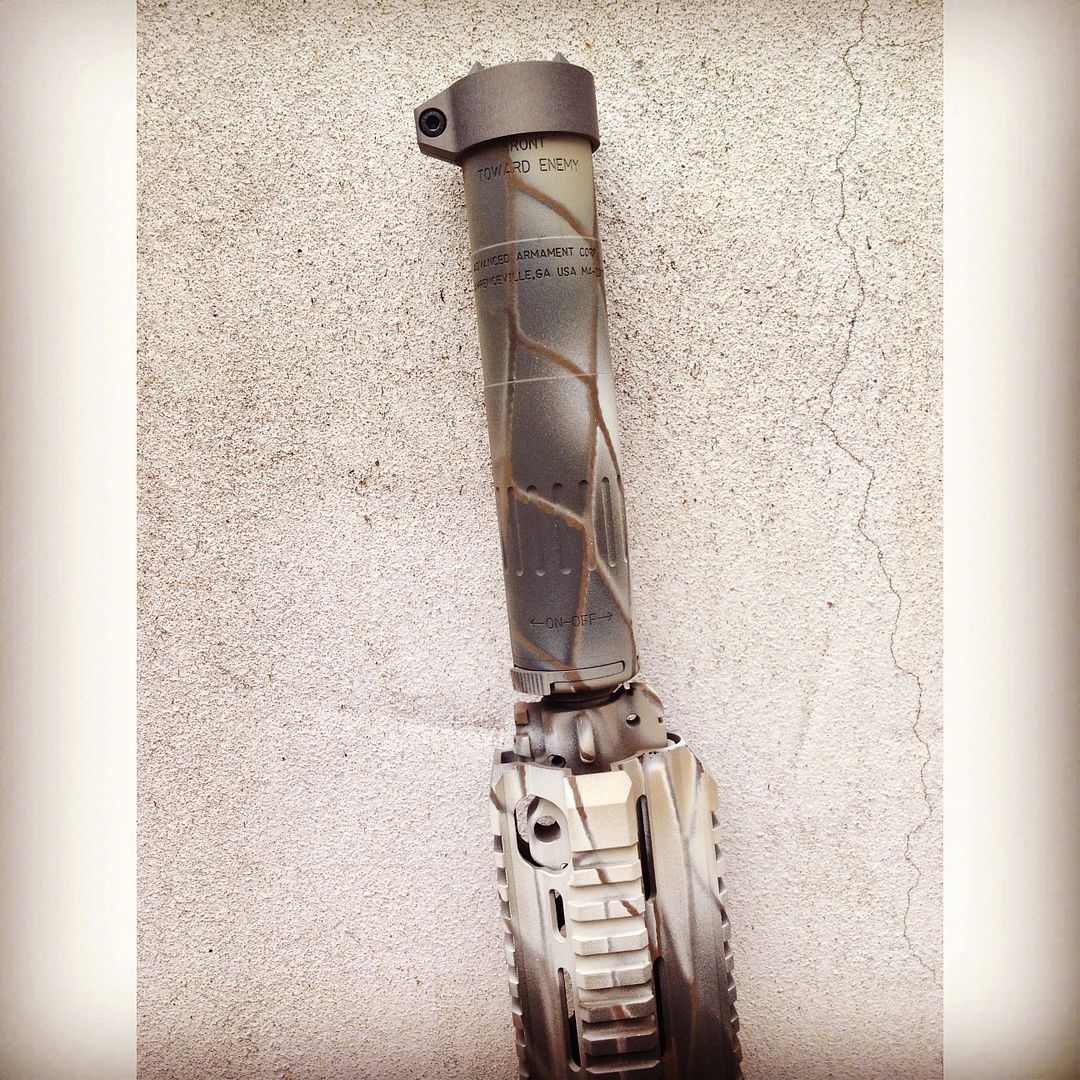
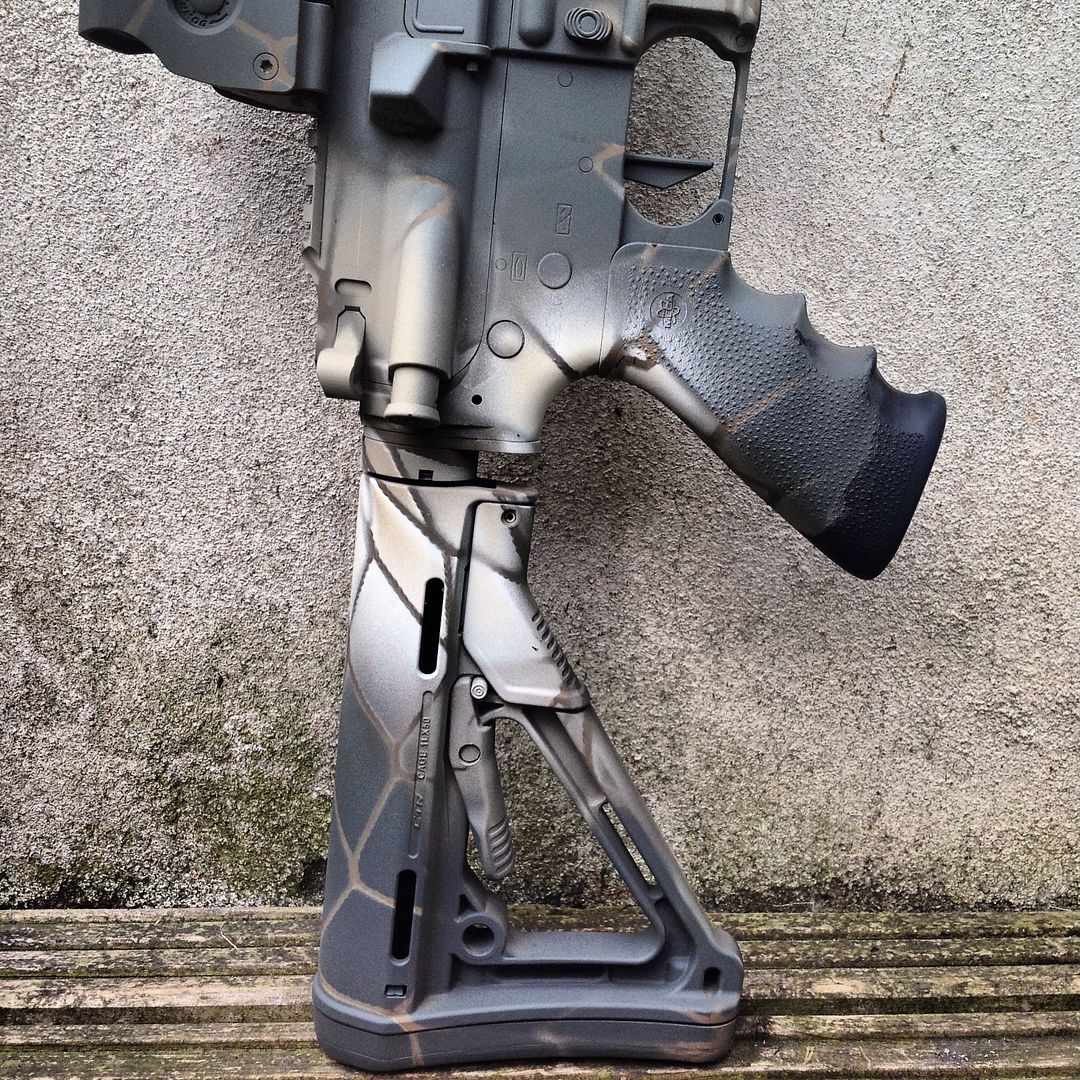
As well as masking the relevant areas, I decided to paint with the stock closed, so that the buffer tube would remain black. I’ve not done this before and I’ve seen it in pics, In The Wild, so I thought why not?
Now you can establish your base coat. Here I used Humbrol Dark Brown 29. It’s a favourite of mine.
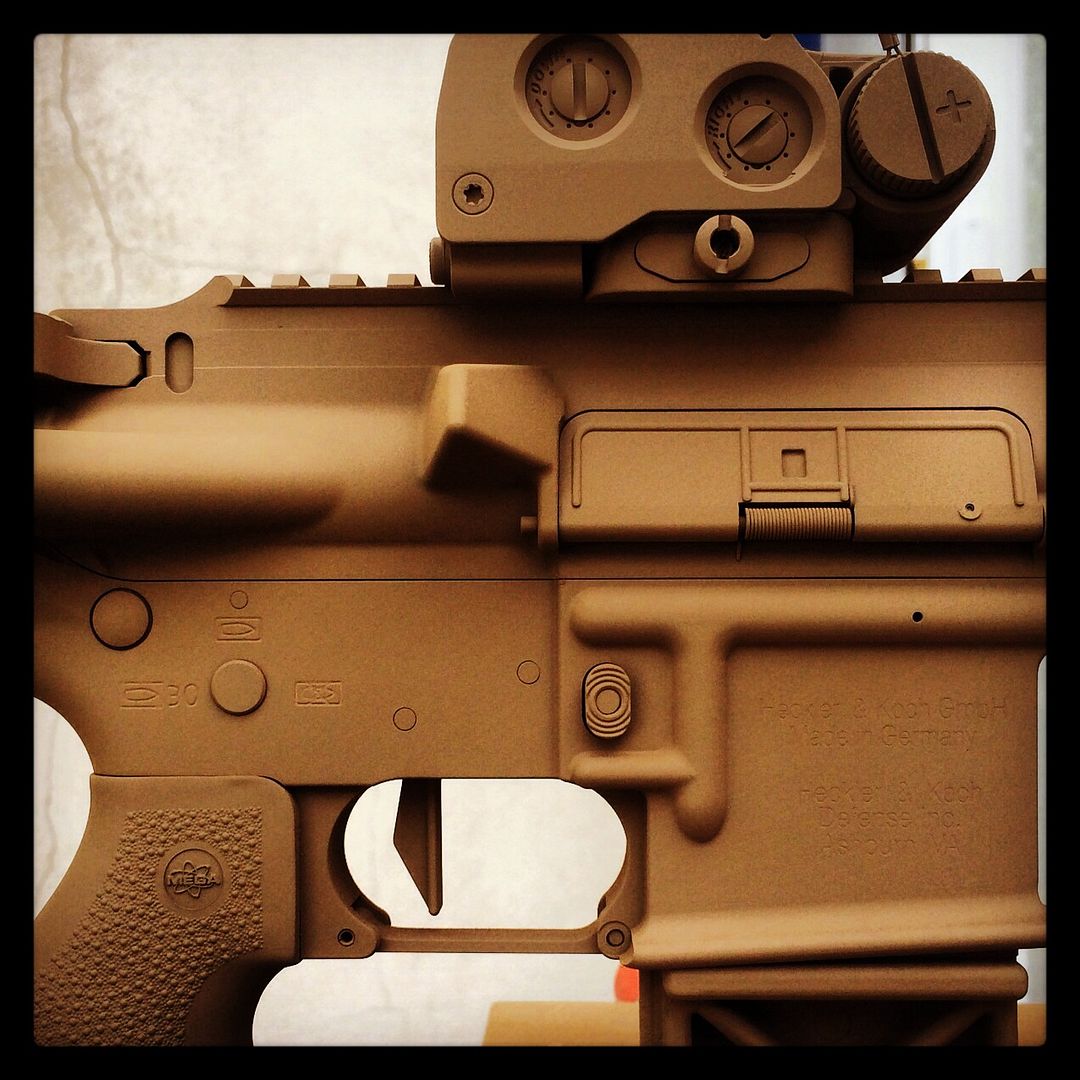
29 Goes on smoothly, provides an even tone and is very forgiving. I’ve rarely if ever over done it. It sprays well and doesn’t clog the nozzle or obscure surface details. It also covers excellently and is fast drying. However, to accelerate drying I use a hair dryer on the paint between coats. Drying the paint rapidly, prevents it from going shiny. To further guard against this, it also helps if you heat the surface of the gun with the hair dryer, prior to spraying. Ideally the paint should dry as soon as it hits the surface of your blaster.
I normally leave the base coat overnight, but as long as it’s dry you can go straight on with the pattern.
Next, prepare the rattle cans to be used in the pattern in the same way as that of the base coat.
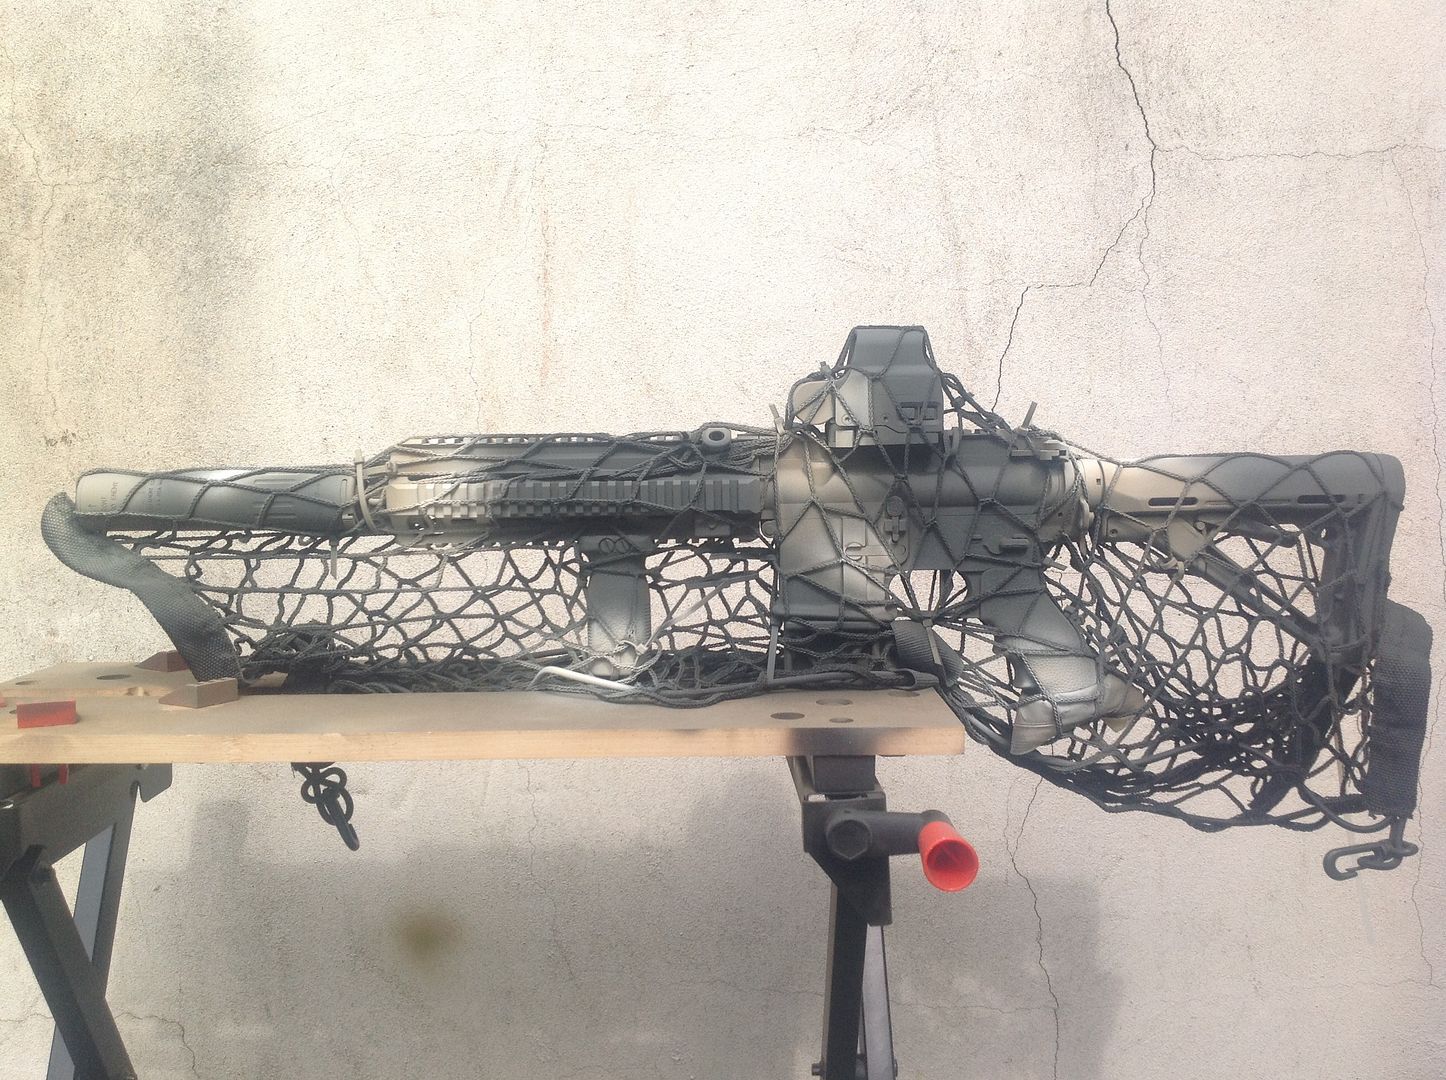
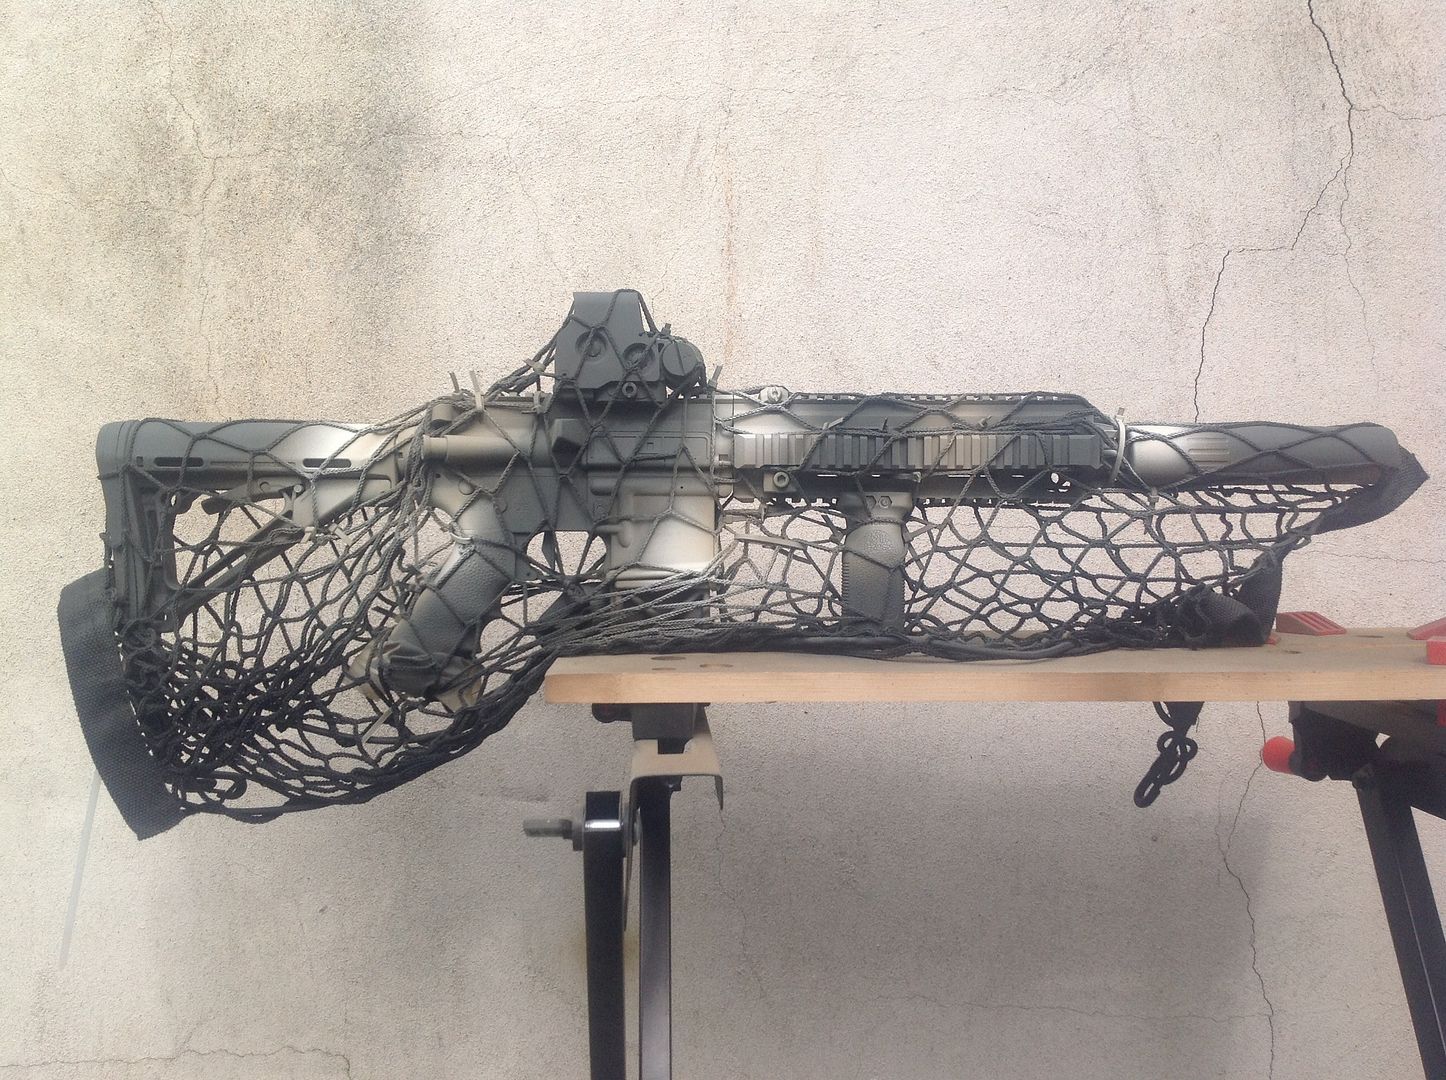
While the cans are heating up, place the cargo net over the blaster and secure it with a few cable ties, then simply spray through.
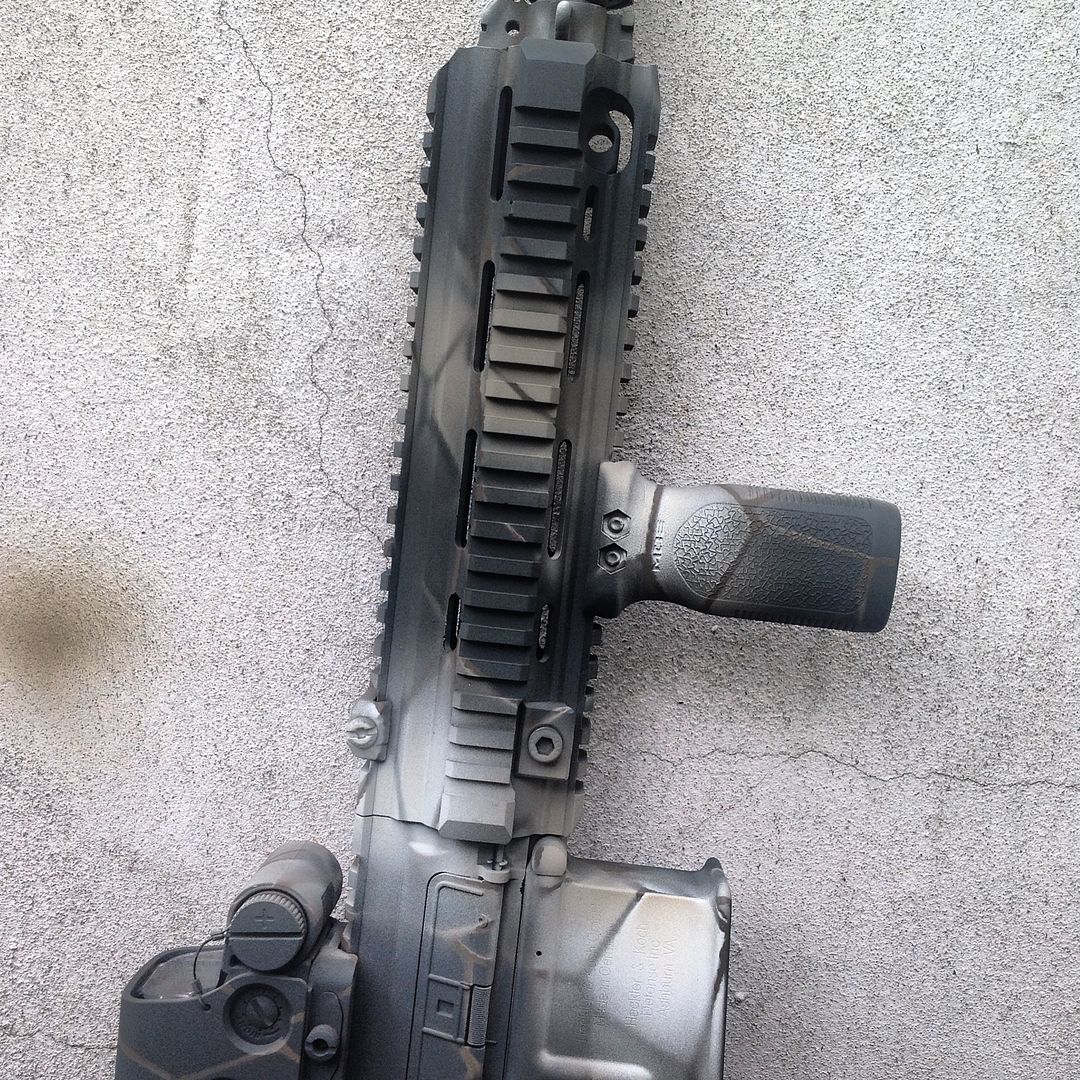
I first coated the entire blaster in Halfords Khaki. Halfords’ Camouflage range is severely limited in terms of colours, but it’s my favourite paint for this application and is available locally in most cities in the UK. Krylon Khaki is an OK substitute, but I don’t think Krylon goes on as well as Halfords’ paint.
Next, I painted bands of colour using Halfords Olive Green. This is more of a grey-green. After testing it and a few other greys and greens by other manufacturers, I decided this was the perfect shade. I was glad a Halfords paint came out best, as it sprays so well. As an alternative, Krylon Olive is similar in tone, but is more green than grey.
Because I wanted this element to be rich and deep, I sprayed a number of light coats, drying thoroughly between applications.
Next, I used MTN94 Bone White for the highlights. I wanted really high contrast between light and dark to help break up the blaster’s outline – hence the choice. Personally, I’m not that keen on the application of MTN94; although the range of colours available is without equal. The nozzle provided with MTN94 is a low pressure design and the paint itself remains tacky upon application for a while longer than I’d like. However, the nozzles from Fosco brand paints fit MTN94 cans and address the low pressure problem. MTN94’s rich bone white colour is also unbeatable, so I knew I had to use it despite its limitations.
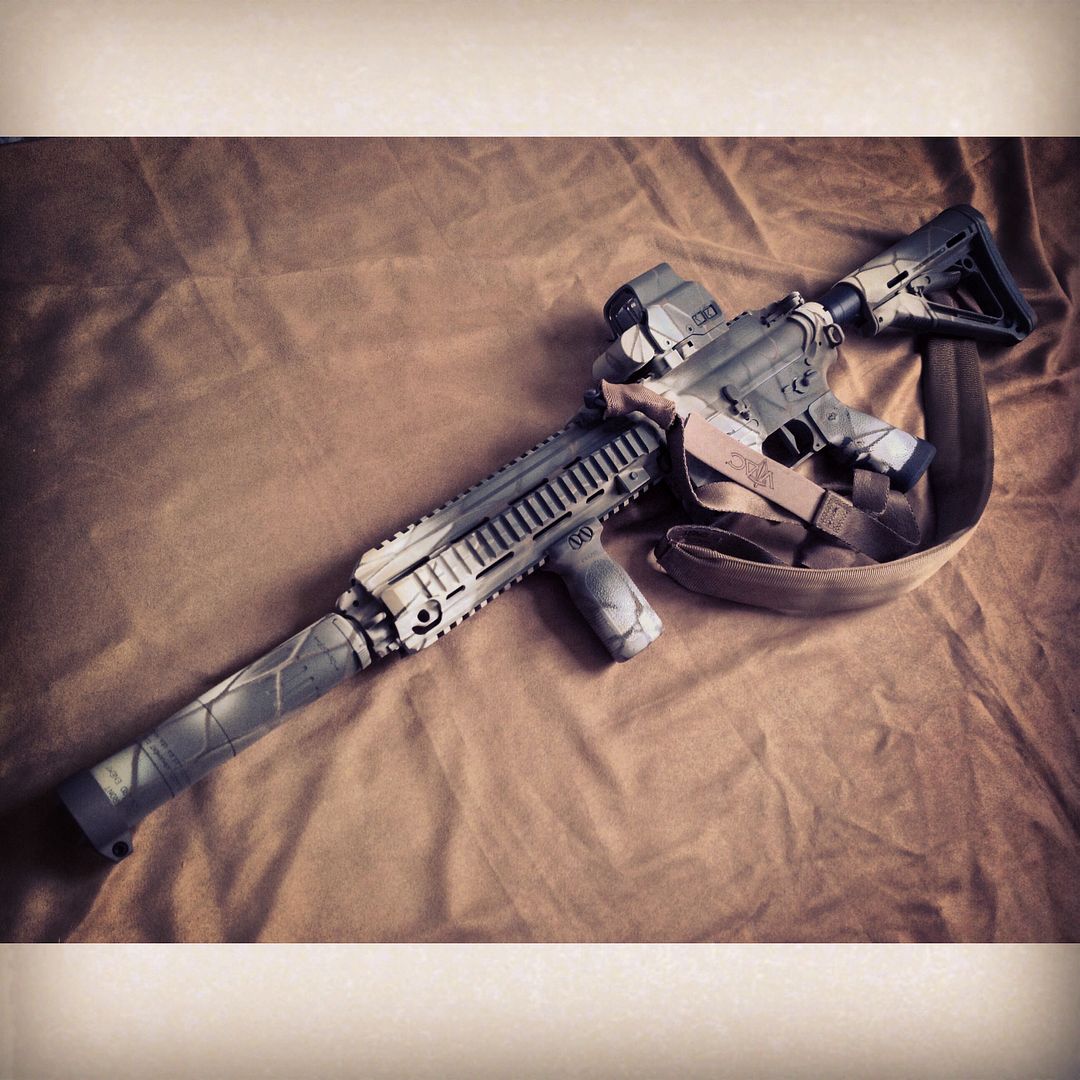
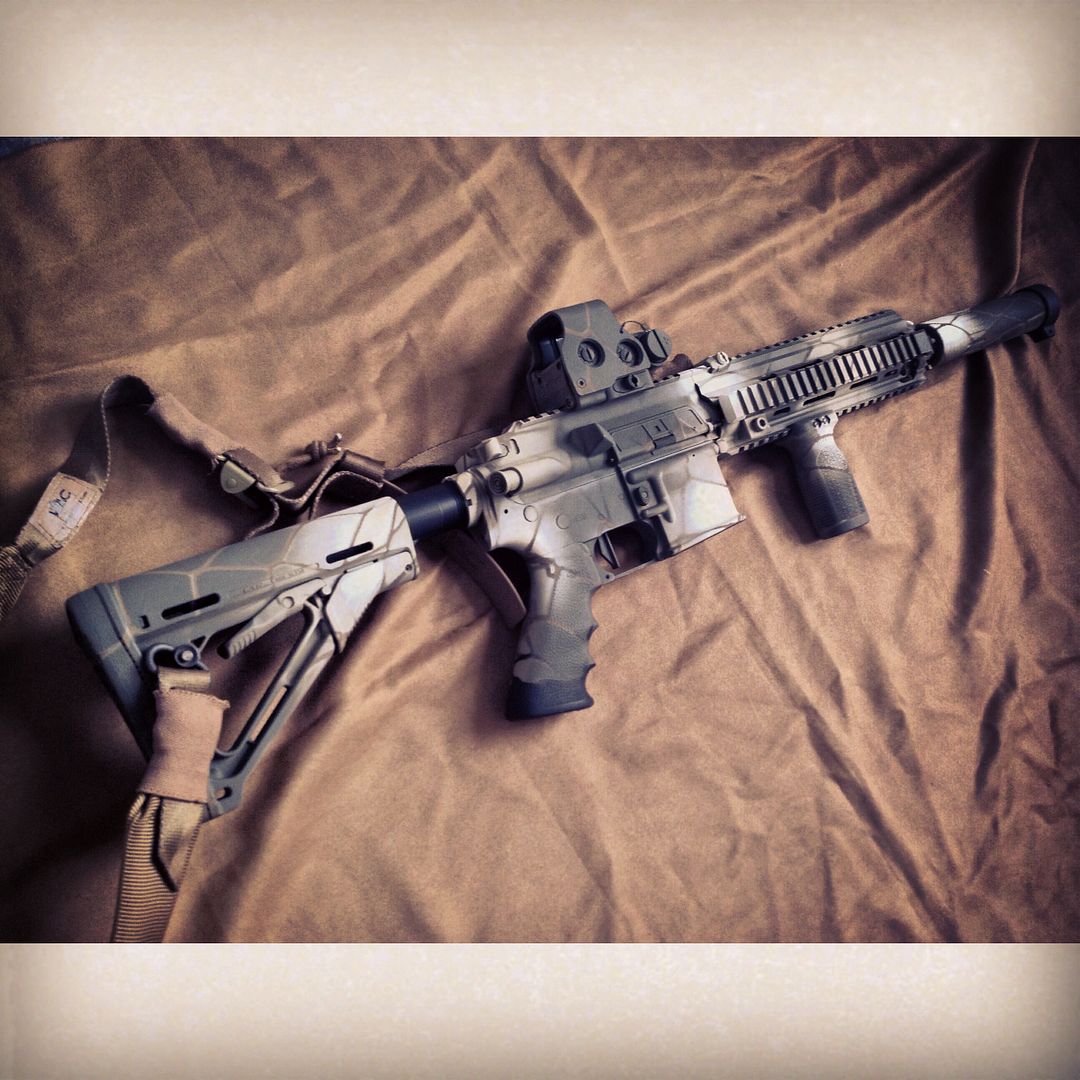
Anyway, after all of that, you should end up with something like this:

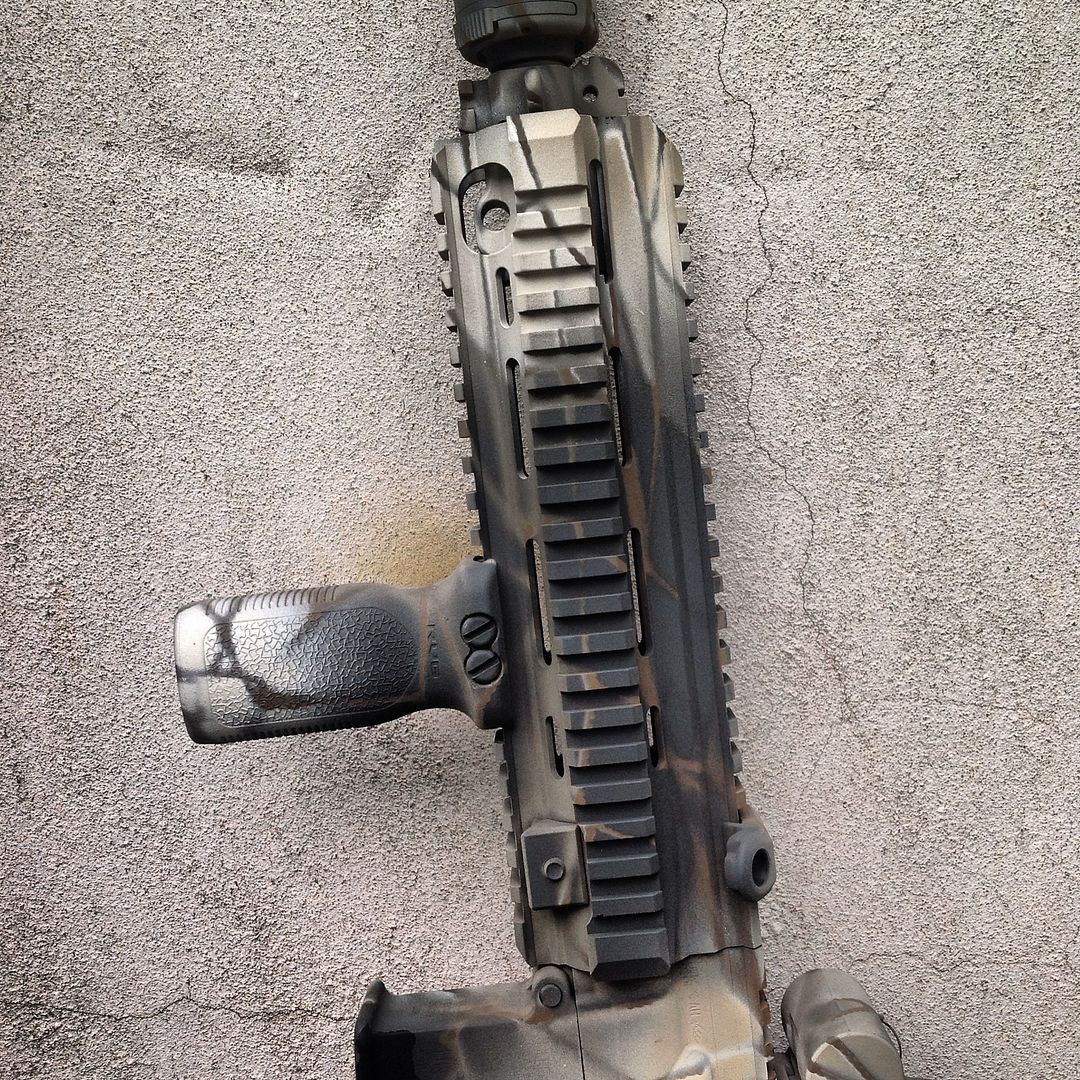
Close ups of the net effect:
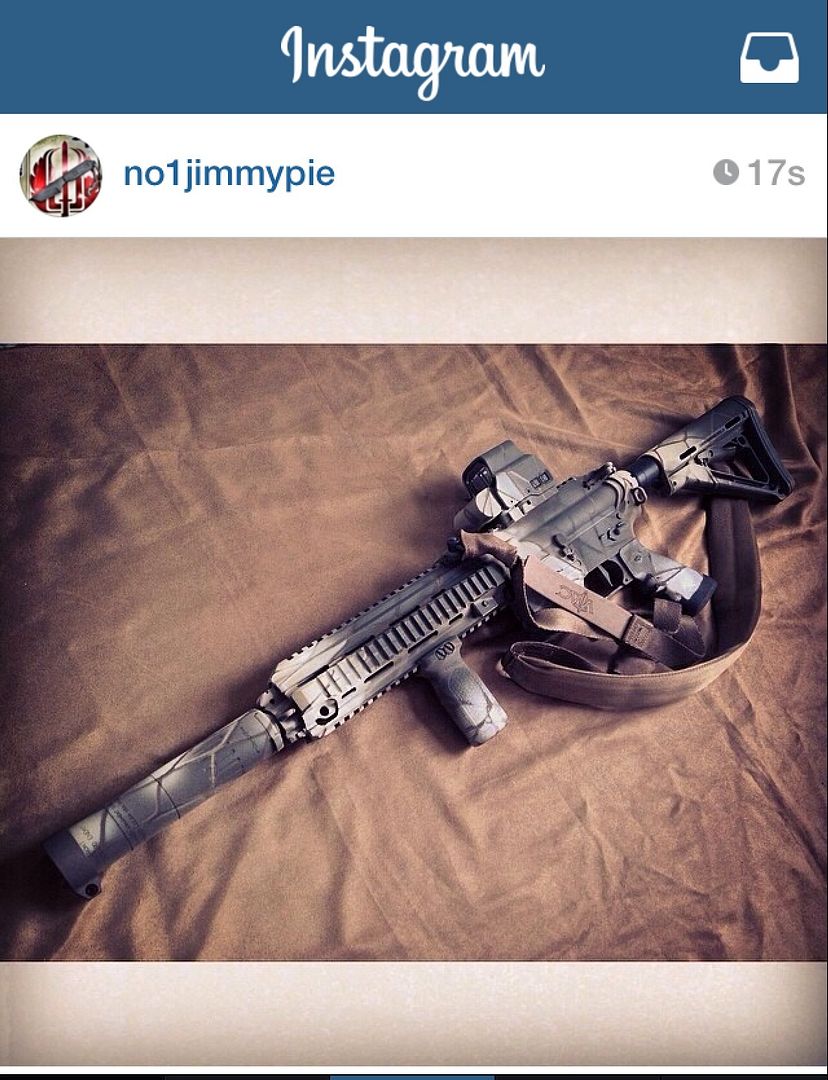
Finally, I’m absolutely stoked that @no1jimmypie reposted a pic of the build. Not only is it a fantastic boost for the blog, but Jim was one of the key people who, by giving me the encouragement and confidence to get started, got me into painting blasters. I owe Jim a huge debt of gratitude, so as you can imagine to have the build featured in his IG feed is more than humbling 🙂
Parts List
SGT 416*
Kimplacustom Glass Breaker*
PTS AAC hider* and M4-2000 can*
FCC Geissele style trigger*
Modify Eotech protector
Eotech EXPS2
Magpul RVG vert grip
Magpul RSA 45 degree offset front QD port
BFG 1″ QD sling swivel x 2
VTAC sling
Colt trigger guard
Hogue with Torx baseplate screws
Colt receiver extension nut
Com spec buffer
Magpul com spec CTR stock
*Repro
![]()
Follow the blog on Facebook:
