

After seeing a couple of Ryan from Backcountry Workshop’s paint jobs at a recent game at Spartan Airsoft, I knew I had to feature his technique in the blog.
Ryan is an ex-Royal Marines Commando, and absolutely does not fuck about…
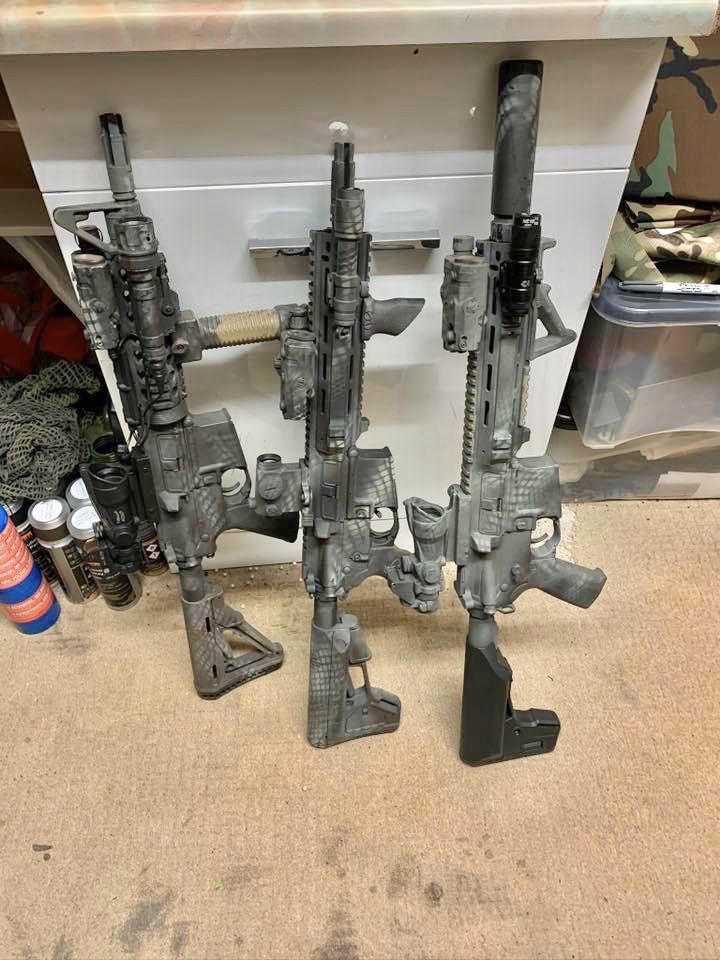
He was kind enough to write some words and take some pics, as he progressed the paint on a third L119.
Words and Pics: Ryan from Backcountry Workshop
I am not really spraying to fit into an environment – more just to break up the solid colours when playing airsoft in a rural or woodland area.
Essentials
- Spray paint – I use Halfords Camo paint
- Scrim net – multiple sizes if you wish
- Masking tape (any really)

Rifle Set Up
So without teaching people to suck eggs: get all you Gucci bits on where you need them, then ensure you tape up all the parts you don’t want covered in paint.

I then get the rifle hung up in the garage, ready to go. It’s easier to work around the rifle in this position.
Step 1
Give the rifle a good base coat. I just use a black, even spray over any previous paint jobs.

Step 2
Start with green, going in diagonal lines; then brown in the opposite direction. Then onto the tan, which I do in multiple passes.

Step 3
I place my large scrim net for the pattern, then start with the tan etc; just going in random paths to try keep the pattern as organic as I can.

How it looks after Step 3:

Step 4
I get my smaller net and start doing exactly the same I did in the previous step.

The Finished Product

Follow Backcountry Workshop on Instagram
