Words and pics: Henrik (Trident-05)
I’ve wanted a DMR platform for a long time – one I could use for a more expressive paint job.
Trident EOD is part of TF EXO. As such, our impression-based Block II rifles are limited to the paint jobs seen in reference pics.
For a long time a teammate and I drooled over the MK14 EBR, but the project turned out to be too expensive.
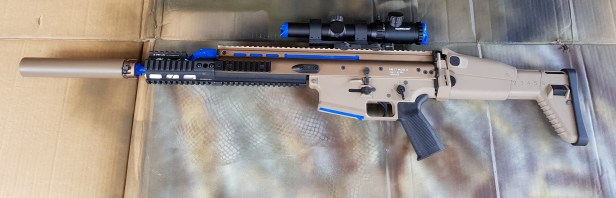
Therefore, I ended up buying a WE SCAR-H GBBR.

I understand that there is a discourse, as to whether rifles which are FDE out of the box should be painted or left as is. I’m not sure why there should be do’s and don’ts on this matter. It comes down to what you prefer.
For me there was no question: it had to be painted!
With a decent paint job, almost all modern firearms achieve that next level greatness.
There are exceptions obviously, but the SCAR-series is not amongst them. WE’s original FDE color is not bad, but mixing it up with accessories that are – in my case – black, makes the rifle look messy. Paining gives a more uniform look and ties the accessories into the whole, seamlessly.
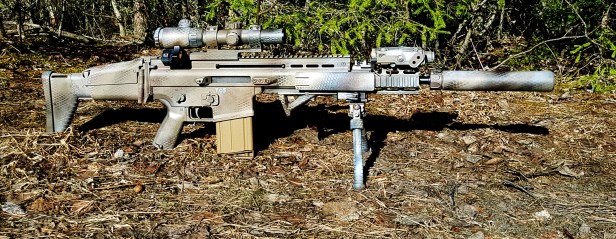
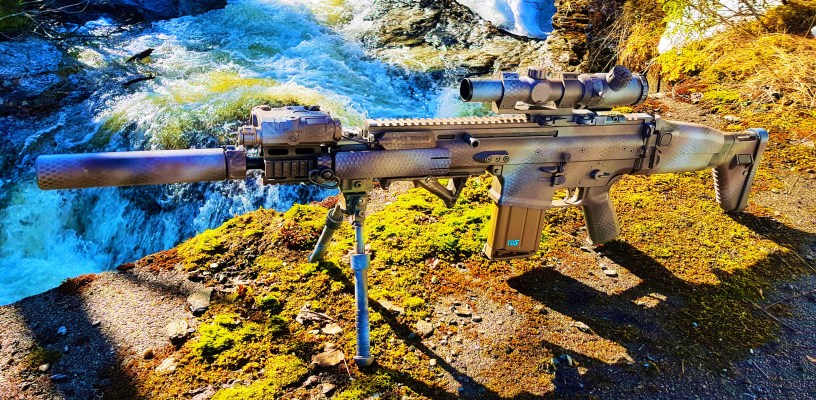
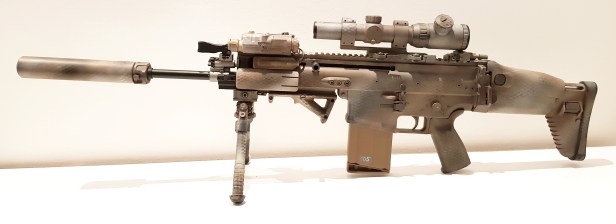
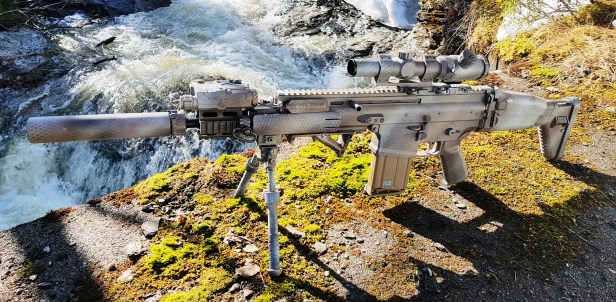
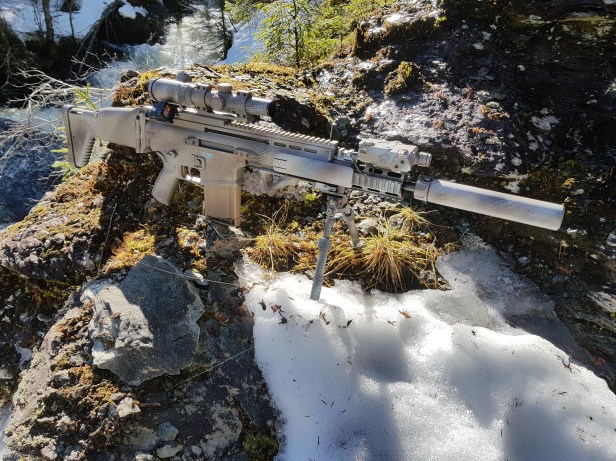
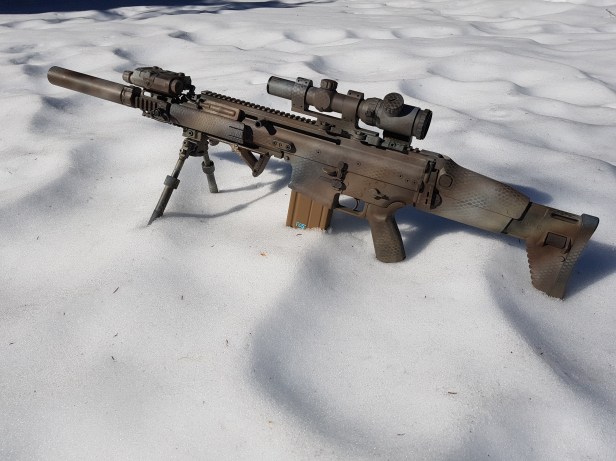
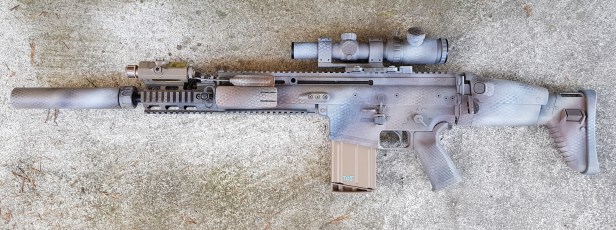
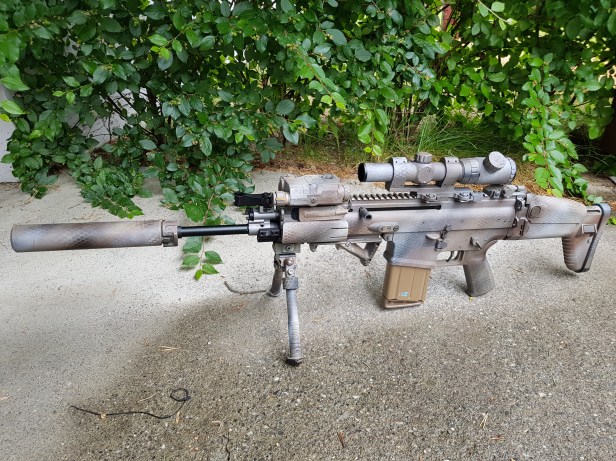
The SCAR has a huge, flat receiver which makes it ideal for exhibiting bold patterns. It’s a whole different ball game from getting a distinctive disruptive look on an AR, because of the large surface area.

Most SCARs in reference pics are not painted – but some are. And I’ve got say, they look smashing!
When it comes to how I painted the SCAR, I tried to strike a balance between cool and effective.
Since the 28th EOD company that Trident replicates does not use SCARs, I chose to find inspiration in the SCARs used by the 75th Ranger Regiment. The EOD-guys seem to roll together with these guys quite frequently, so it’s not very far away in terms of taking a liberty kit wise.
The other influence was of course desert or arid environments.
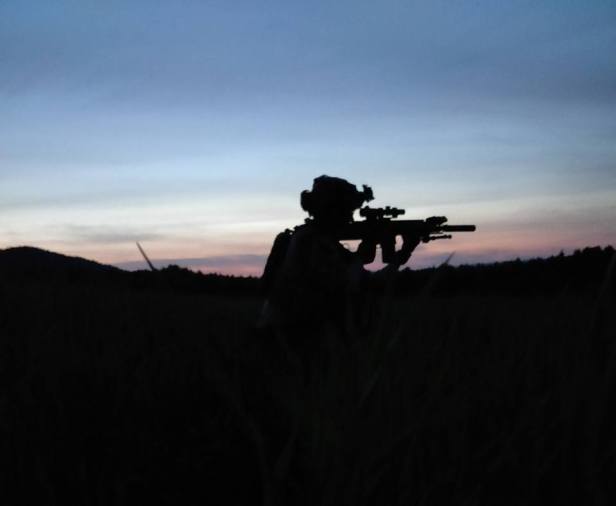
Since this was more of a side project and not directly related to my impression, I was pretty free in terms of how it could look. That said, for me it’s all important to set it up for practical uses.
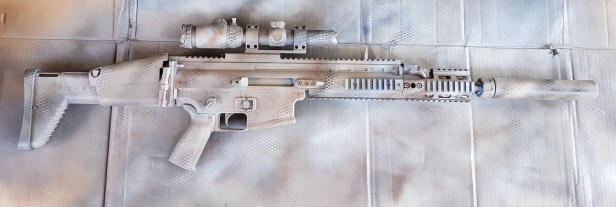
Talking accessories, I went with a bipod and a low-powered variable optic to achieve the DMR setup. Painting bulky equipment like this in situ ties those items into the pattern much better.
I get this a lot from my girlfriend: sometimes I can get a bit obsessed with details. But, it’s the details that make something complete, right?
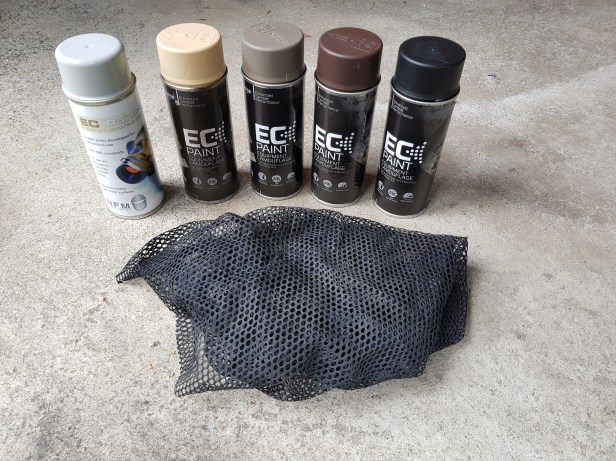
I like to do a good masking job before I start painting. Masking the bolt carrier obviously, and the barrel. I mounted the accessories I wanted to paint together with the gun itself, and I was ready to roll!
I used five different EC Paint colors: black, light grey, coyote brown, mud brown and sand. Since black isn’t a natural colour but an absence of light – shadowing from natural objects – it is not the smartest colour to use in terms of camouflage; but I had a system.
I started with random patterns using black, then light grey; then worked between them with first mud brown, then sand, and finally coyote brown – since it blends in with most of the other colours.
I bought a cheap mesh tank top to make the snakeskin pattern. By applying contrasting colours over the first layer, it makes a decent perspective effect. I did this over 60%-ish of the rifle, then removed the mesh. I then just sprayed gently with random colours here and there to finish it.

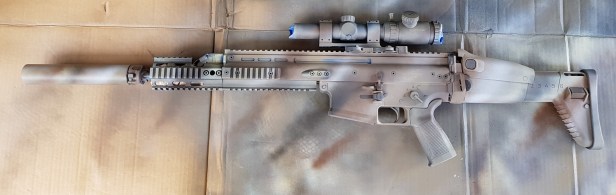

I waited until the paint was dry (5-10 minutes with EC Paint, I love it!), then removed all the masking tape.
When I’m painting rifles, I try to deliver a thin layer of spray in case I want to remove the paint later.
The first time I painted my TM HK416 I ended up with a horrible thick paint coat, which took me a lot of work to remove and re-paint.
A thin layer also helps progress natural wear and tear instead of faking it.

It is really simple. Just find some colours and perhaps some inspiration pictures, then start painting your guns. It is fun and creative!